BOSCH Panel-Ready Dishwasher Drain Pump Teardown
ID: 175746
Description:
Steps:
- Pump photo.
- Teardown of the drain pump of a Bosch or Balay PANELABLE dishwasher; if it is a standard model with panels, you must remove the top cover and the right side cover.
- Reason for the teardown of the pump: the machine does not drain, previous checks carried out in the:
- Guide 1:
- Teardown of the side covers and panels on the panel-ready model.
- Teardown of the cover Torx screw using a T20 driver.
- Lift the thermal and sound insulation cover upwards.
- It is nearly impossible to fit your hand through the small remaining gap to access the drain pump, so you will need to remove the electronic module to increase the space.
- To access the interior as well as to disassemble the electronic module, you must disconnect the external power plug.
- Remove the top cover of the electronic board.
- By removing the module's top cover, you can unclip and lift it to move it to the side.
- Moving the electronic module gives us more room to access it with both hands.
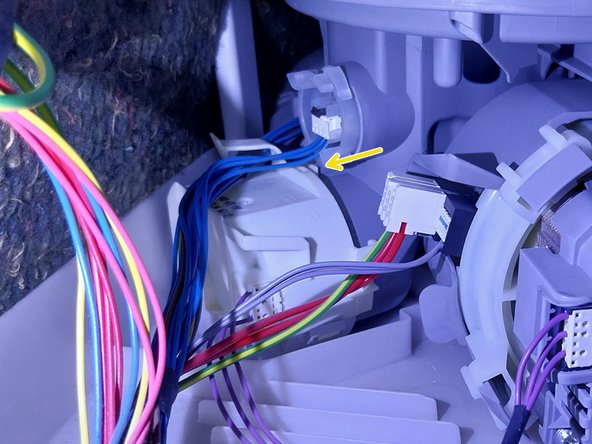
- Here we can see the drain pump from the right side; in photo 2, I have marked the pull tab that we must press "sink" in order to allow us to rotate it 1/4 turn and remove the pump.
- Observing the pump outside the machine makes it much easier to understand why it gets stuck and cannot be removed without pressing the plastic tab.
- Another teardown option we have is removing the protective plate and prying up the front panel skirt; we can also access the pump through here, but the upper locking tab is not as visible.
- I'm sorry that the lighting in this series of photos wasn't as good as in the others.
- Other views of the drain pump and photo 3, view of the cavity left by it.
- Pump image; NOTE that it is 55 V AC three-phase, so we cannot test it electrically with any type of cable or transformer, as I have already tested this and detail it in another document.
- Supplementary Video 1: In my case, the pump shaft had plastic and hair from pouring buckets of mop water into the kitchen sink,
- END of Guide 2.