Danger Hiptop Battery Replacement
ID: 176559
Description: Here's a complete guide to replacing the...
Steps:
- Remove one Torx T7 screw 6mm long from the back, then use a spludger to separate the back from the main case.
- Skip this step if you have the U.S. T-Mobile model.
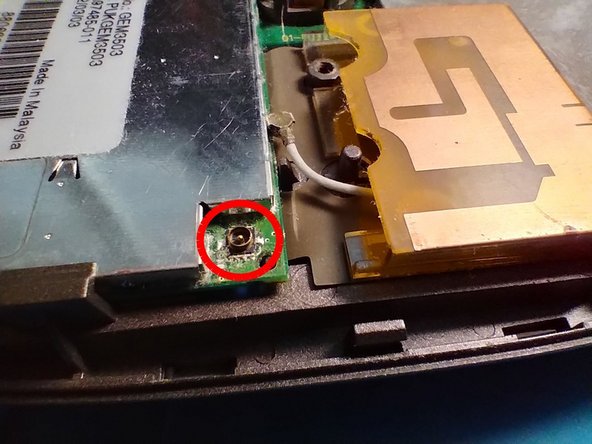
- Locate the antenna connector. With a spludger, gently pry up under the connector where indicated, and it will pop off.
- Remove the RF module as follows:
- Remove a Phillips PH1 x 6mm screw from the left side of the black plastic bracket.
- Remove a skinny Phillips PH0 x 7mm screw from the right side of the plastic bracket.
- Slide the black plastic bracket carefully from underneath the display ribbon cable towards the left, and set it aside.
- The RF module is now held by a clip at the bottom, a small round locator pin on the lower right, and a connector at the top edge, underneath. Use a spludger at the top edge to pry the RF module connector loose. It will pop off.
- Now just lift and slide the RF module up, and will clear the tab at the bottom. Set the RF module aside.
- Lift the antenna module out, and set it aside.
- Remove the SIM card so that the front case can be removed.
- First remove the four screws indicated to release the front case.
- Use a spludger to pry all the way around the front of the case to release it.
- Be careful not to damage the thumb wheel board ribbon cable which is still attached.
- Use a pair of tweezers to grip the thumb wheel board ribbon cable, and pull it straight up to disengage it. To replace it later, just use tweezers to press it straight down into the connector.
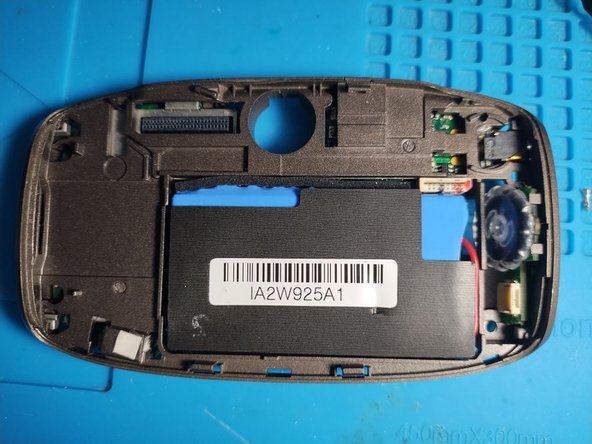
- The battery is now able to be removed. Use a pair of tweezers to pull straight up on the battery ribbon cable.
- Use a razor or Xacto knife to slice the blue plastic battery sleeve, and remove the battery from the sleeve. Slice along the side without the battery manager circuit board.
- Here’s pictures of the original battery, which will read 0 volts as it’s long since been drained.
- Battery polarity is as indicated.
- Battery part number is Samsung SDI ICP653465A, 1200mAh nominal 3.6V Li-polymer with built-in protection board on the side of the battery
- The part number 653465 means 6.5mm thick, 34mm wide, 65mm long. You'll find plenty of replacement batteries online that are 6.5mm thick and 34mm wide, but none 65mm long. Just select one that's less than 65mm long, and around 1200mAh.
- A 1200mAh 653450 Li-polymer battery is readily available on eBay. Some replacement batteries claim to fit this model, but they must meet these dimensions.
- Batteries with side connections to the protection board do not seem to exist, so the original battery flex cable cannot be reused, and you’ll need to solder the new battery in place.
- Cut the connector off one wire at a time so you don’t short the battery, strip just a few mm of insulation, twist and tin the wire ends.
- Replace the blue plastic cover over the new battery, and seal with Mylar or electrical tape. Be sure to include the foam padding to keep the battery from moving around too much.
- Tin the two indicated pins on the battery connector, and solder each color wire as shown. These two pins supply power to the phone.
- Place the battery back into the case, as shown in the last photo. The wires tuck under the battery.
- Reassemble the phone in reverse order.
- Congratulations! Your Sidekick is now working. Enjoy.
- A word about chargers. There is no documentation on this. The charging port is center positive (+), and uses a barrel connector that measures 3.45mm outside diameter. So a nominal 3.5mm barrel connector should work fine.
- As for charging voltage, use a 5V source. Any 5V USB charging brick will work fine, but it’s best if it provides at least 350mA, since that’s what the phone draws initially. Most brick chargers deliver 1A.
- Here’s a look at the connector, and a homemade charging cord.