iPhone 14 charging coil assembly replacement
ID: 176580
Description: Here is what happened to me: I wanted to...
Steps:
- Power off your iPhone before beginning disassembly.
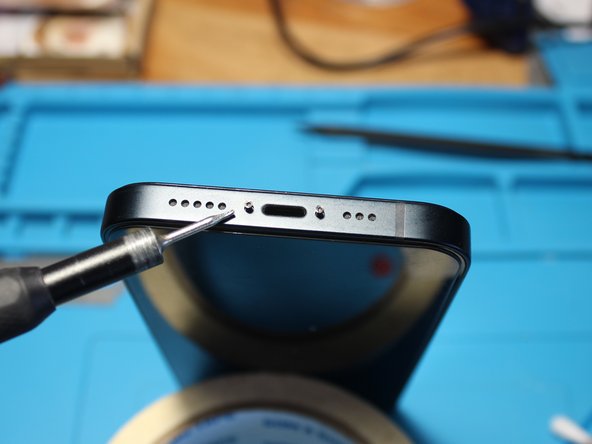
- Use a P2 pentalobe screwdriver to remove the two 6.8 mm‑long screws on either side of the charging port.
- If inserted too far, an opening pick can damage your device. Follow this step to mark your pick and prevent damage.
- Measure 3 mm from the tip and mark the opening pick with a permanent marker.
- You can also mark the other corners of the pick with different measurements.
- Alternatively, tape a coin to a pick 3 mm from the tip.
- If your iPhone has a cracked rear glass, keep further breakage contained and prevent bodily harm during your repair by taping over the glass.
- Lay overlapping strips of clear packing tape over the iPhone's rear glass until the whole face is covered.
- Wear safety glasses to protect your eyes from any glass shaken free during the repair.
- If you can't get the suction cup to stick in the next few steps, fold a strong piece of tape (such as duct tape) into a handle and lift the rear glass with that instead.
- If all else fails, you can superglue the suction cup to the rear glass.
- Use a hair dryer or a heat gun to heat the bottom edge of the iPhone until the rear glass is slightly too hot to touch.
- Never leave your heat gun in one spot for an extended period of time.
- Apply a suction handle to the bottom edge of the rear glass, while avoiding the very edge of the glass.
- Pull up on the suction cup with firm, constant pressure to create a slight gap between the rear glass and the case.
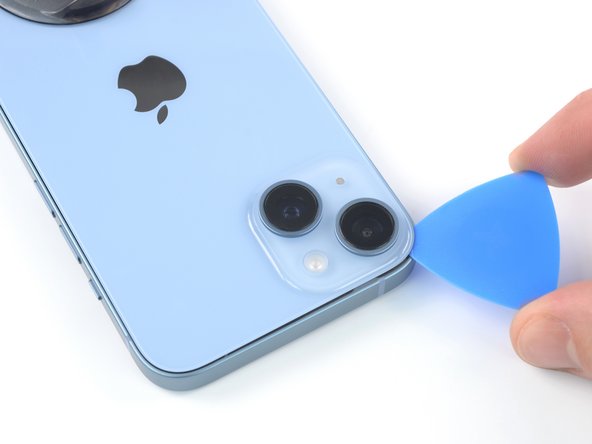
- Insert an opening pick into the gap.
- The adhesive holding the rear glass in place is very strong; creating this initial gap takes a significant amount of force. If you're having a hard time opening a gap, apply more heat, and gently rock the rear glass up and down to weaken the adhesive until you create enough of a gap to insert your opening pick.
- Heat the left edge of the iPhone until the rear glass is slightly too hot to touch.
- Slide the opening pick around the lower left corner and up the left edge of the iPhone, slicing through the adhesive holding the rear glass in place.
- Don't insert your pick more than 3 mm, as you may damage internal components.
- There's a delicate cable along the right edge, next to the volume up button. Don't insert your pick here, as you may damage the cable.
- Heat the right edge of the iPhone (the edge with the volume buttons) until the rear glass is slightly too hot to touch.
- Re-insert your pick at the bottom edge of the iPhone, and slide it up the right side to continue separating the adhesive.
- Don't insert your pick more than 3 mm, as you may damage the charging coil cable.
- Heat the top edge of the iPhone until the rear glass is slightly too hot to touch.
- Insert your pick underneath the top right edge of the phone. Slide it around the top-right corner and halfway across the top edge.
- Insert your pick underneath the top-left edge of the phone. Slide it around the top-left corner and halfway across the top edge.
- Don't insert the pick more than 3 mm, as you may damage or smear the camera array.
- Don't try to fully separate the rear glass yet, as a fragile ribbon cable still connects it to the iPhone's logic board.
- Remove your suction handle from the rear glass.
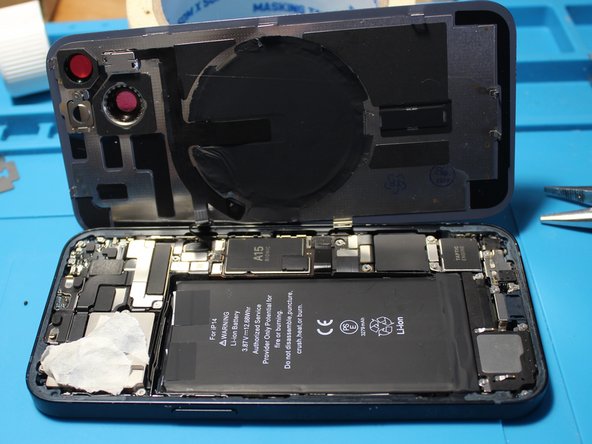
- Slowly open your iPhone by swinging the rear glass up from the left side, like the back cover of a book.
- Be careful not to strain the short charging coil flex cable.
- Lean the rear glass against something to keep it propped up while you're working on the phone.
- If you don't have anything at hand to lean the rear glass against, your suction handle can do the trick.
- During reassembly, lay the rear glass in position, align the clips along the top edge, and carefully press the top edge into place before snapping the rest down. If it doesn't click easily into place, check the condition of the clips around the perimeter of the rear glass and make sure they aren't bent.
- Use a Y000 screwdriver to remove the two 1.3 mm-long screws securing the battery connector cover.
- Throughout this repair, keep track of each screw and make sure it goes back exactly where it came from to avoid damaging your iPhone.
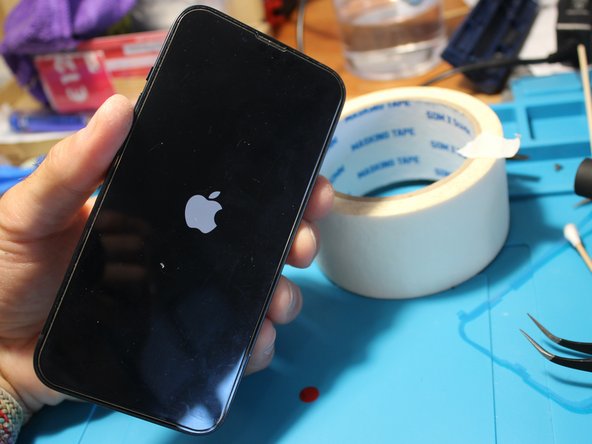
- During reassembly, this is a good point to power on your iPhone and test all functions before you seal the display in place. Be sure to power your iPhone back down completely before you continue working.
- Grasp the battery connector cover with a pair of tweezers and slide it upwards (towards the A15 print) to unlatch the top hook.
- Remove the battery connector cover.
- Use the pointed end of a spudger to disconnect the battery cable by prying the connector straight up from its socket.
- Try not to damage the black silicone seal surrounding this and other board connections. These seals provide extra protection against water and dust intrusion.
- Bend the connector slightly away from the logic board to prevent it from accidentally making contact with the socket and providing power to the phone during your repair.
- Use a Y000 screwdriver to remove the single 1.0 mm-long screw securing the charging coil connector cover.
- Use a pair of tweezers to remove the charging coil connector cover.
- Use the pointed end of a spudger to disconnect the charging coil cable by prying the connector straight up from its socket.
- Remove the rear glass assembly.
- Apply new adhesive where it's necessary after cleaning the relevant areas with isopropyl alcohol (>90%).
- During reassembly, pause here if you wish to replace the rear glass adhesives.
- Start by removing any adhesive and pieces of glass from your iPhone frame.
- The adhesive is very sticky so the method that worked best for me was using a razor and a pair of tweezers.
- Take your time with this. All remaining glass and adhesive left will increase the chance of the backglass breaking again.
- Unscrew the Y000 screw holding the flash clip in place.
- Lift the clip and store it somewhere safe along with the screws and other parts.
- Remove the clip keeping the microphone in place.
- To do so use a pair of tweezers and slide them under the openings to the side. Just be careful doing so.
- When done you can see the small cushion between the clip and microphone.
- You will have to move the microphone grill across to the new back cover before moving on. I had to use heaps of hot air and pry it from the old back cover.
- Make sure you get the clip holder and the cylindrical grill.
- You will need some adhesive to glue them back to the new cover. Apply enough to make it stick.
- Use a hair dryer or a heat gun to apply heat to the back cover.
- Lift the ribbon cables carefully with a spudger or flat tweezers as shown in the image.
- The flash can be pushed inwards from the back when the holding clip has been removed.
- Use heat from the back and directly to the charging coil to loosen the adhesive of the charging coil.
- You can use a razor blade to lift the adhesive flaps on the side. If you are really careful you should be able to do so without damage.
- Apply heat to the coil again and you may insert flat tweezers between the back cover and the coil. It is probably safer to insert it from the bottom part!
- Inspect the coil to make sure there is no damage to the copper and connections.
- If your new back cover lacks the magnets you have to move them across from old to new in order to move on!
- Place the old assembly on the new back cover and align everything carefully. You probably won't need new adhesive as the old one is probably still strong enough.
- Place the flash and microphone back into place, screw down the flash clip and add the clip for the microphone.
- It is always recommended to test anything before resealing the back cover. Rest the new backglass against an object and reseat the coil and then the battery connector.
- Close the back cover and start up your iPhone. Mine fortunately worked right away.
- Test the video camera with sound as well as the wireless charging capabilities. If anything seems to be off you can inspect everything again before finalizing this repair.
- As you can see the camera glass is protected with a red film from the inside. Do not use hard objects to remove it as you could scratch the glass.
- Use cotton swabs or something similar to clean your camera lenses as well as the camera glass. If you forget this step your photos and videos might look off.
- Reapply glue to the frame before closing everything down. My battery came with an adhesive gasket that I used.
- With everything nice and clean and glue or a gasket added you may reconnect the coil and battery in this order and close the back cover.
- Start up your iPhone and test everything again to make sure the repair is successful.
- Screw the two P2 pentalobe screws back to the bottom of your iPhone. You're done!