Soundproofing a Door with Door Gap Tape
ID: 177912
Description: This guide is intended to show the user how to...
Steps:
- Stand on the side of the door you are attempting to prevent light and sound from entering and illuminate the opposing side with a light source.
- Close the door and take note of where the light is coming through.
- This will highlight the area you are trying to seal.
- Measure the width of the door gap to the closest increment possible to acquire the appropriate door gap tape thickness.
- The thickness of the gap tape will vary based on the width of the gap of each unique door. However, most door gaps can be closed with 1/8, 1/4/ 3/8, or 1/2 inch gap tape. In this example, we will be using 1/8 inch tape.
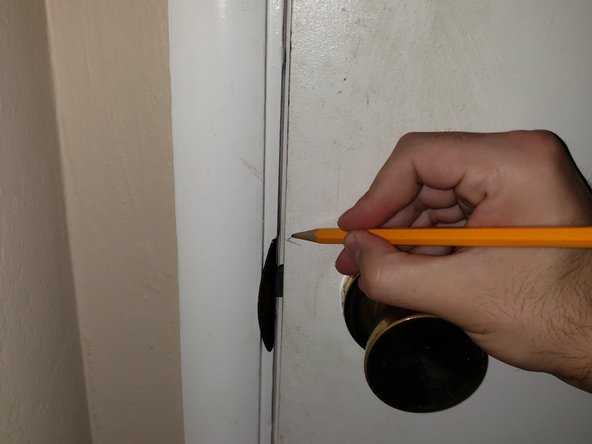
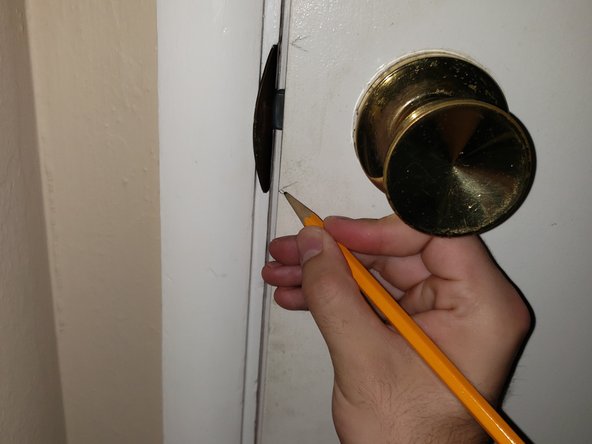
- Mark where the light stops and starts using a pencil.
- If there is door hardware in the way (hinges, deadbolts, etc.) like in this example, make sure to "skip over" the hardware with the gap tape. This should be reflected in your markings.
- Open the door and measure the length of the section(s) marked previously.
- This can be done with either a measuring tape or the door gap tape itself.
- Cut out the appropriate length of door gap tape and temporarily attach double-sided tape to the back of the door gap tape.
- Temporarily stick the door gap tape to either the door itself or the door frame using the double-sided tape.
- This is to help check for a good seal before the placement is finalized.
- The door gap tape will be placed on the door frame at the end of this tutorial but can be permanently fixed on the door itself if the user wishes.
- Inspect the gap tape door seal and make sure that: the door can shut fully, the gap tape is the correct width, and that the tape is in the correct area.
- If there are any sufficiently large or irregular gaps, consider using a thicker width of door gap tape in those specific sections or applying a second layer of door gap tape if the dimensions allow.
- Note the difference between the "natural" door gap and the section of the door with door gap tape temporarily installed. (circled in red)
- Open the door and remove the temporarily stuck door gap tape. Be sure to remove any double-sided tape that might be stuck to the door.
- Clean the area of the application using a cotton ball (or any other disposable cloth) and rubbing alcohol.
- If you are attaching the door gap tape to the door, clean the side of the door instead of the threshold.
- Remove the adhesive protector on the back of the gap tape and apply the gap tape to the target area.
- Make sure to apply the tape gradually, peeling the protector back as the exposed adhesive touches the application surface.
- Repeat this step for any other sections present.
- If the application is not to your liking, gently remove the tape by peeling back the adhesive strip and re-clean the area with alcohol before re-taping.
- Close the door and check for a good seal where the door gap tape was applied by looking for any light passing through.
- Congratulations! You have successfully sealed the gap on your door.
- The only places where light should pass through are areas that have door hardware, as circled in red in this example.