Roland KR-33 Dead Key Repair
ID: 178078
Description: This is a guide for disassembling the key panel...
Steps:
- Perform all maintenance on a large clean surface free of any dust or debris. The extruded aluminum chassis is easily damaged.
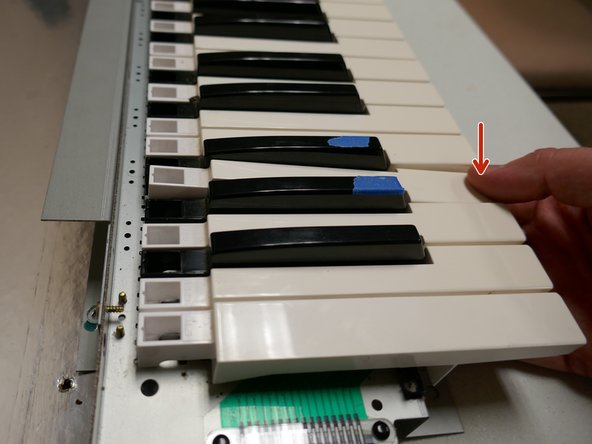
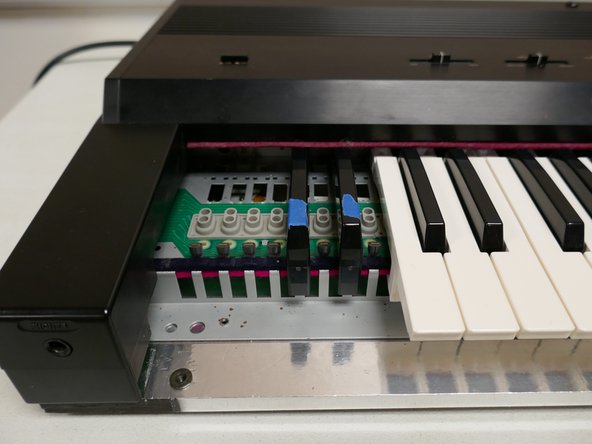
- Test and mark any affected keys before continuing.
- Unplug the device. Later steps involve close proximity to exposed electrical components. Proceed at your own risk.
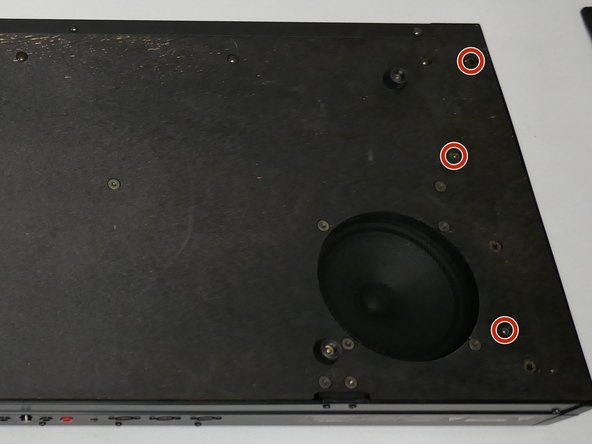
- Flip the keyboard with the bottom facing up as shown.
- Remove the 6 screws securing the lid and base plate (3 on each side)
- The lid can now be opened for basic cleaning. Continue guide for full disassembly.
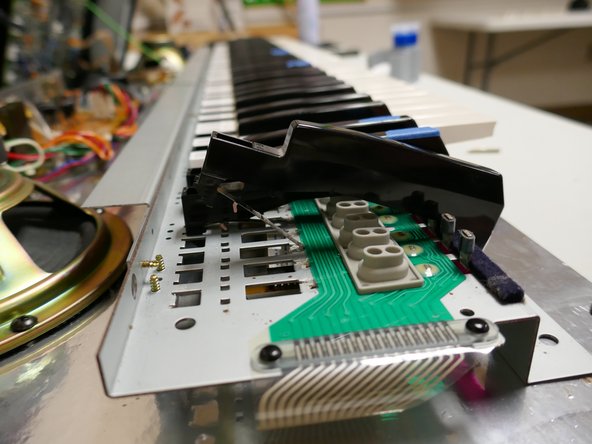
- Remove the 4 screws shown to remove the metal fascia piece under the keys. This also partially frees the key panel.
- DO NOT FLIP OVER YET. The second image is for detail only.
- Remove the remaining 6 screws to free the front of the key panel.
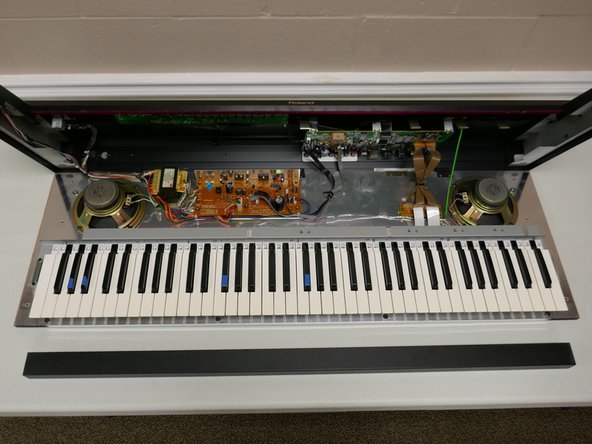
- The keyboard may now be flipped back over. Do this carefully as the key tray and lid are now partially loose.
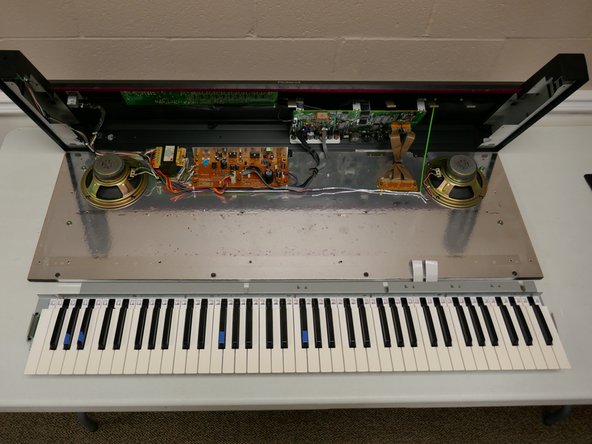
- Open the lid by holding both sides of the upper chassis. It should hinge backwards and be stopped by a green grounding cable.
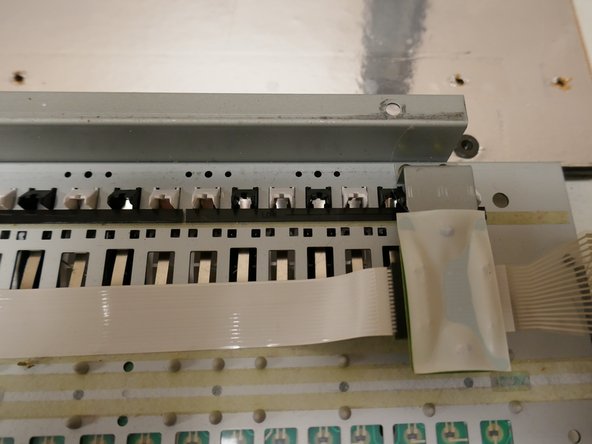
- Remove the 4 screws in the top of the key panel as shown. You will need a thin-shaft screwdriver to access these screws.
- Disconnect the two white ribbon cables to completely free the key panel.
- The key panel may now be removed from the chassis.
- Separate the key panel from the chassis and flip over to see the underside of the keys.
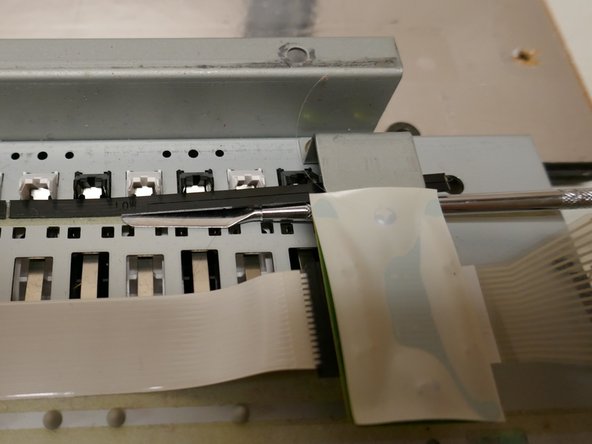
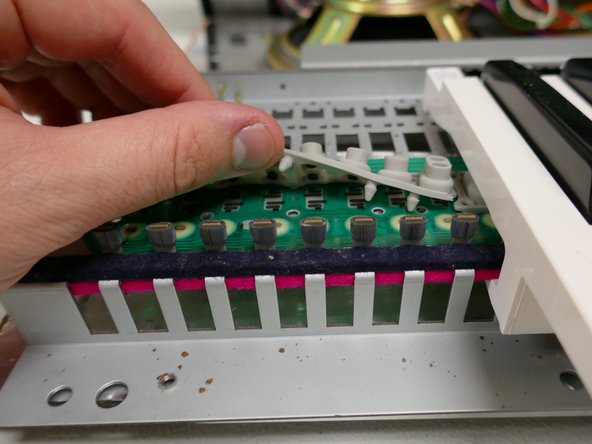
- Using a spudger, carefully lift the plastic retaining strip(s) for the affected keys.
- Note: The retention strips are held down with a thin double-stick tape. If damaged it can be replaced later.
- Note: The length of the key retention strip matches the length of a key-switch membrane.
- Turn the key panel back over
- To remove a key, pull forward slightly then push down. The key will rotate forward and come out of its retention slot.
- Slide the key backwards to free the leaf spring then pull forward to remove the key entirely.
- Note: It is easiest to clean/replace the key membranes if all keys on that section are removed first.
- Note: The white keys must be removed first in order to remove the black keys.
- Once all keys have been removed on the affected membrane, flip the key panel over.
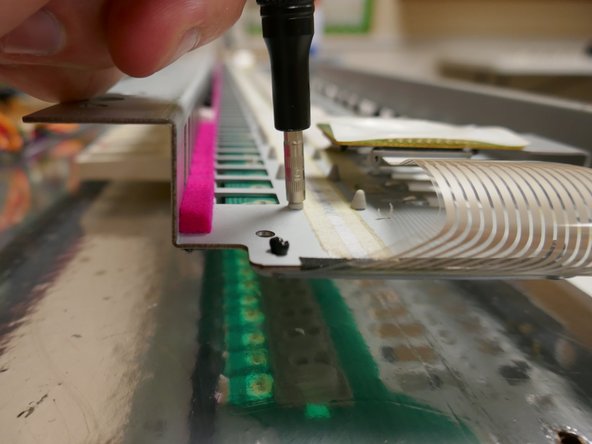
- Using a 2.5mm nut driver or similar tool press the tree-shaped retaining stud through the hole. Pull gently from the other side to loosen the membrane.
- The membrane contacts may now be cleaned with isopropyl alcohol.
- Press the tree-shaped studs back through the board.
- Note: Use gentle pressure while reinstalling the membrane to avoid tearing it.
- Note: If additional pressure or guidance is needed press on the center of the stud as shown with a small hex driver or similar implement.
- Place the key spring back in the appropriate slot as shown.
- Hook the corresponding key back over the key-spring for installation.
- Reinstall only the affected keys for testing in the next step.
- Place the key tray back in the chassis
- Reinstall the two ribbon cables
- Close the lid, attach the power cable, and power on the keyboard.
- Test the affected keys.
- If the keys are not working repeat steps 8-12
- Once the affected keys have been repaired reinstall remaining keys as shown in step 11
- Reinstall key retaining strip(s). Replace double-stick tape if necessary.