Canon EF 100-300mm f/4.5-5.6 USM Teardown
ID: 178194
Description: This guide will take you through partially...
Steps:
- If possible, try to work in an environment with minimal dust. The goal is to try to avoid dust from getting inside of the lens as much as possible.
- Remove the two Phillips #000 screws on the side of the lens mount, holding in the contact assembly.
- Next, unscrew the four Phillips #000 screws holding the lens mount onto the lens.
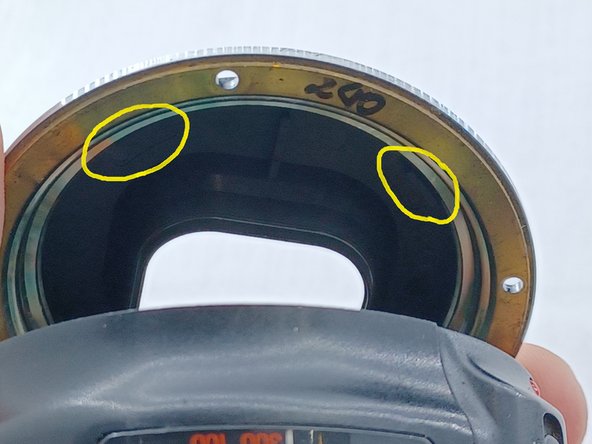
- Carefully lift up one side of the lens mount (side opposite of the lens contact). Push the black plastic cover out of the lens mount. Take note that there are four plastic clips around the cover. These clips can break easily if you're not careful.
- Be careful when lifting up the side of the lens mount. The lens contact is still attached to the lens mount with a ribbon cable that is attached to the main PCB board.
- Push the lens contact off of the metal lens mount and set the lens mount to the side.
- There are two variable resisters on the PCB board. Do Not mess with these as doing so may inhibit the autofocus from working properly. They are for the pulse adjustment and USM reference frequency and cannot be easily readjusted without an official Canon service manual.
- This step involves handling sensitive electronics. Avoid static discharge.
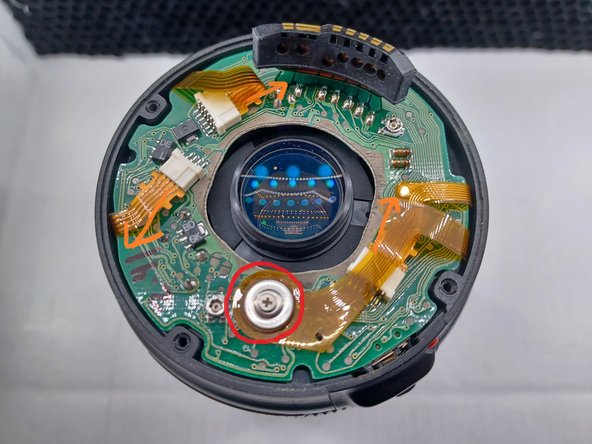
- Unscrew the Phillips #000 screw that holds the ribbon cable to the main PCB board.
- Use extreme care while handling ribbon cables and connectors as they can be easy to damage.
- Disconnect the remaining three ribbon cables connected to the main PCB board.
- iFixit connector guide
- Remove the main PCB board and set it aside.
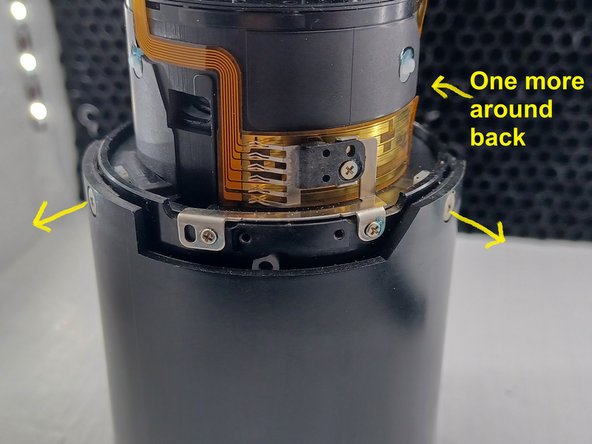
- Unscrew the six Phillips #000 screws holding in the fixed barrel.
- Remove the fixed barrel, being careful of the ribbon cables.
- Pull off the focus ring.
- Take out the six Phillips #000 screws holding in the top of the autofocus assembly.
- Unscrew the three Phillips #000 screws outside of the zoom ring.
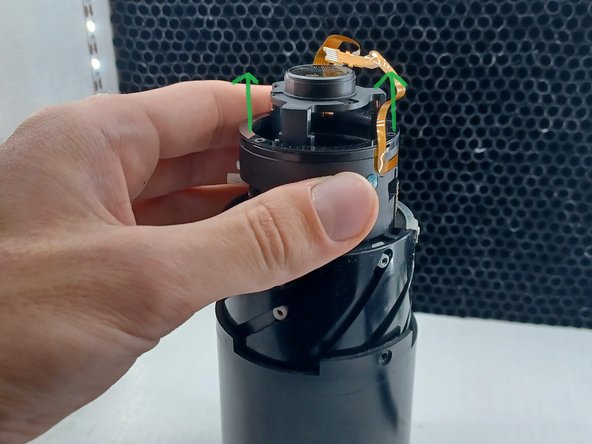
- Carefully pull off the autofocus assembly.
- Unscrew the two Phillips #000 screws holding on the zooming key.
- Take off the zoom ring.
- Unscrew the three JIS #000 screws holding in the zoom assembly.
- Remove the zoom assembly from the front lens assembly.
- Avoid touching the sides of the zoom assembly or the outside of other barrels inside of the zoom assembly. These parts are greased and you want to avoid rubbing off any of this grease to keep the lens zooming smoothly.