2003-2009 Toyota 4Runner Hood Struts Replacement
ID: 178262
Description: Replacing 2003 Toyota 4Runner hood struts is a...
Steps:
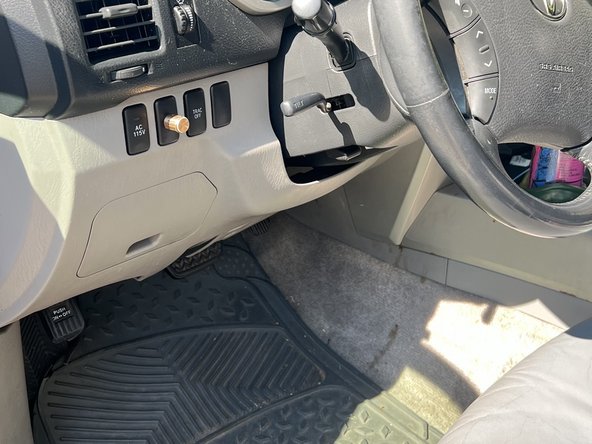
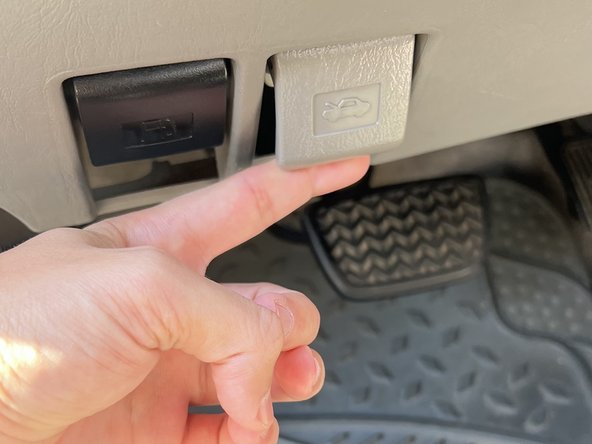
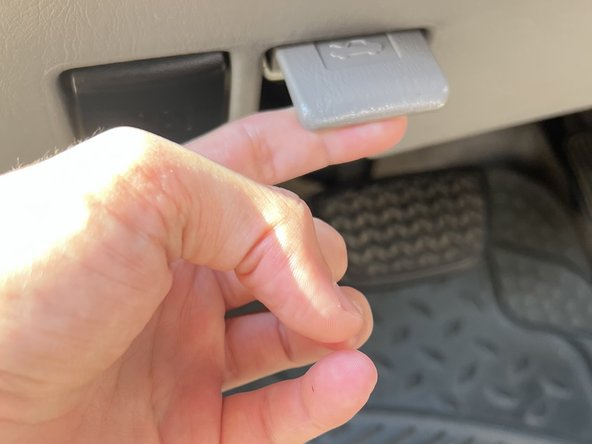
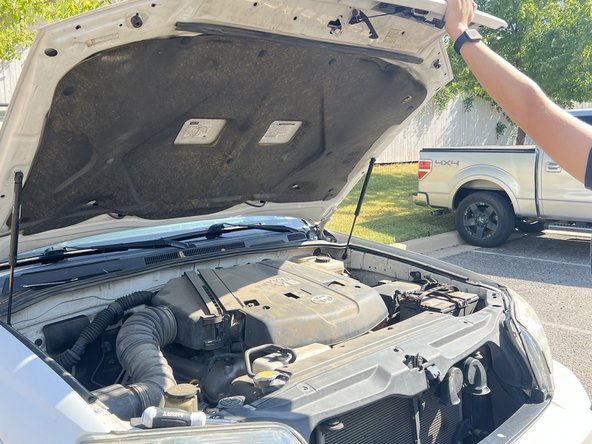
- Release the hood latch located under the steering wheel.
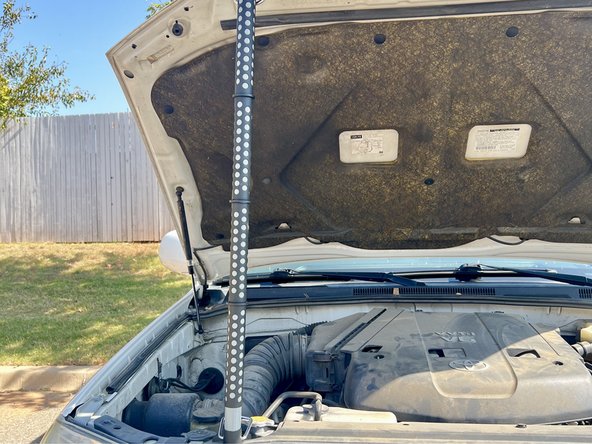
- Lift the hood, then place the hood strut in a secure location and ensure it is holding the weight of the hood.
- Ensure the hood is being supported by pulling on the hood to test that the prop is secure before proceeding to the next step.
- You may want to put on gloves before moving on to the next step to prevent grease or other debris from getting on your hands throughout the rest of the guide.
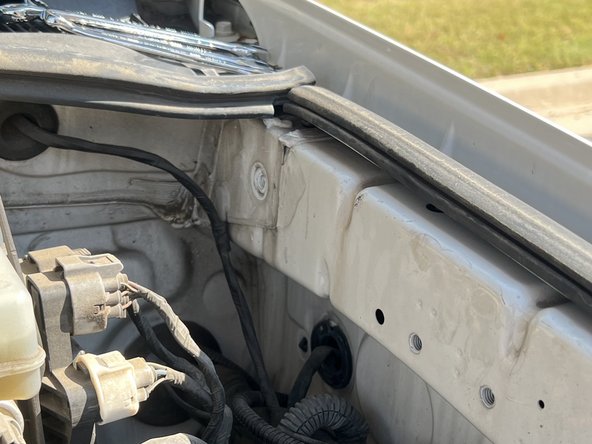
- Start the replacement on the right side of the hood.
- You may want to have a friend hold up the hood to ensure the hood prop is correctly supporting the weight of the hood while you complete the next part of this step.
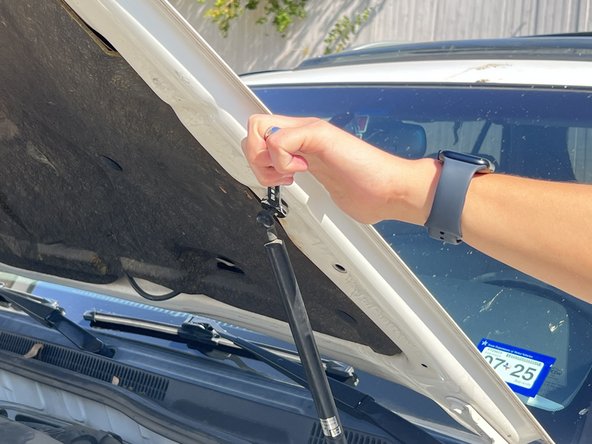
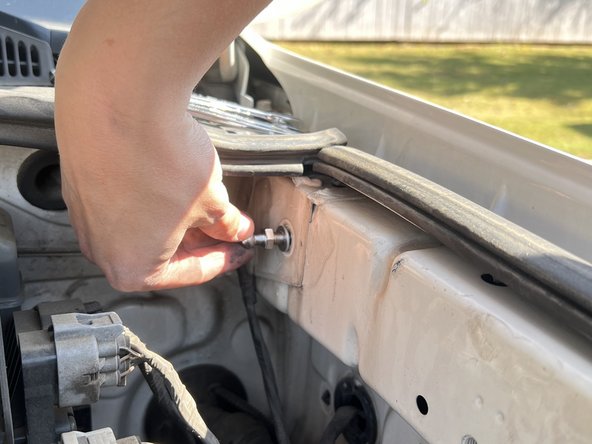
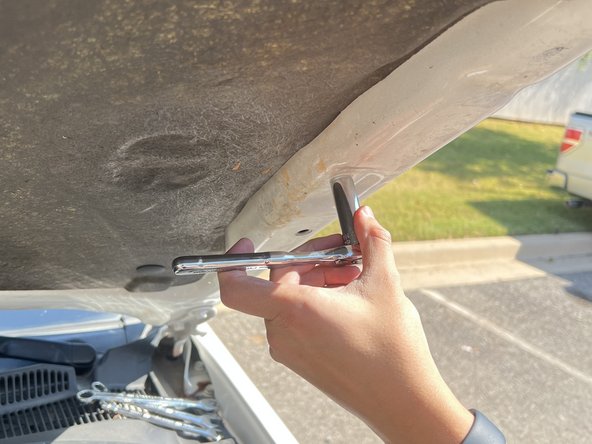
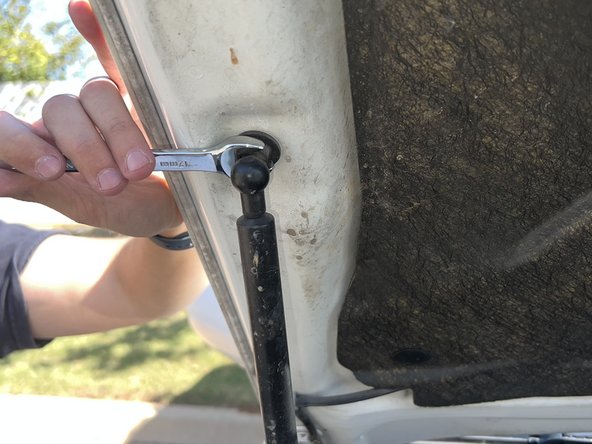
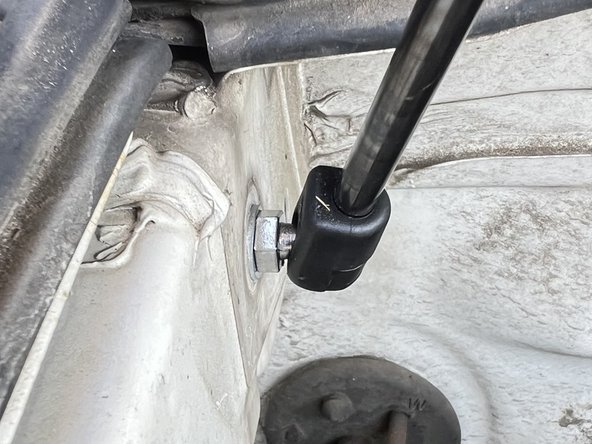
- Using the 12mm wrench, unbolt the top of the hood strut by twisting the bolt counter-clockwise until it comes loose.
- If the bolt is stuck you may need to spray WD-40 on it to loosen it.
- Remember that to the right makes the screw tight, while to the left makes it loose. Or just remember that righty tighty, lefty loosey.
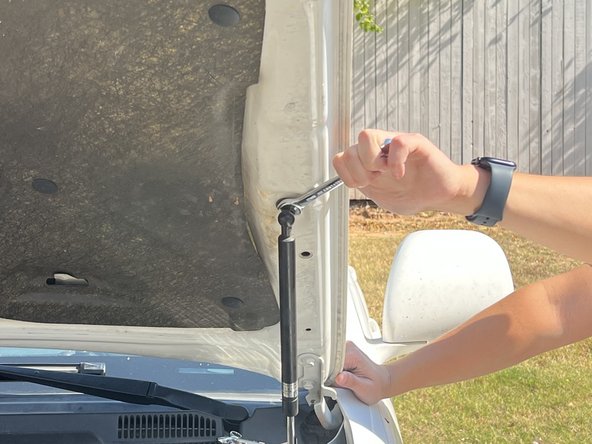
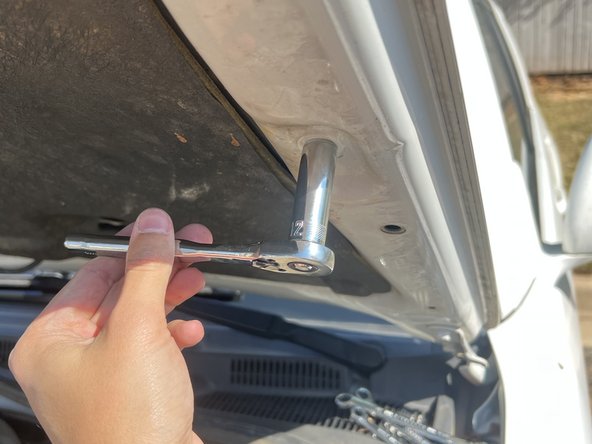
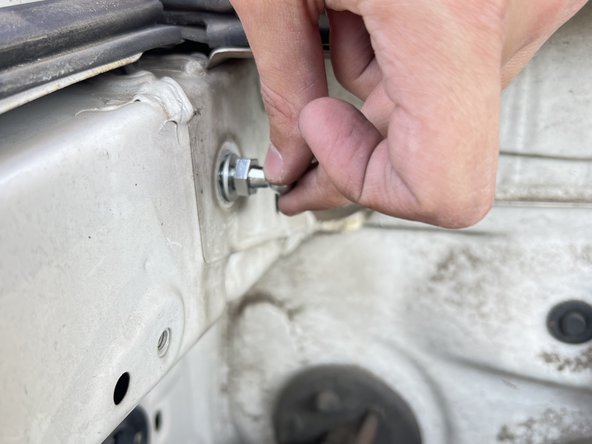
- Remove the bottom bolt, turning counter clockwise, on the old hood strut using the 12mm wrench.
- If the bolt is stuck you may need to spray WD-40 on it to loosen it.
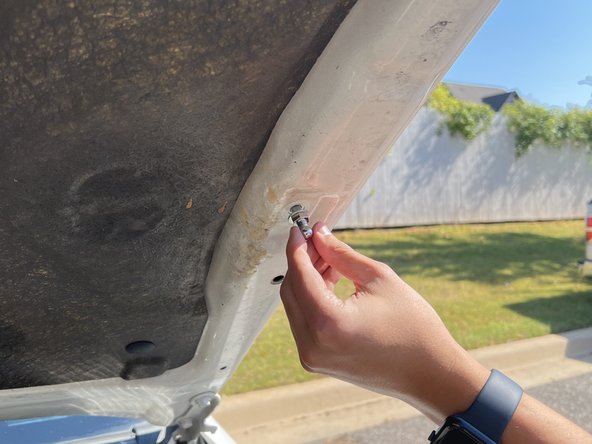
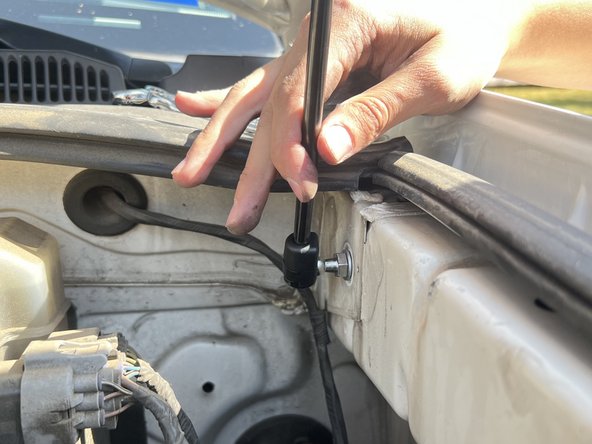
- Get the new bolt and washer from the hood strut kit.
- Place the washer on the bolt with the rough side toward the bolt and the smooth side toward the car.
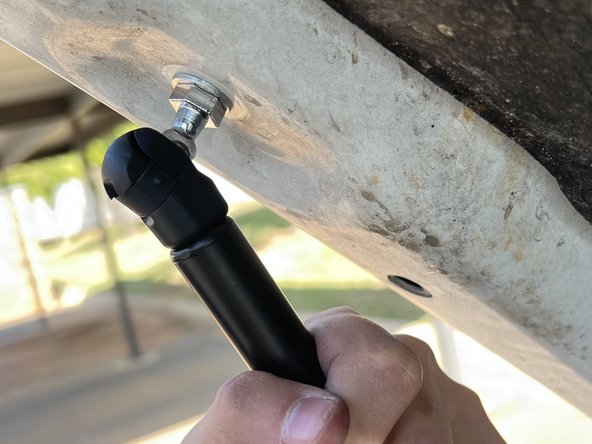
- Use your hand to start turning the bolt into the threaded hole from the removal in Step 4, turning clockwise.
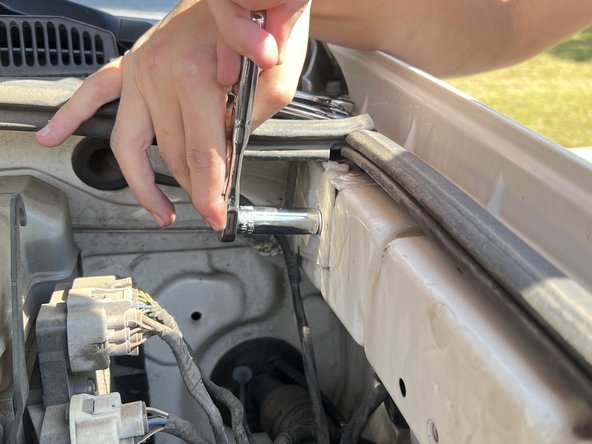
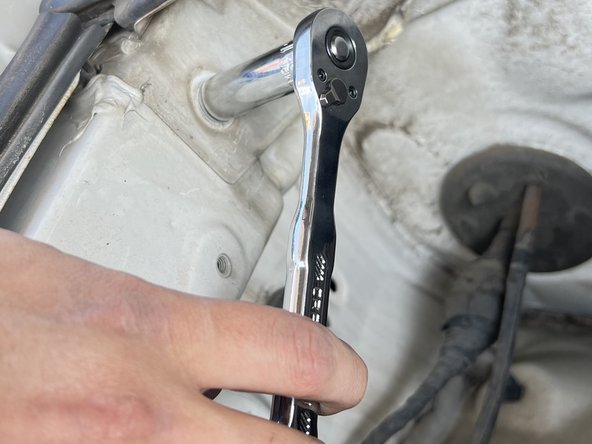
- Once it is tight enough to stay on, use the 12mm socket wrench to turn the bolt until it is secure.
- Get the new bolt and washer from the hood strut kit.
- Place the washer on the bolt with the rough side toward the bolt and the smooth side toward the car.
- Use your hand to start screwing the bolt into the threaded hole from Step 3, turning clockwise.
- Using the 12mm socket wrench, turn the bolt until it is secure.
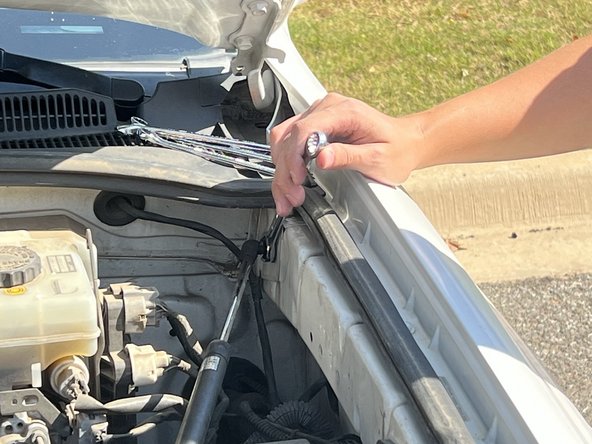
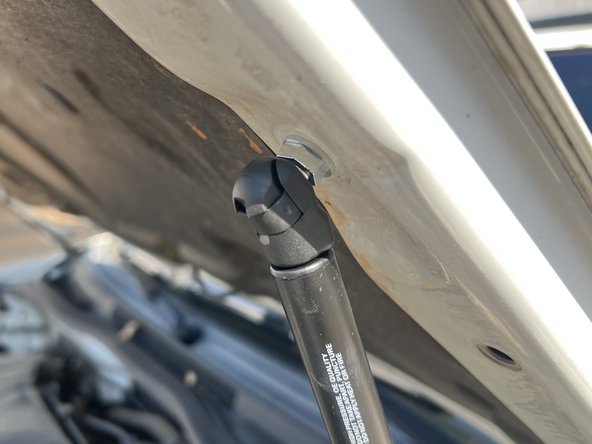
- Get the new hood prop from the kit.
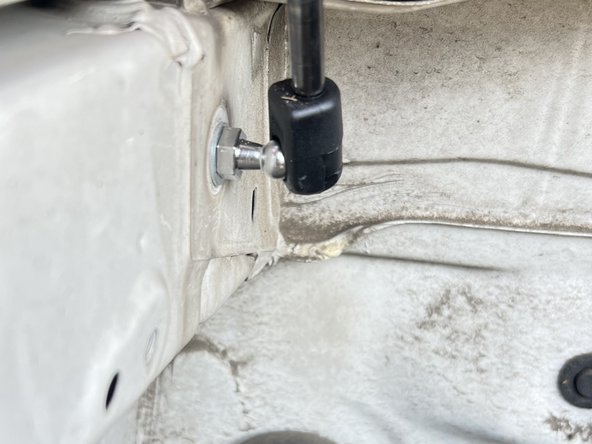
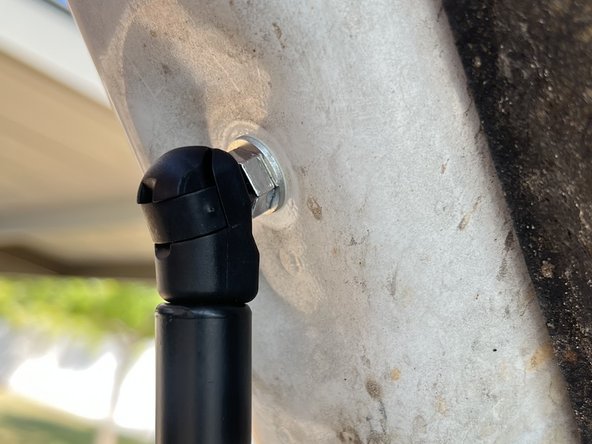
- Press the extended end of the hood prop firmly onto the ball joint that you installed on Step 5.
- It should snap into place with a little force.
- Similar to the previous step, line up the top of the hood prop with the bolt that you installed in Step 6.
- Press the other end of the hood prop firmly on to the ball joint.
- It should snap into place with a little force.
- You are now finished with the right side and are halfway done!
- Turning counter-clockwise, unbolt the top side of the left hood strut using the 12mm wrench.
- If the bolt is stuck you may need to spray WD-40 on it to loosen it.
- Unscrew the bottom bolt on the old hood strut using the 12mm wrench by turning it counter-clockwise.
- If the bolt is stuck you may need to spray WD-40 on it to loosen it.
- Get the new bolt and washer from the hood strut kit.
- Place the washer on the bolt with the rough side toward the bolt and the smooth side toward the car.
- Use your hand to start screwing the bolt, clockwise, into the threaded hole from Step 10.
- Once the bolt is tight enough to stay on, use the 12mm socket wrench turn the bolt until it is secure.
- Get the new bolt and washer from the hood strut kit.
- Place the washer on the bolt with the rough side toward the bolt and the smooth side toward the car.
- Use your hand to start screwing the bolt clockwise into the threaded hole from Step 8.
- Using the 12mm socket wrench, turn the bolt clockwise until it is secure.
- Get the new hood prop from the kit.
- Press the extended end of the hood prop firmly on to the ball joint that you installed during Step 11.
- It should snap into place with a little force.
- Similar to the previous step, line up the top of the hood prop with the ball joint that you installed during Step 12.
- Press the other end of the hood prop firmly on to the ball joint.
- It should snap into place with a little force.
- You are now finished with the left side and are finished with the replacement.
- Ensure any tools used during the replacement are removed from the engine area to prevent the hood getting stuck while closing it in the following instructions.
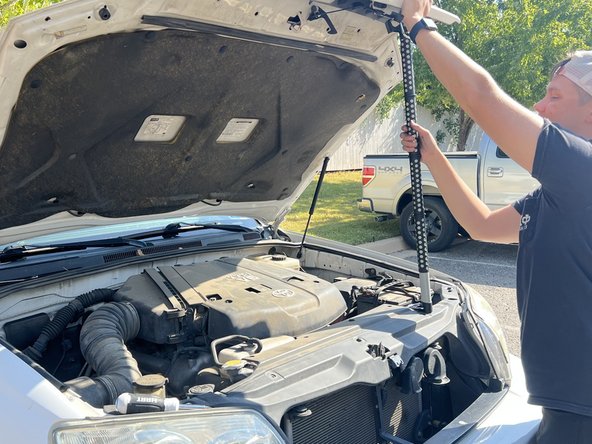
- Carefully remove the hood prop that you installed during Step 2 while holding the hood.
- The weight of the hood should now be held by the new struts.
- Close the hood, and now you have successfully replaced the hood struts on your Toyota 4Runner.
- The old hood struts are non toxic and safe to dispose of in a standard trash bin.