Samsung Galaxy Tab S9 Display Replacement
ID: 178997
Description: Mishaps happen, and that was me one early...
Steps:
- Apply heat to the screen to loosen the adhesive. A heating pad or 3D printer heated bed is recomended, but a heat gun or hair dryer can also do the trick, just be careful not to apply excessive heat to avoid damage to the battery.
- Recommended temperature: 60-80°C, about 2-5min. Increase only if necesary, DO NOT EXCEED 100°C
- Take note of the location where the adhesive and display flex conector is:
- Adhesive location
- Dsiplay flex connector
- Be careful during prying, slicing too deep risks damage to the flex cable.
- Camera location (for orientation)
- Using a suction cup, lift the middle right side and insert a pick and/or plastic card into the gap, slowly slice left and right
- Do the same from the middle top side
- Again from the middle left side
- Lastly, from the middle bottom side
- Once again, watch out for the display flex connector
- If the pick doesn't slice through, don't force it, instead continue to apply heat and try again. Try not to insert the pick too deep.
- Once the display can lift free, DO NOT SEPARATE THEM JUST YET!
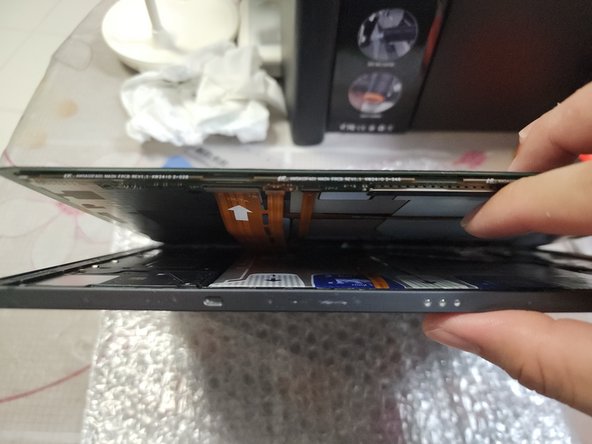
- Once the display can lift free from the tablet, prop the tablet as shown, such that you can hold the display and shell separately, with the bottom side facing you to facilitate the connector removal.
- Using a spudger or fingernail, disconnect the display and stylus digitizer connectors from the display.
- Once the display is separated, use a spudger to scrape off any adhesive residue from the sides of the frame.
- Optional: use kapton tape or any method you prefer to cover the camera and fingerprint sensor from dust.
- Use wipes and isopropyl alcohol (70% or more) to clean off any remaining adhesive.
- From this point, if you'd like to replace the battery, you would need to remove the motherboard cover at the top, disconnect the flex cables crossing the battery, and follow the instructions printed on the battery removal tabs.
- There are 15 silver screws and 2 black screws holding the frame down, take note where the black screws are located for reassembly.
- Grab the replacement display from its packaging, without removing the protective plastic and adhesive liner.
- Connect the display flex connector to the replacement display, then turn on the tablet to test its functionality
- You may use the Samsung Members app to perform the test, as I was unable to access the ServiceMode menu for some reason. Make sure both the capacitive touch and S Pen functionality works before reassembling
- If you had replaced the battery, ensure the motherboard cover is put back, otherwise the tablet will not turn on.