HP 15-dw0037wm Display Assembly Replacement
ID: 179262
Description: Is your HP 15-dw0037wm not closing properly or...
Steps:
- Before you begin, discharge your laptop battery below 25%. A charged lithium-ion battery can catch fire and/or explode if accidentally punctured.
- Power off your laptop and disconnect the charger and any peripheries before beginning disassembly.
- Set the laptop down with the lower case facing up.
- Lift a corner of the lower silicone foot and peel it completely off.
- Repeat for the upper silicone foot.
- Use a Phillips screwdriver to remove the five 8 mm screws.
- Remove the two 5 mm Phillips screws.
- Insert an opening pick into the gap between the lower case and chassis.
- Starting from a corner is recommended.
- Slide the pick around the entire perimeter of the device until the lower case fully releases.
- Remove the lower case.
- Detach the coaxial connector by grabbing it securely from the gold colored metal section and gently lifting upwards.
- Don't tug on it from the white end or towards the side. It is likely to get damaged.
- Remove the four 4 mm Phillips screws that secure the two hinges.
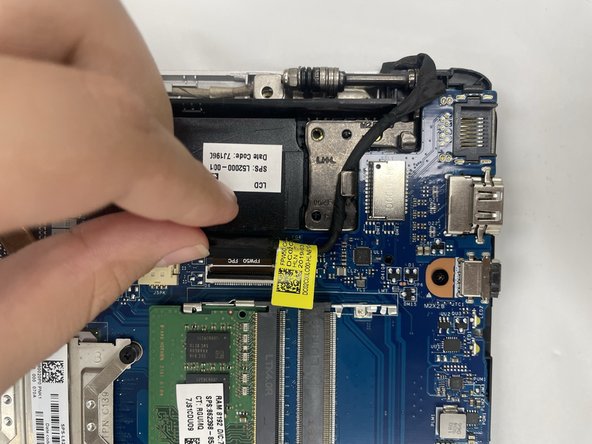
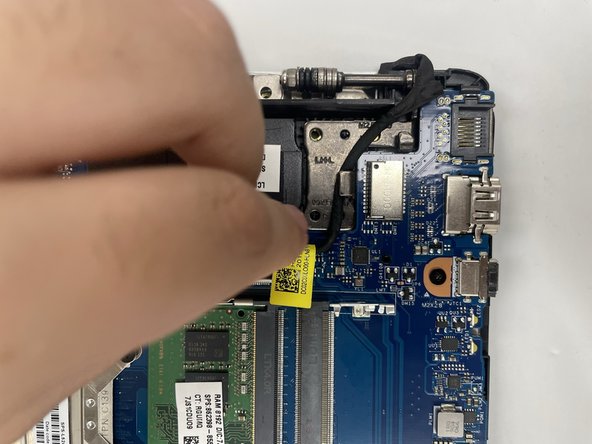
- Flip up the black locking flap on the ZIF connector.
- Disconnect the display cable.
- Use an opening tool to lift up the hinges.
- Grab the hinge and pull it outwards.
- Repeat onto the other hinge.
- Gently grab the plastic cover and use both hands to lift it slowly from one side to the other.
- Lift up the plastic cover to fully detach it.
- Remove the six silver 4 mm Phillips screws that secure the hinges to the screen.
- Remove the two black 4 mm Phillips screws.
- Be careful when removing the screws because it's possible that the foil underneath and the threaded hole itself can come off.
- Lift up the hinge from the lower half and gradually separate it from the screen.
- Repeat on the other side.