Oculus Quest Joystick Replacement
ID: 180645
Description: Over time, the joysticks on the quest will wear...
Steps:
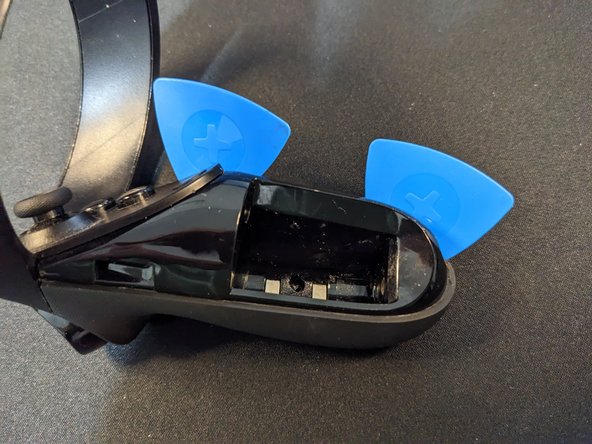
- Remove the battery compartment cover
- Remove the battery
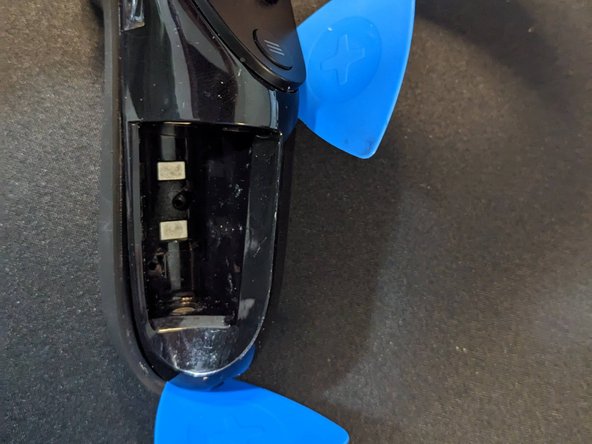
- Remove the sticker in the back of the battery compartment, to reveal two screws
- Remove the two screws
- Insert a pick near the bottom of the controller
- Insert another pick near the top as indicated
- Be careful not to go too deep towards the controller with the pick, as there is a ribbon cable in the area connecting the controller to the IR LED Array
- Slide the bottom pick around the bottom, the clips on the other side should pop out
- Remove the picks
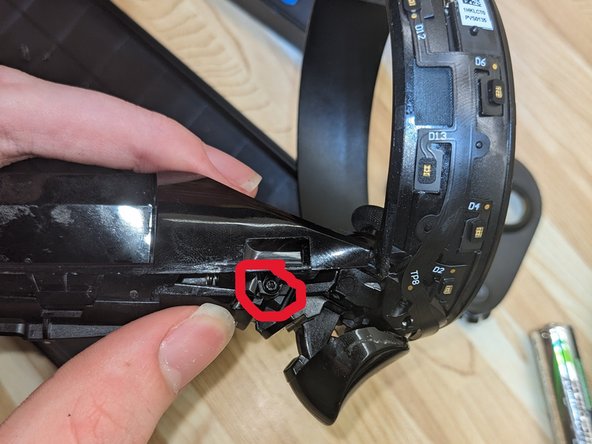
- Grab the back casing, and pull back gently
- Afterwards, while still pulling back, pull down on it, for it to come off.
- Remove the two screws near the trigger, these hold in the IR Ring Shield.
- These further steps can be extremely tedious, time consuming, and throughout the entire process, is very easy to permanently break the controller. There is likely ways to improve the process, however, this is what worked for me for both of my controllers. Please use extreme caution going forwards.
- Look at further images to see where the IR Ribbon Cable sits, so you know where and what to avoid
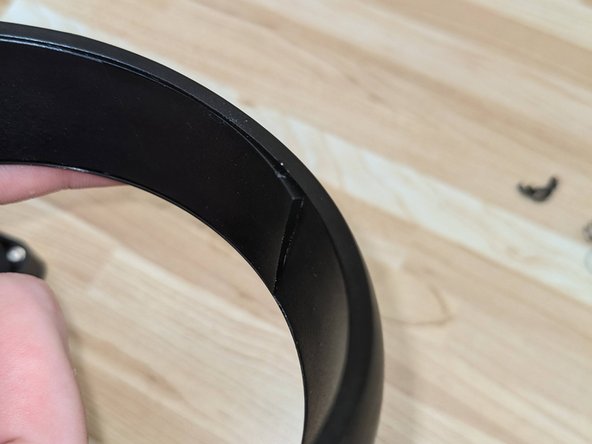
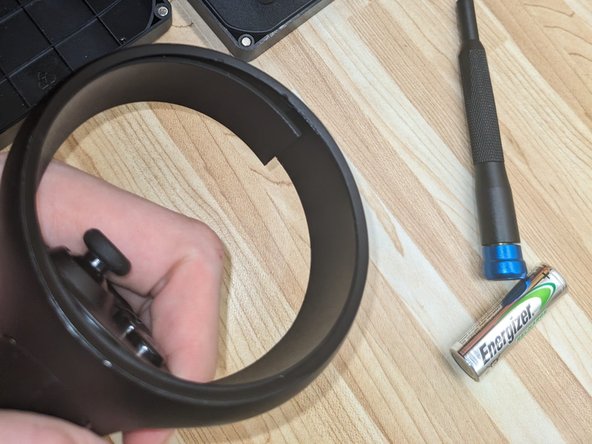
- Look for the seam in-between the two halves of the inner IR Ring
- Insert a screwdriver with a flat head, or a pick, while making sure to push towards the outside of the outside of the ir ring.
- Always try to push towards the outside, and slowly rotate down while applying pressure, to avoid catching in-between the IR ring ribbon cable, or catching it itself.
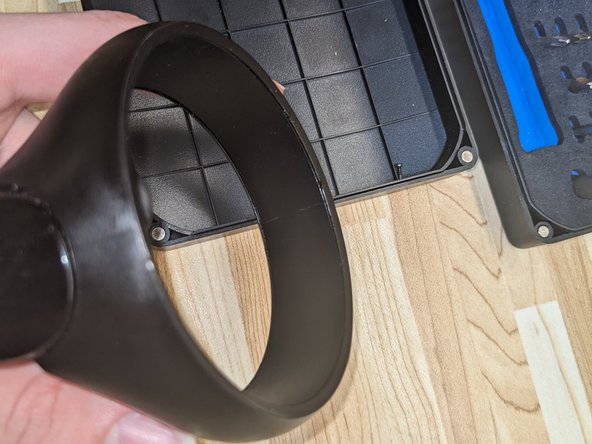
- Slowly pry the adhesive away until you have a gap similar to the one shown.
- Where you got the gap, insert the pick or screwdriver again, and while applying pressure, slowly rotate it down, and it should "fall" to the other side, where it sits vertically.
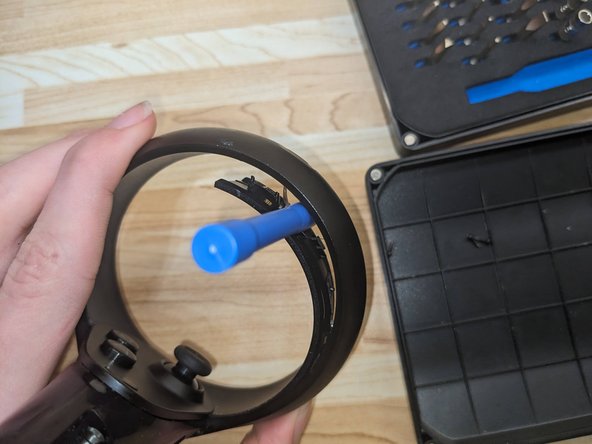
- Insert a stick like object in the gap, to avoid it from clicking back into place with the adhesive.
- Avoid placing the pick on top of one of the IR LEDs, and avoid separating the cable from the body of the inner IR ring, so place it as shown.
- Each half of the IR Ring has a separate cable, and they are not inter-connected, instead, there is just a post the cable is hanging onto.
- Using a similar process, start prying off the other side of the IR Ring.
- This process is again, extremely time consuming, and took me around 30 minutes to an hour to do. As it kept clicking back in on me.
- Once You have both sides off, you'll want to start to slowly pry around towards the main part of the controller, you'll likely feel alot of force in this process (note the completely white parts of my fingers haha).
- Try pushing the two halves over eachother, as shown, while trying to keep the IR LEDs from being damaged.
- Additionally, keep trying to slice the adhesive around the edges towards the main body of the controller
- Eventually, you should get to a point where all of the tension releases, and you get to a point like this.
- Start by slowly pushing the ends of the two halves down and out of the ir ring shield, and once you are to a point like this, you'll want to push the shield down on the back, while prying the front side up
- On the left controller, there is an extension to the plastic near the trigger, that makes it alot harder to remove the shield. I ended up needing to cut some of it off and pull extremely hard, but ended up still breaking a little rubber dampener inside the trigger, that's there to reduce the sound of using the trigger.
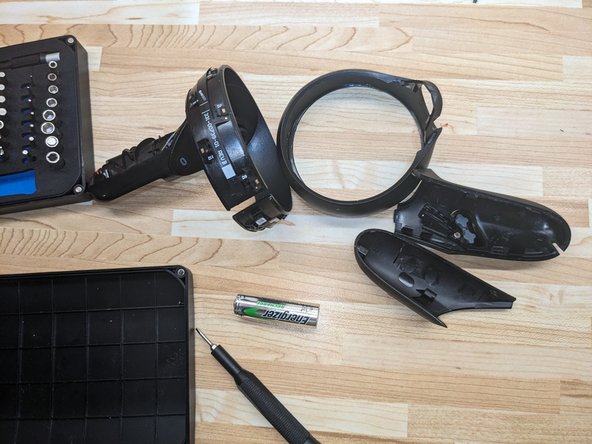
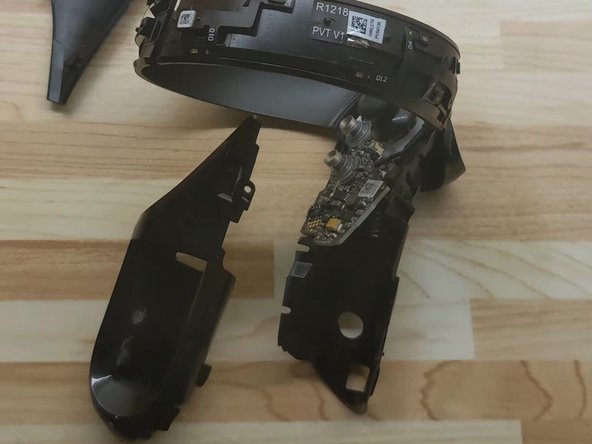
- Afterwards, the shield should come off
- Feel free to celebrate a little, as you just completed the hardest steps!
- If desired, you can put a battery back in and test the controller to see if tracking still works, to ensure no damage was caused to the ribbon cable in the process.
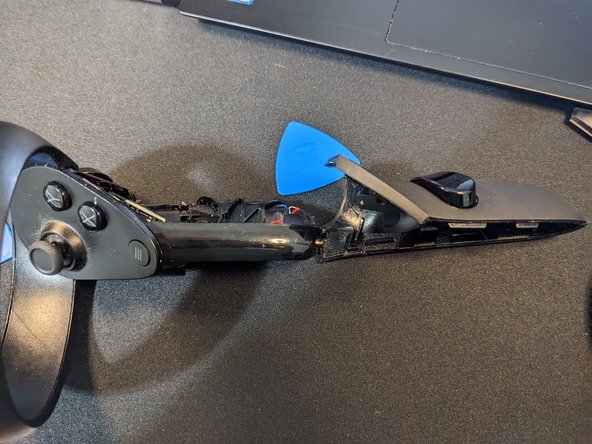
- Remove the two screws now uncovered by removing the IR Ring Shield
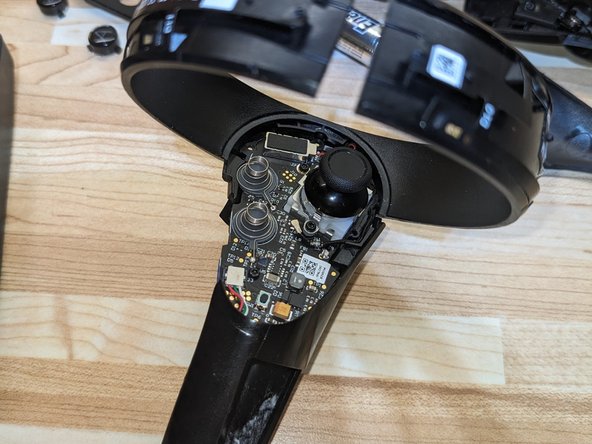
- You can now remove the front cover on the buttons, finally revealing the board at last.
- Unplug the beige battery connection cable from the motherboard near the bottom, as next, we need to remove the battery housing, in order to flip over the main board to unplug the joystick.
- Remove the 5 screws, holding the battery compartment to the main frame of the controller
- Unclip and remove the battery compartment
- This step can be a little bit confusing, as it can be hard to properly grip the two separate parts of the controller, feel free to change how you grip the controller if you feel it's not budging.
- Remove the 4 screws holding in the main board
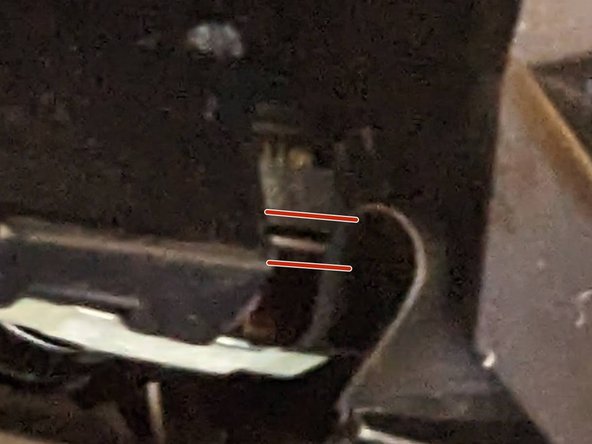
- Unplug the indicated cable from the main board
- Fold the main board over
- The direction you fold it in will change depending on if you're working on the left or right controller.
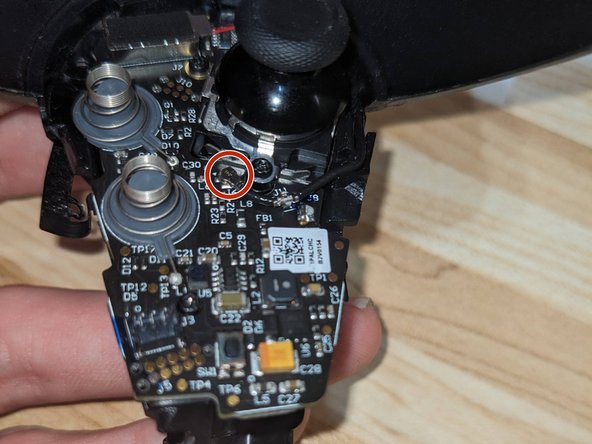
- At last, unplug the joystick from the connector.
- Plug in your new replacement joystick
- While making sure the metal bar behind where the mainboard sits is down, fold the mainboard back ontop of it
- Keep tight pressure on the main board near where the metal bar sits, and test to ensure that the trigger returns after pressing it in, otherwise, continue repeating attempting to put the mainboard back on until it does.
- After confirming the trigger still functions, screw the mainboard back on, starting at the screws near the top.
- Plug back in the black cable.
- Continue re-assembling the device, however, before re-attaching the IR Ring Shield, it might be best to first check that the Tracking and the controller still works
- If tracking does not work
- Check the black ribbon cable on the side of the controller, if it is misaligned as shown, push it back in and align it properly.
- If the controller does not turn on
- Ensure that you plugged back in the battery cable.
- Start by folding the two halves inwards towards each other, to shrink them.
- Hook the IR Ring shield onto it's spot just below the trigger, and then fold it down onto the two inner IR Rings, while still folding them together
- You may have it where one of the halves didn't click into place, push, starting from near the main part of the controller, and slowly slide to the front, it may take a bit of force
- Afterwards, you should have the IR Ring back in place.
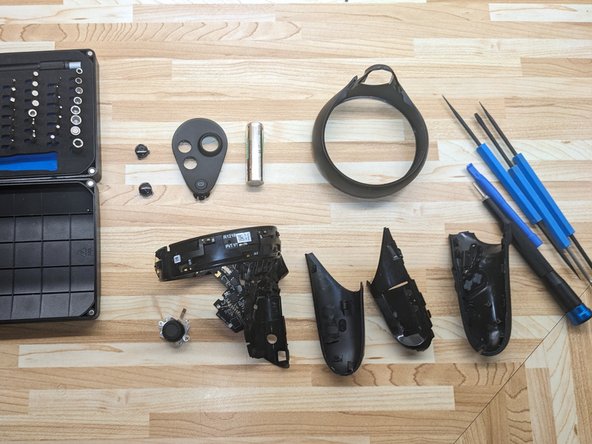
- Continue re-assembling the device until complete!