iPhone 16 Pro Max Battery Removal
ID: 181203
Description: Removal steps for the battery in the iPhone 16...
Steps:
- Your iPhone's battery is secured with three stretch release adhesive strips. The next four steps show how to remove them and free your battery.
- Be careful not to dent or puncture the battery. Avoid using sharp tools near it.
- Use the tip of an opening pick to separate a black pull tab from the bottom of the battery.
- Use tweezers to help peel the tab away from the battery.
- Don't try to pull the tab out from under the battery just yet.
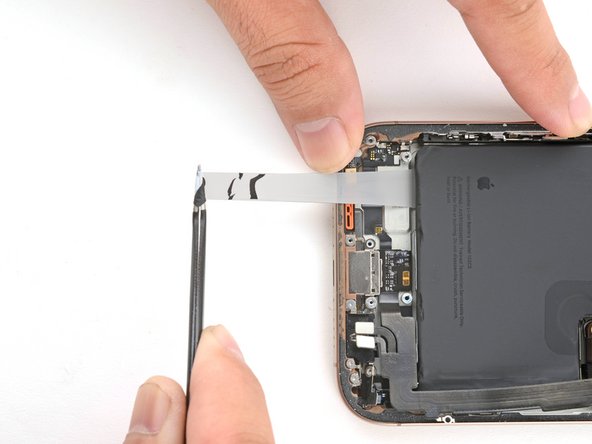
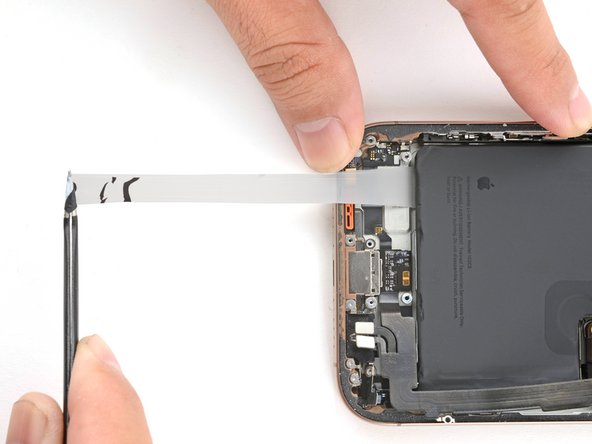
- Use tweezers or your fingers to grab the pull tab.
- Slowly pull the adhesive out from under the battery at as low of an angle as possible.
- Give the strip plenty of time to stretch and re-grip it as necessary. Avoid dragging it over the components or cables above the battery.
- When the strip becomes too long, wrap it around your tweezers and continue pulling.
- If a strip breaks off, try to retrieve it from under the battery. If you can't retrieve it, move onto the next strip.
- Repeat the procedure with the two remaining adhesive strips.
- Carefully bend the lower assembly cable out of the way as needed to access the adhesive strips.
- If you removed all three stretch release adhesive strips, congratulations! Remove the battery and skip down three steps for reassembly instructions.
- If one or more adhesive strips broke, skip to the next step to remove them with isopropyl alcohol.
- The next two steps show how to remove the battery if the adhesive strips broke.
- Lift the bottom edge of the frame to tilt the iPhone.
- Use a pipette or a syringe to apply 2–3 drops of high concentration (>90%) isopropyl alcohol along the bottom edge of the battery, close to where each broken adhesive strip came out.
- Wait one minute for the isopropyl alcohol to flow under the battery and soften the adhesive.
- Insert the flat edge of an opening pick between the left edge of the battery and the frame.
- Pry the battery upwards slowly with steady force. Give the adhesive time to release.
- Don't bend or crease the battery. If it feels stubborn, apply a few more drops of isopropyl alcohol and try again.
- Once the adhesive loosens, grab and remove the battery.