Sony INZONE M3 Teardown
ID: 181256
Description: In this guide I will show you how to teardown...
Steps:
- Overview of Sony 27" INZONE M3 Full HD HDR 240Hz Gaming Monitor. Place the display panel on a cushioned, flat surface.
- Remove the screws on VESA interface
- Tools: iFixit Picks and Opening Picks
- Beware of the snap-fits, because they are fragile. Leave the picks in between so they won't snap again.
- Much effort is required, and this is the most difficult & time-consuming step.
- Refer to 3rd picture for the position of snap-fits. Twist around snap-fits area to unlock them.
- Unplug.
- The joystick comes with a direction indicator: BTM for facing bottom.
- Remove using screws
- Remove two screws
- Remove tape
- Beware of static on your hands. Release it before touching the metal sheet.
- Remove plug;
- remove 6 screws on the front;
- remove a black screw fixing the silicon grease radiator on the back
- When assembling back, it is recommended to fully detach the radiator and mount onto the sheet metal first, to avoid positioning issues.
- Remove bottom sticker
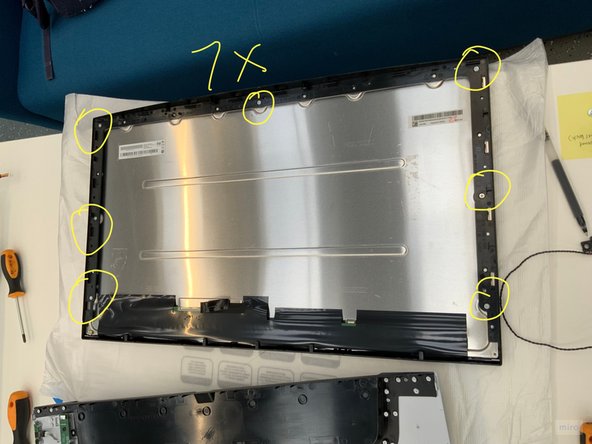
- Remove 7 screws on the middle frame
- A smaller size screw head is used.
- Remove all the stickers and unscrew 4 screws on the PCB
- Another 3 screws hidden under tape on middle frame.
- Detach bottom decoration strip
- And then detach bottom PCB, with magnetic parts
- Full display of all parts.