Replace Philips ceramic grinder motor and sensor
ID: 181859
Description: All newer fully automatic coffee machines from...
Steps:
- Take a photo of the mark on the large gear wheel; it should be in the same position when you reassemble it.
- Although the motor is powered by 230 V, diodes ensure that only positive half-waves are supplied, so that the motor only rotates in one direction. Make a note of how the connection cables are plugged in. Test later to see if it is rotating in the correct direction.
- You can test the motor with approximately 25 V DC. It should turn easily and draw approximately 120 mA. If this is not the case, check the carbon brushes on the side. Only then should you consider replacing it.
- Insert translation here
- Any brackets—in this case, the black rubber sleeve—must be transferred to the new part.
- The speed sensor can only be removed from the inside. To do this, you must disconnect its plug from the main circuit board and expose the cables.
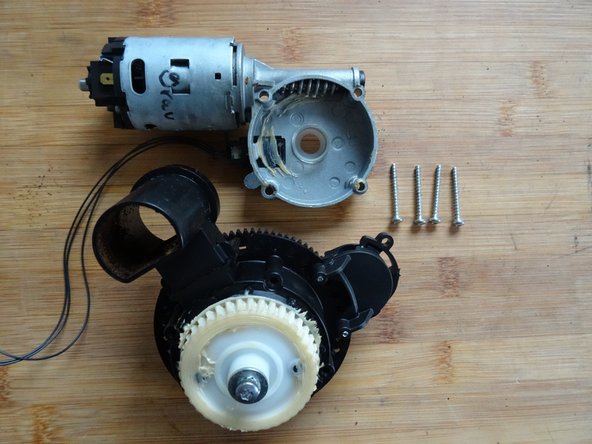
- There are four Torx T10 screws on the underside of the grinding mechanism. Remove those.
- The screw marked in yellow must not be removed when replacing the motor.
- The white plastic sleeve around the screw marked in yellow must be transferred to the replacement part.
- Lift off the motor.
- The machine's electronic use the sensor to measure the number of revolutions. The sensor must be transferred to the new motor.
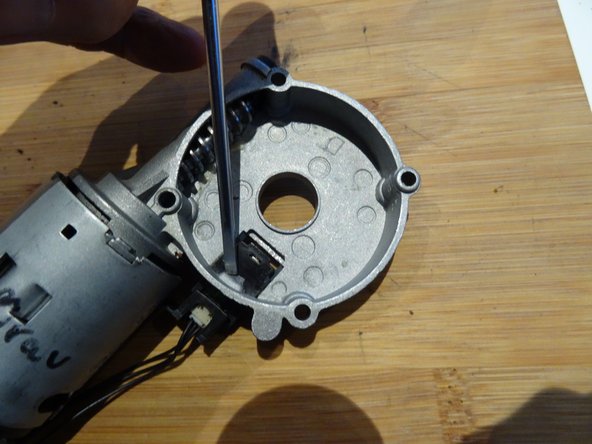
- The sensor is secured on the inside with a locking tab. It can therefore only be removed from the inside.
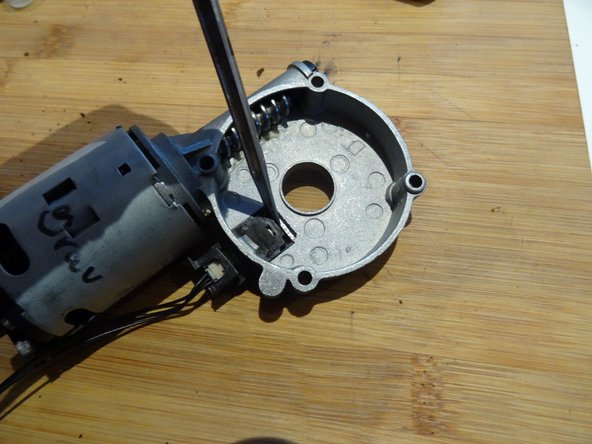
- Press the locking tab firmly down with a flat screwdriver.
- Slide the sensor out, using the flat screwdriver to help if needed.
- Transfer the sensor to the new part.
- Grease the worm gear on the new motor a little; the old grease may be sufficient, but new grease is better.
- Check that the plastic bushing is seated properly in the center opening. Screw the motor tight.