Pentax ZX-5n Sprocket Counter PCB Replacement
ID: 181996
Description:
Steps:
- Push down on the screw to depress the spring loaded hinge and release the door.
- Remove six 5.3 mm #00 screws.
- Remove one 3.4 mm #00 screw.
- The short screw has a machine thread and screws into the plate underneath. The rest screw into the plastic body.
- Remove three 5.3 mm #00 screws (the bottom-most screw is not always present).
- Remove one 7.3 mm #00 screw.
- Remove the remote trigger cover.
- Remove one 3.4 mm #00 screw.
- Remove two 5.3 mm #00 screw.
- Gently lift up on the flash housing to help remove the cover if necessary.
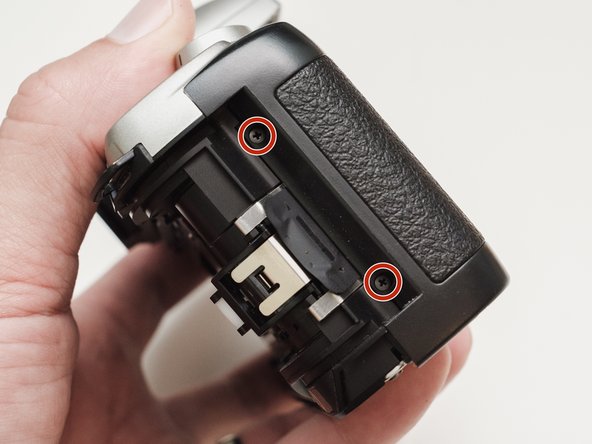
- Remove two 3.9 mm #00 screws.
- Remove two 3.4 mm #00 screws. Remove the plate holding the contacts in place.
- Peel tape from the plate. Leave the tape attached to the flex circuit.
- Remove the flex circuits from their retaining studs.
- Remove one 3.3 mm #0 countersunk screw.
- Remove one 3.9 mm #0 shoulder screw.
- Remove four 3.3 mm #00 screws.
- Pull a little slack through the housing on this flex cable.
- Pop the plate off its posts, rotate slightly clockwise and pull gently through the loosened flex cable.
- To the camera tech that left me a happy little note...I see you.
- It's best to remove these parts now so they don't fall out later on in the repair.
- Gently pull the speaker from its retention posts.
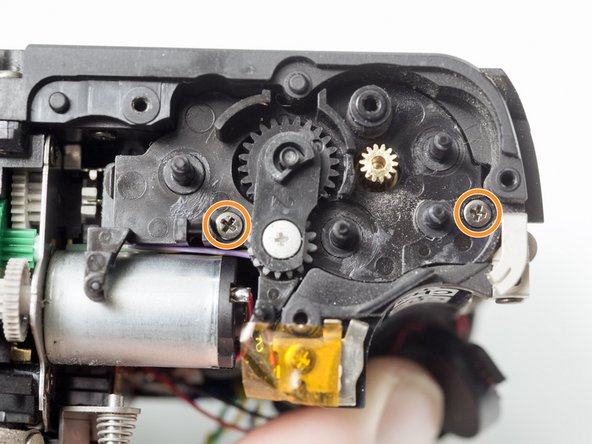
- Remove two 5.1 mm #00 screws.
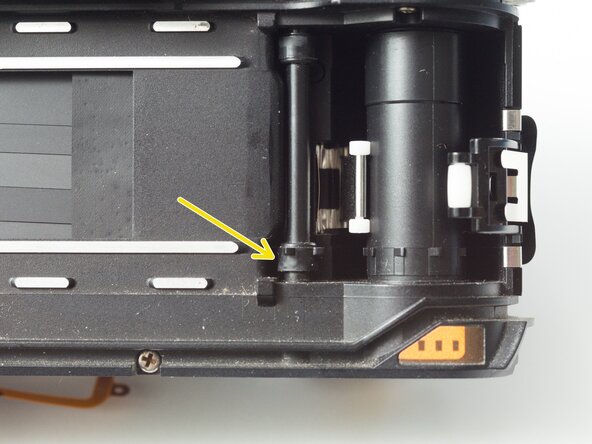
- Installation Notes: The transport gear carrier mates with the sprocket shaft here using a squared off spindle. Make sure they mate properly when reassembled.
- Remove one X mm screw.
- The screw has atypical threads with a very steep angle. It will want to move in/out with relatively little rotation.
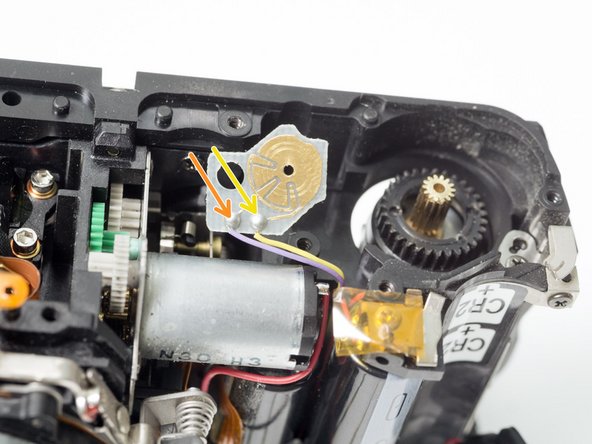
- Unsolder one purple wire.
- Unsolder one yellow wire.