SteelSeries Arctis Pro Wireless Ear Cup Replacement
ID: 182432
Description: If your headset is loose this is the guide for...
Steps:
- Remove the ear pads by pulling gently from the bottom
- Remove the Battery
- Use the Torx T6 to remove the 6 screws holding both speakers ( Red Circles)
- **Note for Reassembly at the end** That small gap circled in green is used to put the ear pads back on, insert the ring around the ear pad into that gap and spin the ear pad until you do a full circle.
- Remove the 4 screws using the Phillips 0
- Make sure the headset is unmuted before pulling up the board.
- Pull up the board gently starting from zone 1 to 3
- Insert a Plastic Spudger in the gap where you find zone 4 to gently push the board away from the casing. Make sure zone 1-3 are lifted.
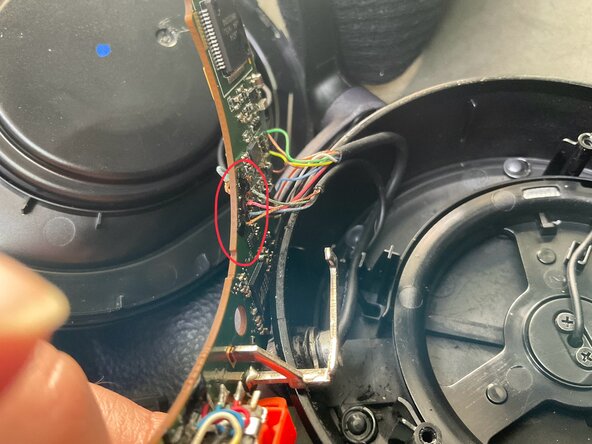
- Gently remove the black glue with a plastic spludger.
- Then unsolder the cables circled
- You can also unsolder the 2 cables that connect the speakers to the board but it’s not necessary for the repair.
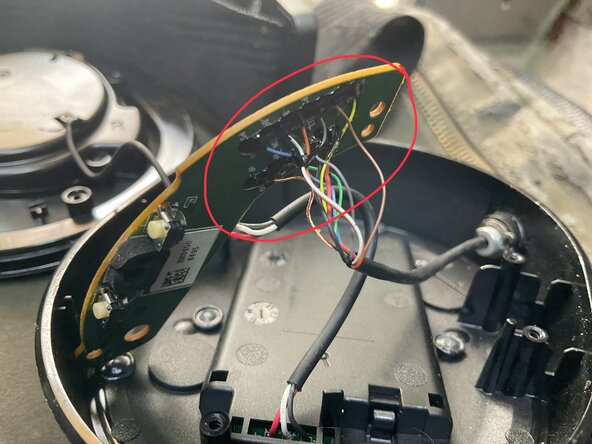
- Gently remove the black glue with a plastic spludger.
- Then unsolder the cables circled
- You can also unsolder the 2 cables that connect the speakers to the board but it’s not necessary for the repair.
- Remove the C ring with the Circlip Pliers and the circular ring behind them on both earcups
- Dont remove the bigger C shaped ring/block that’s on the right side
- Pull out the cables to only have the ear cups shell left
- Remove the volume knob with the spludger by inserting it in the arrow’s direction under the knob and gently pulling it up
- Remove the spring bellow the volume knob
- **For later** When reinstalling the headset you will notice that the knob has a flat line in the middle, you have to line it up with the flat side on the board.
- On the 2 ear cup casing there should only be left the cable that connects to the battery and mic.
- Remove the outer panel that covers the battery and the same outer plate on the other side.
- This part is by far the most tedious of the fix
- Inside the casing there should be multiple glue spots like the ones shown in the picture. I used a nail clipper with the shape of a plier to cut them in square shapes (like shown in the picture)
- Use tweezers or something thin and sharp to gently pry open the battery inner panel
- Use tweezers or something thin and sharp and insert the pointy side in the hole to push the inner panel
- Unscrew the 2 screws with a Phillips 0
- Untether the mic cable from the casing in Picture 2
- Gently pull up the whole retractable mic mechanism. (Make sure the cable on the other side is loose so it can get pulled as you remove the entire mic)
- Remove the battery connector (Sorry I don’t have a picture with the inner plate off but you just need to take it out)
- On the Battery side at the bottom you’ll have to remove 2 small black plastic levers and a transparent small piece
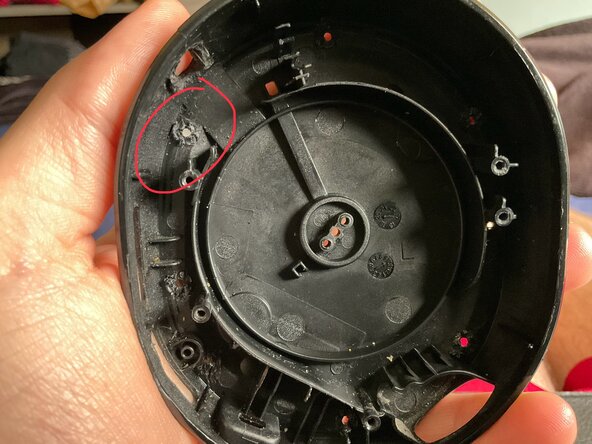
- Remove the glue circled in the picture (I don’t have a picture of the glue itself but it will be where it’s circled)
- Remove the 2 small black pieces and the transparent one.
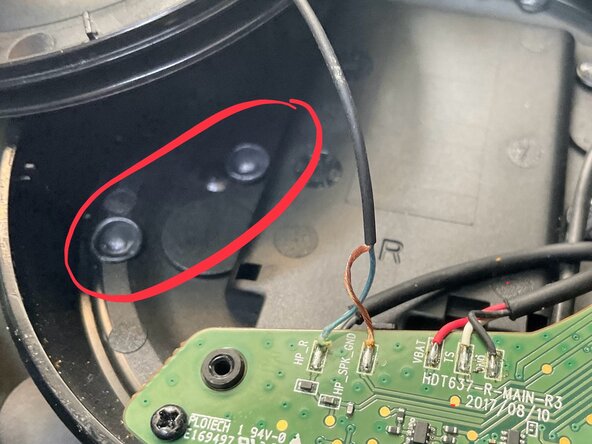
- Remove the magnets circled with a something thin and sharp.
- Reinstall everything in order except for the outer/inner panels and the battery.
- When you make it back to Step 2 and complete it proceed to Step 15
- Use superglue on the spots marked in green
- Install the 4 magnets
- Install the inner panel
- Install the battery
- Install the outer panel
- Let the superglue do its thing for 15-30 minutes.
- Enjoy your headset!
- I made this guide months after I fixed mine, I don’t think I missed any steps but if something isn’t clear let me know and I will clarify.