How to Upgrade the Back Ports to USB-C
ID: 184956
Description: Debris – Keep track of all screws, springs, an...
Steps:
- Turn off the GameBoy Advance SP completely before you start cleaning the port.
- Use a cotton swab dipped in alcohol to gently scrub the inside of the port.
- Do NOT apply too much pressure or use anything sharp to clean the ports.
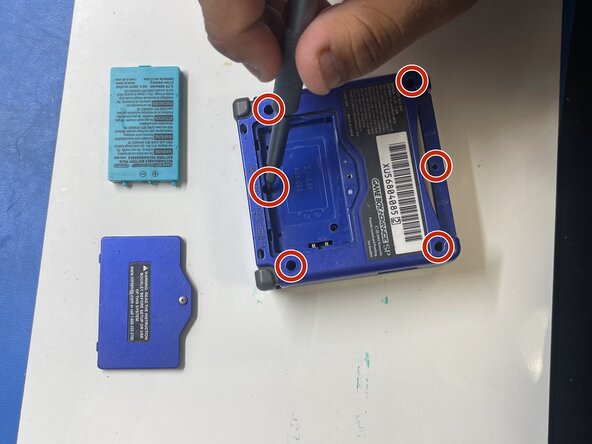
- Use a Y00 screwdriver, to take out the six Tri-Wing 1.5mm screws as you carefully disassemble your GameBoy into 4 parts: console, battery, back panel, and motherboard.
- The next few steps require knowledge of soldering and soldering safety guidelines. We strongly recommend that you review this video on how to safely solder.
- Next, desolder the back port from the motherboard using a desoldering pump.
- Take caution of the other parts of the motherboard as you desolder.
- Clean off any remaining solder on the motherboard when you finish.
- Align your USB-C port in place and ensure the bottom is facing downward.
- Prepare the solder and iron.
- Solder the sides that were previously connected to the old port.
- After it is secured on both sides, solder the 4 metal pins on the back of the new USB-C port.
- Once again, be careful not to damage/apply heat to any of the other parts of the motherboard.
- To test for a successful connection, turn on the device.
- If it doesn't turn on, ensure the port is connected on the correct points. If it isn't, use your soldering iron to solder the correct metal points.
- Follow Steps 1 and 2 in reverse to reassemble.