Samsung Galaxy Tab A9 Plus Battery Replacement
ID: 185938
Description: The Samsung Galaxy Tab A9+ (Models SM-X210,...
Steps:
- Power the device off by holding the power button for 10-15 seconds.
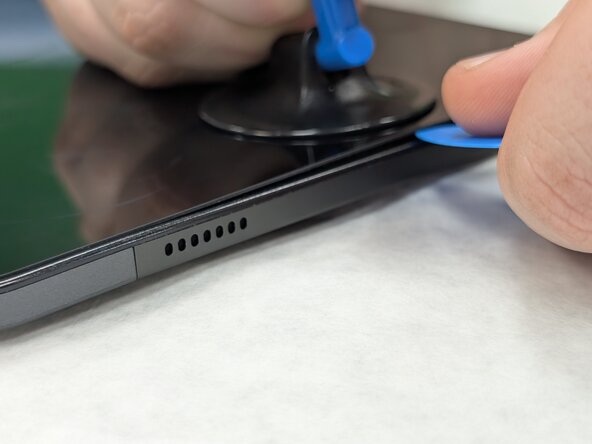
- Use the heat gun to evenly heat the edge of the device and loosen the adhesive securing the screen to the tablet.
- The heat gun should be set on 5 when using it to heat the adhesive.
- Be careful when using the heat gun; it can damage the device if you heat one area too much or for too long.
- Use the suction tool to separate the screen from the case, and insert an opening pick to help keep the screen edge separated from the rest of the device.
- Slide a second pick around the edge to cut through the remaining glue of the screen.
- Continue placing plastic opening picks in the gaps about every inch or so intill the screen fully separates.
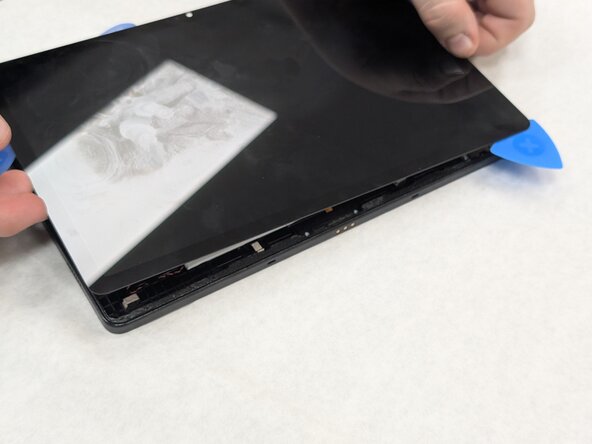
- Gently lift the screen towards the top of the device (the side with the front camera), being careful not to damage the orange flex cable.
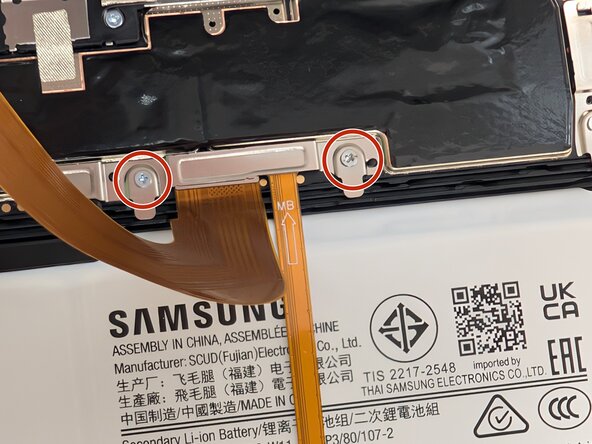
- Use a JIS #00 screwdriver to remove two 2.4 mm screws securing the metal bracket.
- Remove the metal bracket covering the connector and place it to the side to use for reassembly.
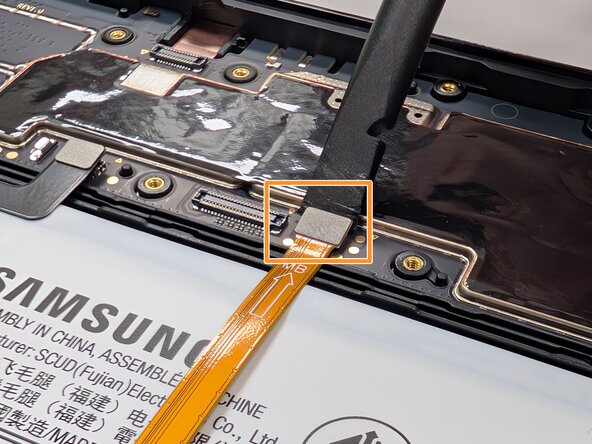
- Carefully slide a spudger or opening pick under the glued-down cable to separate its adhesive and disconnect the cable.
- Remove the display screen from the tablet.
- Use a spudger to remove any excess adhesive remaining on the edges of the device's rear housing.
- If you are having trouble removing the adhesive, try using adhesive remover.
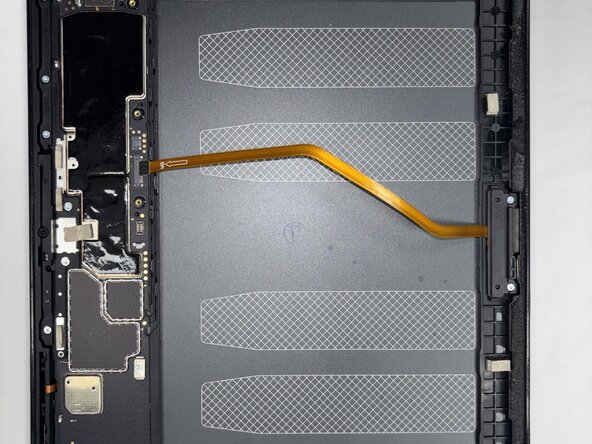
- Place a spudger or an opening tool under the connector's edge and pry straight up to disconnect the orange flex cable.
- Use a spudger to disconnect the black battery press connector.
- Be gentle when disconnecting both of the press connectors, as it is very easy to damage them.
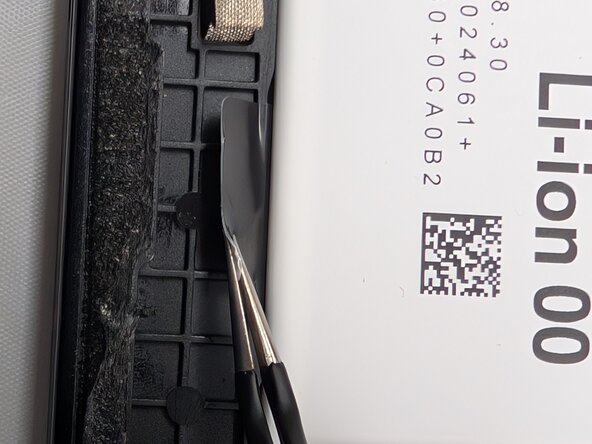
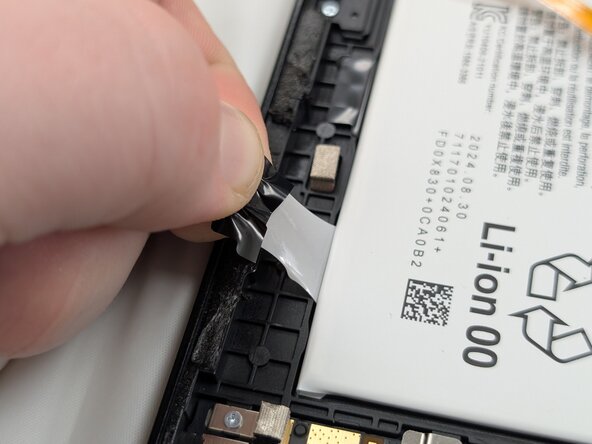
- Use a pair of tweezers to pull the four adhesive tabs until you can get a good enough grip to remove them with your hands.
- Once enough of the strips are pulled out, use your hands to slowly pull all four tabs out from underneath the battery.
- Use a spudger to lift the battery enough to hold it from underneath, then remove it completely.
- Don't use the spudger to pry the battery out as you may bend or warp the battery which could cause a fire.