Sony MVC-FD200 LCD Display Screen Replacement
ID: 185994
Description: This guide will walk you through the steps...
Steps:
- Using your finger, slide the tab on the battery door up to release the battery latch.
- Lift the battery door to reveal the battery compartment.
- Push the gray lever to the left side to remove the battery.
- If any other repairs are needed, make sure to carefully remove the battery to avoid any electric shock or short circuits during repairs.
- Turn the camera so that the top is facing down towards the table.
- Using the Phillips #00 screwdriver, remove all 2.0 mm screws with the arrows facing towards them.
- Flip the camera on both sides and remove the rest of the screws with arrows facing towards them.
- Remove the 2.0 mm screws with the Phillips #00 screwdriver for both sides of the camera.
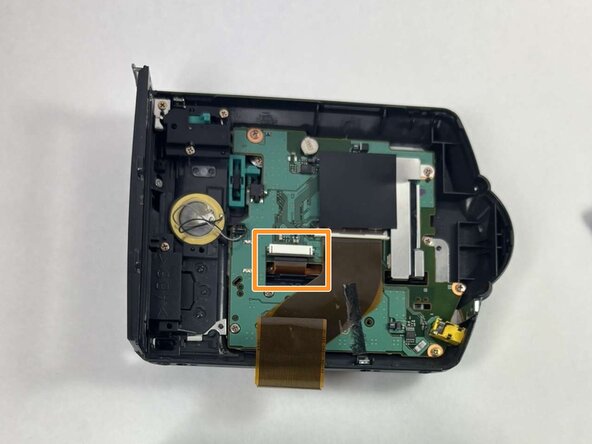
- Detach the ribbon cable that connects the two halves of the device to split them apart.
- Gently pry up the black plastic tab to slide out the ribbon cables.
- Be gentle because this component is thin, but do not be afraid to damage the ribbon cable during removal. Add force progressively in small amounts.
- Remove the six 2.0 mm screws which hold the motherboard in place using the Phillips #00 screwdriver.
- Remove the four 2.0 mm screws which hold down the heat shield using the Phillips #00 screwdriver.
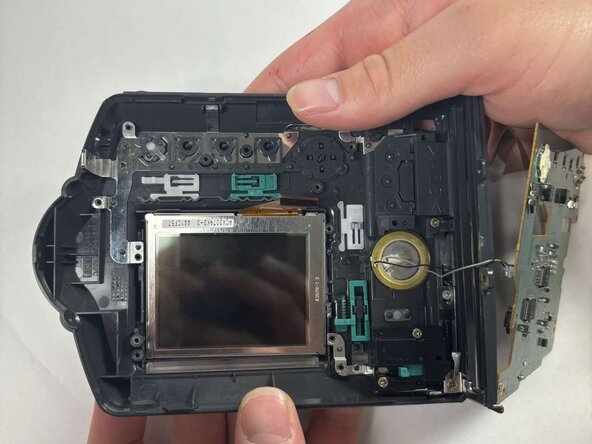
- The LCD display and the backlight which sits on top of it are displayed.
- Push both components out.