Ozeino OW810 Motherboard Replacement
ID: 186163
Description: If your Ozeino OW810 gaming headset isn't...
Steps:
- Before beginning this guide make sure you have gathered your tools.
- You will need The Marlin Screw Driver Set
- It will take approximately 3 min to get assembled
- Once your tools are gathered you may begin the guide
- Before beginning detach the ear muff
- Use the Metal Spudger to help detach
- Highlighted in the red circle is what needs to be detached in order to start the guide
- Everything will be located on the left side of The Ozeino OW810
- After detaching the ear muff gather your tools
- You will need The Marlin Screw Driver set
- Take The Phillips #0 screwdriver to begin
- Highlighted in red is the first screw needed to remove
- Use Phillips #0 to unscrew
- Highlighted is the second screw needed to be removed
- Use Phillips #0 screwdriver
- Highlighted is the third screw needed to be removed
- Use Phillips #0
- Highlighted is the fourth screw needed to be removed
- Use Phillips #0 to unscrew
- Highlighted is the fifth screw needed to be removed
- Use Phillips #0 to unscrew
- Highlighted is the last screw needed to be removed
- Use Phillips #0 to unscrew
- You should have unscrewed 6 screws from the ear muff
- After unscrewing the screws from the ear muff remove the piece
- Locate circuit board highlighted
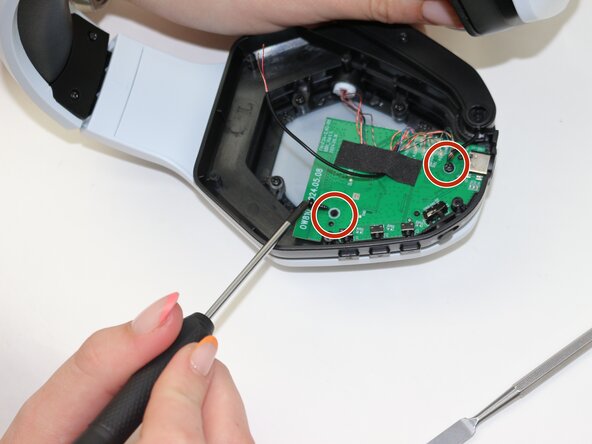
- Highlighted are the screws needed to be removed from the circuit board
- Use Phillips #0 to unscrew
- Remove the motherboard from the headset.