Ozeino OW810 Headband Cushion Replacement
ID: 186179
Description: If you are experiencing issues with your Ozeino...
Steps:
- Insert a nylon spudger in the seam between the right ear pad and the driver housing.
- Pry the right ear pad off.
- Use a Phillips #000 screwdriver to remove the six 3.2 mm screws securing the right driver housing.
- Lift the driver housing off, with care not to strain the connected cables.
- Use a nylon spudger to gently pry out the battery.
- Do not use a metal spudger to pry out the battery. Metal spudgers can easily puncture the battery.
- Remove tape from the battery.
- Pull the circuit board up along with the wiring from either side.
- Replace battery.
- Use a Metal Spudger to remove the ear muffs from the headset.
- Using a Phillips #000 screwdriver, remove the 1st 9mm screw that secures the left head piece.
- Using a Phillips #000 screwdriver, remove the 2nd 9mm screw that secures the left head piece.
- Using a Phillips #000 screwdriver, remove the 3rd 9mm screw that secures the left head piece.
- Using a Phillips #000 screwdriver, remove the 4th 9mm screw that secures the left head piece.
- Using a Phillips #000 screwdriver, remove the 5th 9mm screw that secures the left head piece.
- Using a Phillips #000 screwdriver, remove the last 9mm screw that secures the left head piece.
- Use your hands or the metal spudger to pry open the earpiece to find the green panel.
- After opening the ear piece find the green panel and look for the 1st 7mm screw. Use the Phillips #000 screwdriver to remove the screw that is holding the green panel in place.
- Use the Phillips #000 screwdriver to remove the 2nd 7mm screw that is holding the green panel in place.
- Using either your hand or the tweezers carefully remove the green panel from inside the headset.
- After removing the panel, use either your hands or tweezers to carefully remove and replace the volume and power buttons.
- Lastly, remove the slide button from the headset using a pair of tweezers.
- Before beginning this guide make sure you have gathered your tools.
- You will need The Marlin Screw Driver Set
- It will take approximately 3 min to get assembled
- Once your tools are gathered you may begin the guide
- Before beginning detach the ear muff
- Use the Metal Spudger to help detach
- Highlighted in the red circle is what needs to be detached in order to start the guide
- Everything will be located on the left side of The Ozeino OW810
- After detaching the ear muff gather your tools
- You will need The Marlin Screw Driver set
- Take The Phillips #0 screwdriver to begin
- Highlighted in red is the first screw needed to remove
- Use Phillips #0 to unscrew
- Highlighted is the second screw needed to be removed
- Use Phillips #0 screwdriver
- Highlighted is the third screw needed to be removed
- Use Phillips #0
- Highlighted is the fourth screw needed to be removed
- Use Phillips #0 to unscrew
- Highlighted is the fifth screw needed to be removed
- Use Phillips #0 to unscrew
- Highlighted is the last screw needed to be removed
- Use Phillips #0 to unscrew
- You should have unscrewed 6 screws from the ear muff
- After unscrewing the screws from the ear muff remove the piece
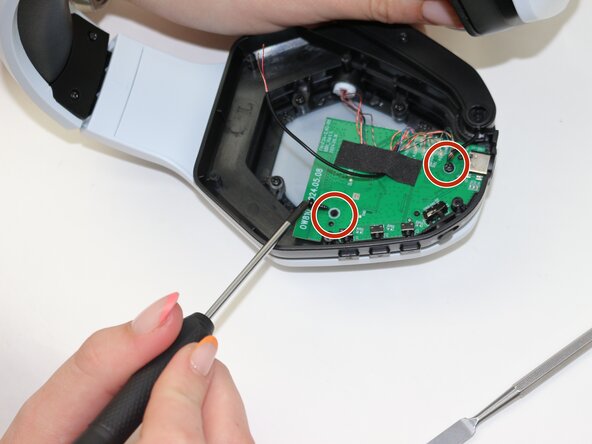
- Locate circuit board highlighted
- Highlighted are the screws needed to be removed from the circuit board
- Use Phillips #0 to unscrew
- Remove the motherboard from the headset.
- Remove both earmuff pieces
- Unscrew all 5 3.175mm screws from each side of the ear pieces
- Pull sound pieces (that go towards the ear) off both sides of the headset
- Pry the silver battery off of the frame
- Carefully unscrew the 2mm screw on the green circuit board
- Pull circuit board out carefully
- Once circuit board is removed, unscrew the four screws on the frame beneath it
- Repeat on other side
- Remove the light board portion from the back of the earpiece
- Repeat on other side
- Remove 3.174mm screws from the white framing
- Repeat on other side
- Remove the 2 4mm screws in the black piece of the headband
- Repeat on other side
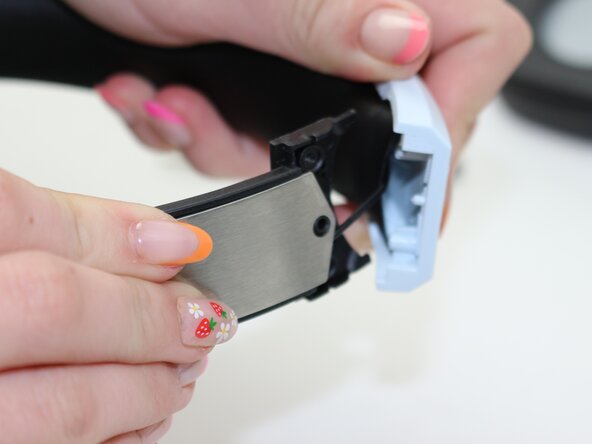
- Gently pull on the earpiece framing to remove it from the headband
- Repeat on other side
- Carefully remove and replace the cushioning