Asus Chromebook Flip CX1400FKA-AS88F Screen Replacement
ID: 186291
Description: Is your ASUS Chromebook Flip screen cracked,...
Steps:
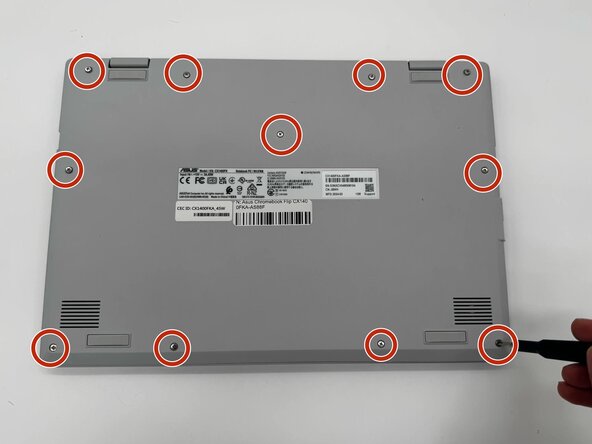
- Using a Phillips #0 screwdriver, remove the three 6.4 mm screws securing the metal brackets.
- Keep the screws organized in a safe and clearly labeled area to ensure an easy reinstallation later.
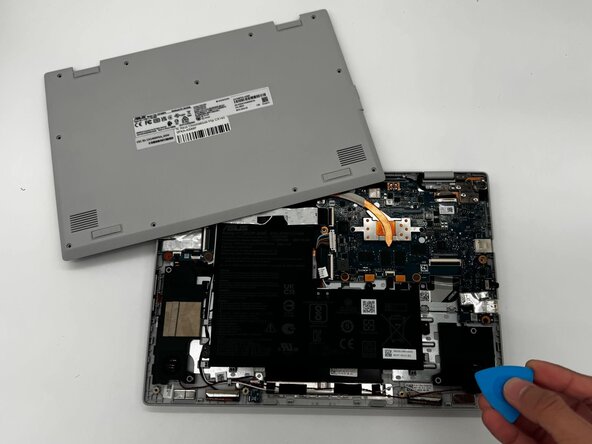
- Use an iFixit opening tool or nylon spudger to gently separate the bottom cover from the Chromebook.
- Only use plastic or nylon tools when prying open the case. Metal tools can easily scratch or damage the internal components.
- Insert the tip of the opening tool into the seam between the top and bottom covers, then slide it along the perimeter to release the internal clips securing the case.
- Insert opening picks around the edges as you go to prevent the clips from reattaching.
- Once all clips are released, carefully lift and remove the bottom cover from the device.
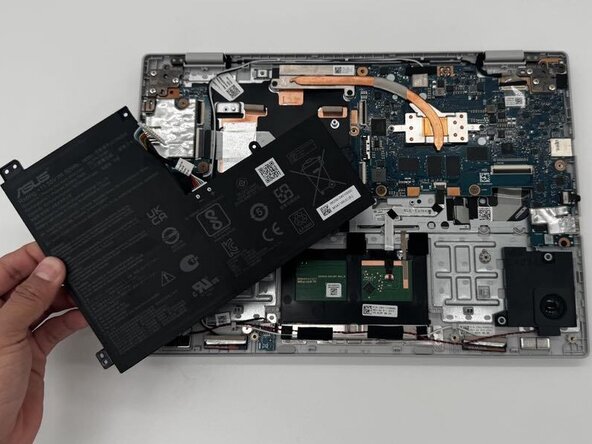
- Disconnect the ribbon cables from the motherboard.
- Disconnect the fan cable from the motherboard by pulling the connector straight out.
- For helpful tips on disconnecting cable connectors, refer to the Recognizing and Disconnecting Cable Connectors guide.
- Do not pull on the cables directly. Always disconnect by gripping the connector to prevent tearing the ribbon or damaging the socket.
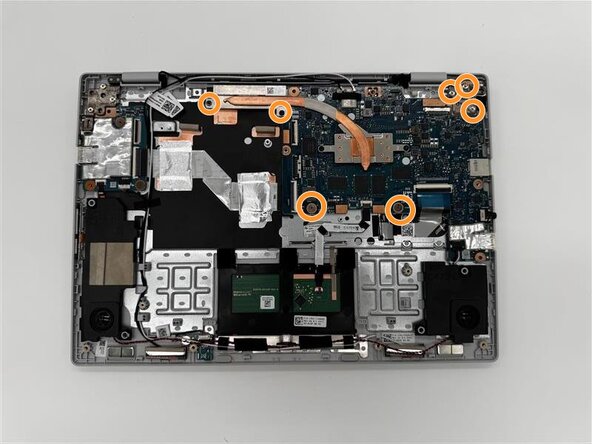
- Using a Phillips #0 screwdriver, remove the three 6.4 mm screws securing the metal brackets to the motherboard assembly.
- Apply gentle, steady pressure when loosening the screws to avoid stripping the heads or damaging the surrounding components.
- Once the screws are removed, lift and remove the brackets from the device. Keep them in a safe place for reinstallation.
- Disconnect the speaker wire connector from the motherboard by gently pulling it straight out of its socket using tweezers or your fingers.
- Avoid pulling on the wires themselves—grip the plastic connector to prevent damage to the speaker cable or motherboard port.
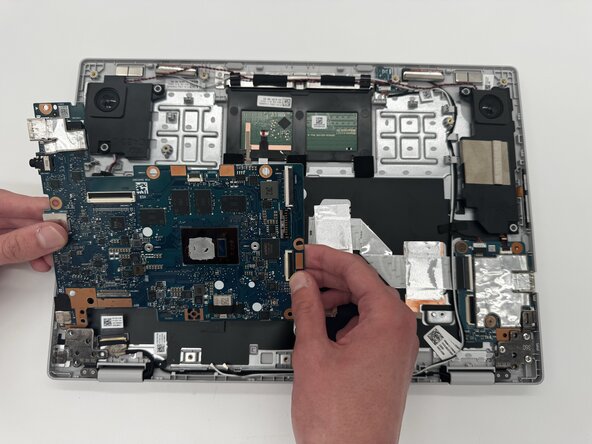
- Disconnect all cables attached to the motherboard.
- Remove the mounting screws securing the motherboard.
- Carefully remove the motherboard from the base.
- Use a Phillips #0 screwdriver to remove the screws from the hinge connecting the screen to the base.
- Disconnect the cable connector located beneath the motherboard.
- Tilt the screen back and lift it out of the case.