Alienware M14xR2 Hard Drive Replacement
ID: 18784
Description: This guide will show you how to safely access...
Steps:
- Turn the computer off.
- Disconnect the charging cable from the computer.
- Failure to unplug the charging cable could result in electric shock and serious injury.
- Flip the computer upside down.
- Loosen the two 6.35 mm size 1 Phillips screws on the back cover.
- The two screws are spring loaded and will not separate from the cover.
- Slide the back cover towards you and then lift upwards to remove.
- Loosen the two 6.35 mm size 1 Philips screws attaching the battery to the laptop.
- The two screws are clipped into the battery and will not detach.
- Pull up on the black tab on the battery to reveal the connection between the battery and laptop.
- Pull up on the white connector to disconnect it from the laptop.
- The battery is now free to remove from the laptop and can be set aside.
- Unscrew the four 6.35 mm size 1 screws.
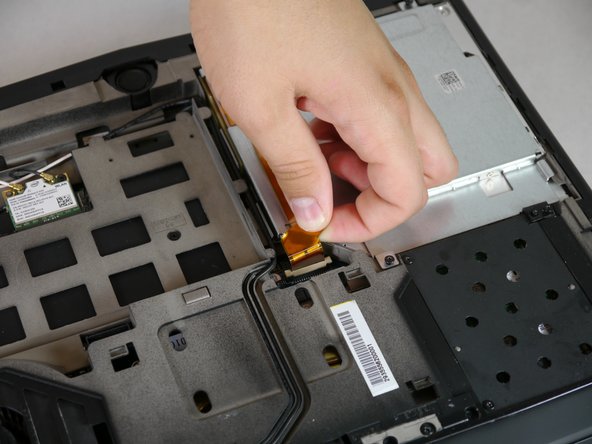
- Pull up on the end of the orange tab to detach it from the white connector.
- Lift the optical drive up and out of the laptop and set it aside.
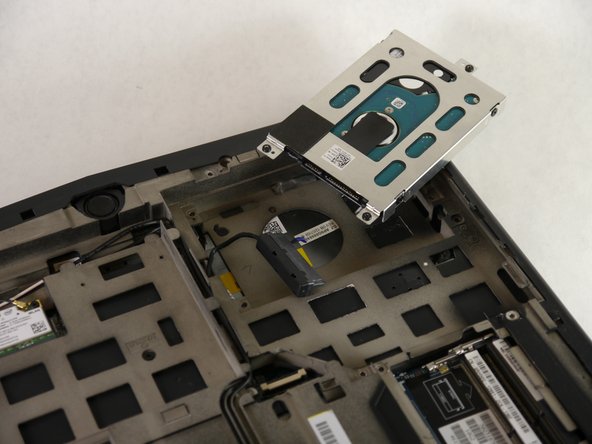
- Loosen the three 6.35 mm size 1 screws to release the hard drive from the rest of the laptop.
- The screws are spring loaded and will not come loose from the hard drive assembly.
- Pull up on the black tab gently as there is still a cable attaching the hard drive to the computer.
- Pull the connector that is attached to the cable at the end of the hard drive out and away from the hard drive to detach it.
- Set aside the now disconnected hard drive.