Velocity NoteMagix M10 A82 Cooling Fan Replacement
ID: 18800
Description: This guide will show how to safely remove the...
Steps:
- Place the notebook on the table, with the battery facing away from you.
- Slide the switch from "lock" to "unlock" with your right hand on the right side of the computer.
- Maintain holding the right switch in the "unlock" position.
- Use your left hand to slide the left switch from "lock" to "unlock".
- Maintain both left and right switches in the "unlock" position.
- Use your forefingers to push the battery out of the computer.
- Place the laptop fully opened with the keyboard facing upwards.
- Remove the hinge cover by wedging the spudger underneath at the bottom edge and gently prying upwards while sliding the spudger along the cover.
- Carefully remove the keyboard by lifting the top of the keyboard closest to the screen.
- Pull the keyboard away from the mousepad.
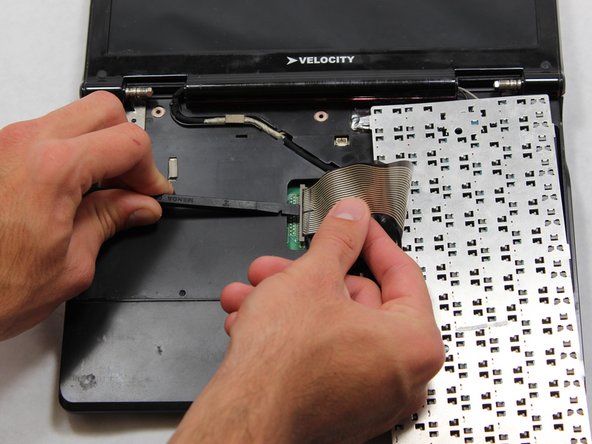
- Be careful to not damage the ribbon underneath the keyboard that connects the keyboard to the computer during removal.
- Wedge the spudger between the plastic clamp that holds the ribbon in place and carefully pry the connector off.
- Remove the eight 5.65mm Phillips #1 screws.
- Place the computer open and with the screen facing up on the table.
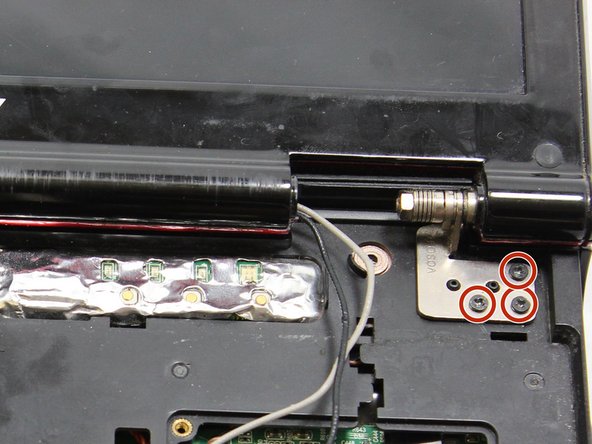
- Remove the three 3.65mm Phillips #1 screws in the right hand corner. Also remove the mirrored set of screws on the left side.
- Remove the black and gray wires by gently grasping the wires where they connect to the motherboard and pulling up.
- Using the plastic opening tool, pry the base of the cable connecting the screen to the motherboard upwards.
- Remove the front cover plate by wedging the spudger underneath at the bottom edge of the computer and gently prying upwards while sliding the spudger around the base of the laptop.
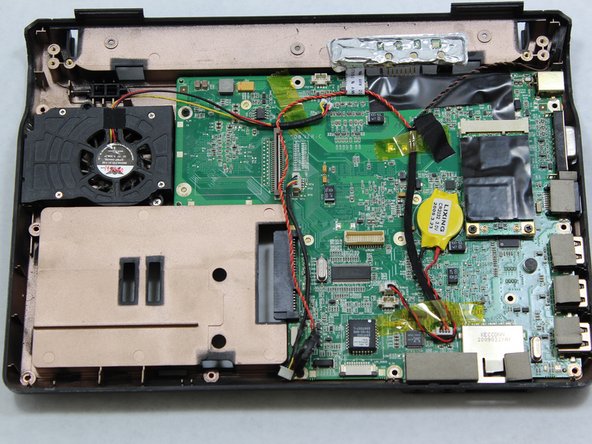
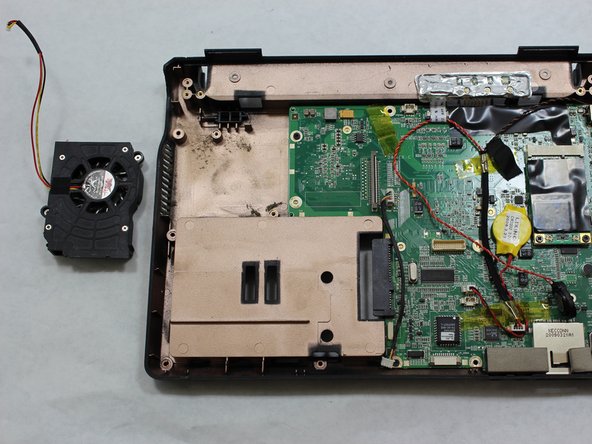
- Remove the two 4.80mm Phillips #00 screws holding down the fan.
- Remove the red, yellow, and black wires connecting the fan to the motherboard by placing your index finger underneath the wires where they connect to the motherboard, pinching the wires together with your thumb and index finger, and gently pulling the wires upwards.