Logitech G715 Battery Replacement
ID: 190934
Description: Follow this guide to replace a worn-out or dead...
Steps:
- Slide the power switch on the top edge of the keyboard to the OFF position.
- Unplug all cables from your keyboard.
- Lay your keyboard down with the feet facing up on a clean work surface.
- If your work surface might scratch the keyboard, place a soft towel under it.
- If you have a USB receiver stored in the battery cover compartment, use your finger to slide it out and remove it.
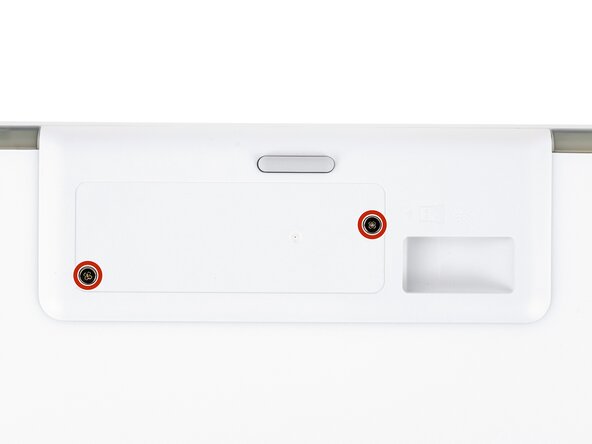
- The Logitech sticker hides two battery cover screws.
- Heat an iOpener and lay it on the Logitech sticker for one minute.
- Alternatively, you can use a hair dryer to heat the sticker. Make sure it's on the Low setting to avoid warping the plastic.
- Use an opening tool, spudger, or your fingernail to peel up a corner of the sticker until you can grip it with your fingers.
- Peel up the sticker with your fingers and remove it.
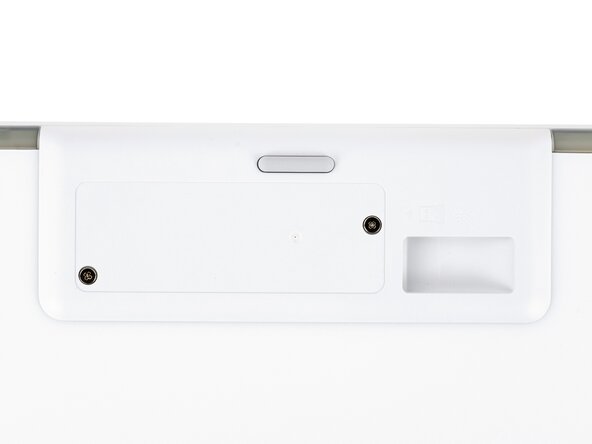
- Use a Phillips screwdriver to remove the two 8.4 mm‑long screws securing the battery cover.
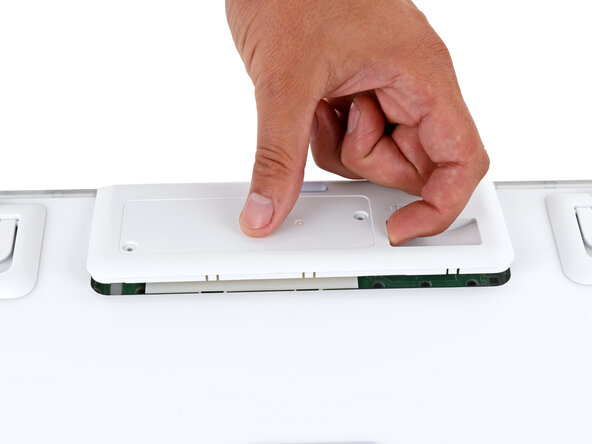
- Plastic clips secure the edges of the battery cover.
- Insert your finger in the USB receiver compartment on the battery cover.
- Pull up the bottom edge of the cover to release the clips.
- Don't try to fully remove the cover yet, as it's still connected by the battery cable.
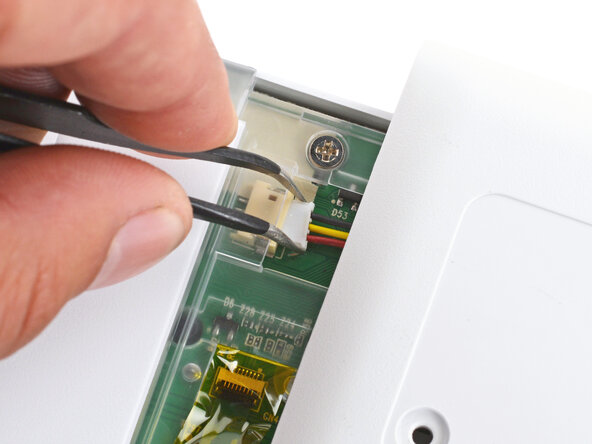
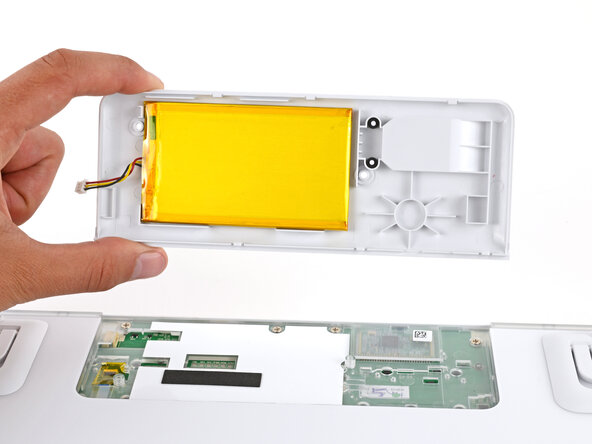
- Gently pull the cover to the right so you can access the battery connector on the left side of the recess.
- Use a pair of angled tweezers to firmly grip the battery connector.
- Hold the tweezers with your fingers as close to the connector as possible to get a firm grip.
- Gently rock the connector side‑to‑side and slide it straight out of the socket.
- Remove the battery cover.
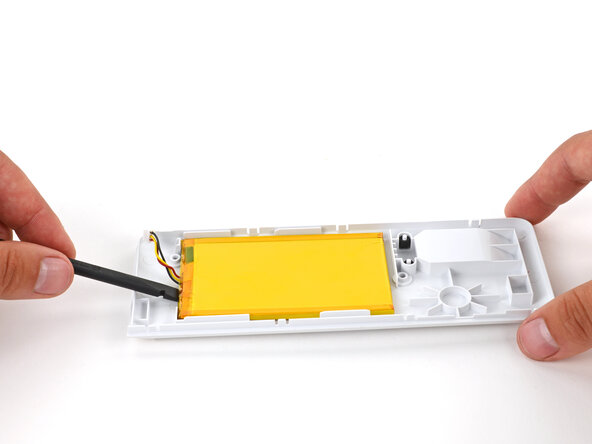
- Light adhesive secures the battery to its cover.
- Gently slide the flat end of a spudger under one of the short edges of the battery and lift to separate the adhesive.
- Be very careful not to puncture the battery, as it can leak dangerous chemicals or catch fire.
- Remove the battery from its cover.
- During reassembly:
- Remove any old adhesive from the battery cover.
- Use thin, double‑sided tape to secure the battery to the cover.
- Make sure the battery is properly positioned on the cover. The cable should be on the side opposite the USB receiver, and the battery should be within the guide rails.