Cobra 29 LTD Classic Antenna Connector Replacement
ID: 19116
Description: The antenna connector connects the antenna to...
Steps:
- Turn the power switch, the leftmost knob, counterclockwise to off.
- Turn the device around and firmly pull the power cable plug to remove it from the radio.
- Unscrew the securing cap counterclockwise from the antenna connector.
- Gently pull the antenna cable to remove it from the back of the radio.
- Unscrew the cap counterclockwise on the microphone plug to disconnect the cable.
- Gently unplug the microphone plug.
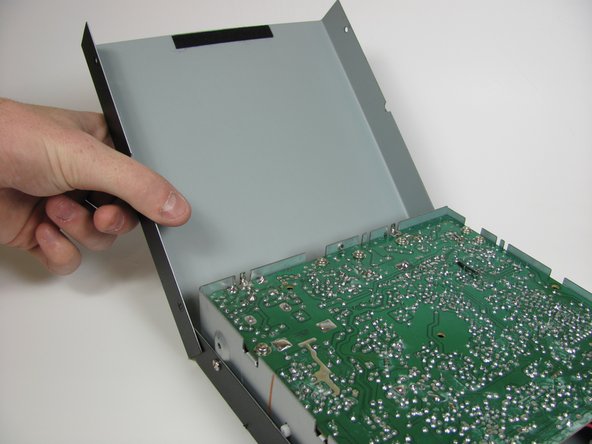
- Unscrew the top four 6.0mm Phillips head screws counterclockwise on the left and right side of the device using a #1 Phillips head screwdriver.
- Gently life and remove the top cover.
- Gently set down on a hard, flat, non-conductive surface to minimize risk of shock or breaking your radio.
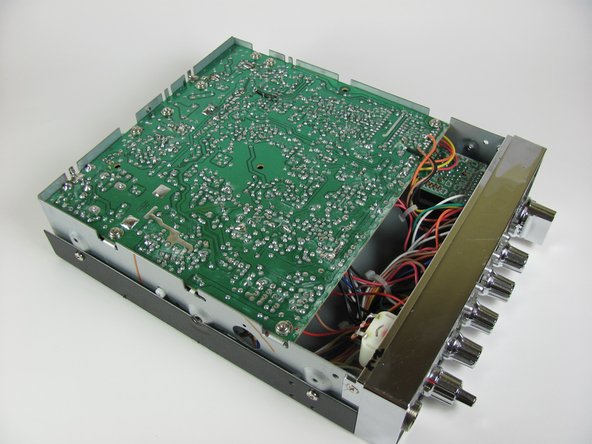
- Carefully flip the radio over.
- Unscrew the four 6.0mm Phillips head screws counterclockwise on the left and right side of the device that connect the remaining cover, using a #1 Phillips head screwdriver.
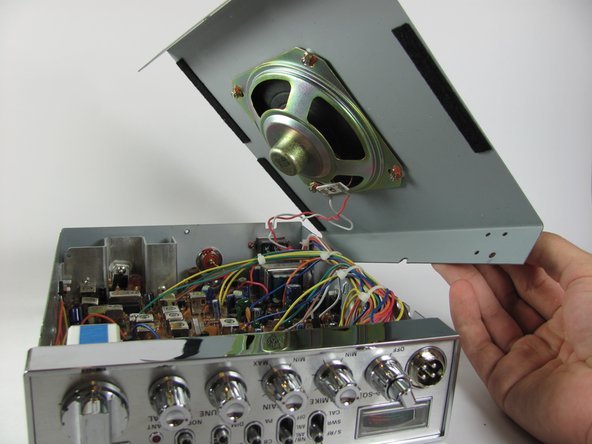
- Watch out for the wires connected to the speaker. These short wires will not allow you to move the cover very far.
- Gently lift and remove the case cover.
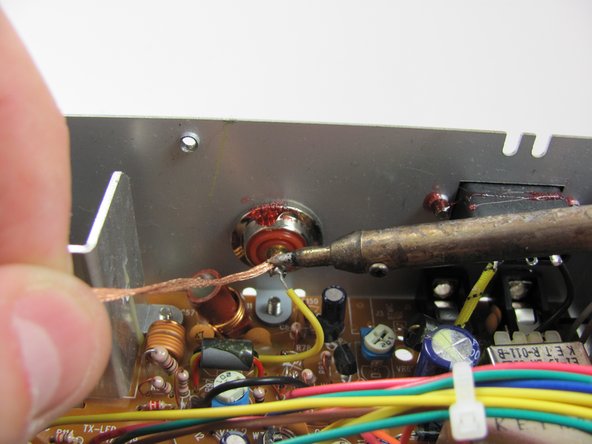
- De-solder the yellow wire that is connected to the antenna connector, with a soldering iron and the desoldering wick.
- During reassembly you will need to solder the components back together.
- The wire may still be hot, so let it sit for 30 seconds before continuing.
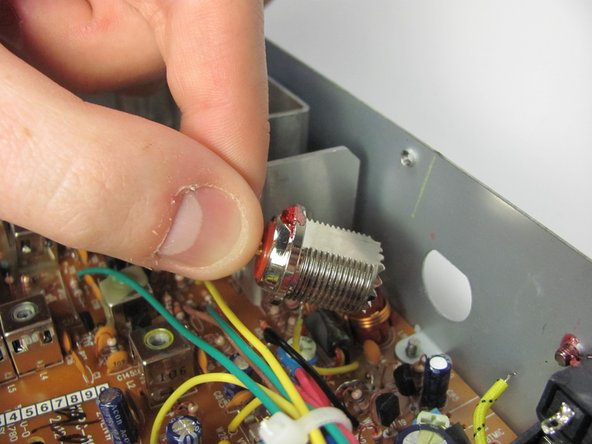
- Detach wire from back of antenna connector.
- Use a wrench to unscrew the nut counterclockwise, that secures the antenna connector to the device.
- Remove the securing nut and washer from the antenna connector.
- Gently pull the antenna connector through its hole into the case.