Les Paul Wireless Guitar Peripheral Neck Connection Replacement
ID: 19140
Description: This guide will show to replace the neck...
Steps:
- Remove batteries
- Remove void warranty sticker
- The sticker is covering a torx screw
- Unscrew the 11 screws securing the back of the body using a T10 Torx screwdriver. Each screw is 1 cm long.
- Push level, this will detach the back of the guitar from the front.
- Carefully remove the back of the body
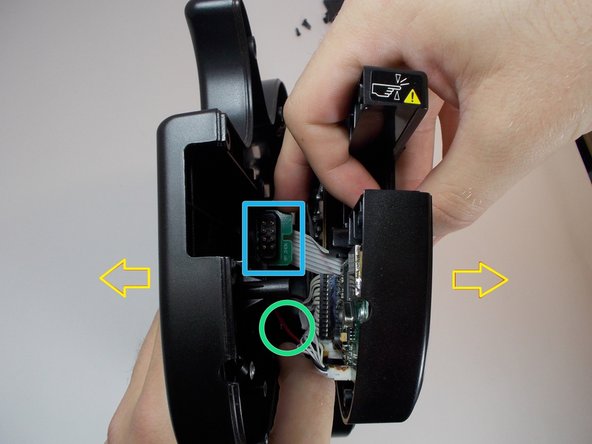
- The battery pack cord is attached to both sides of the guitar, be careful not to tear it apart.
- The neck connector may be stuck to the back so be sure to detach it before fully pulling
- Remove the 10 screws (each are 1 cm long) on the back of the neck using a T-10 Torx security screwdriver.
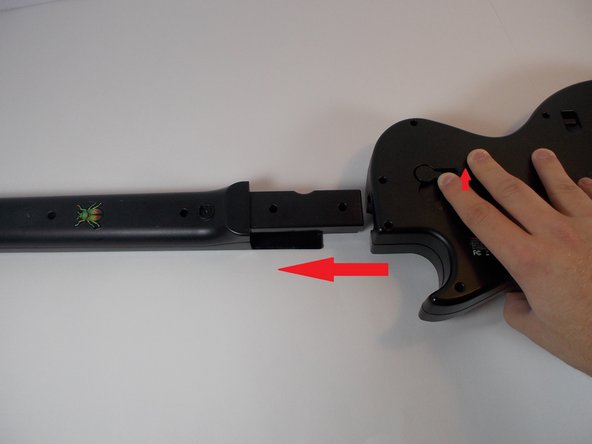
- Remove the back of the neck.
- First check to see if the button motherboard is not damaged.
- Next, make sure the wire is not damaged.
- Then make sure that the connection motherboard is also not damaged.
- If any of these parts are damaged, then it will need to be replaced.
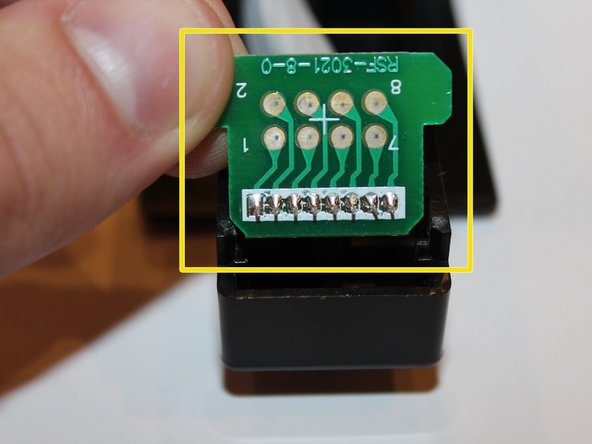
- Check to see if the neck connection chip is not damaged inside of the guitar.
- Make sure that all 8 prongs of the chip are not damaged or broken.
- If the neck chip is damaged then it will need to be replaced.
- The lock mechanism may be another reason for trouble in your neck connection.
- Use the guitar tear down to open the guitar to this point.
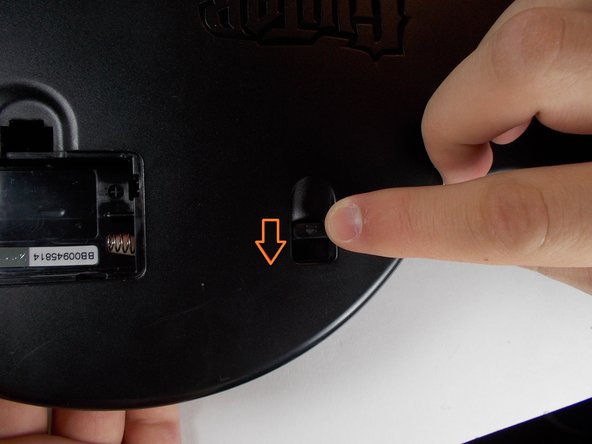
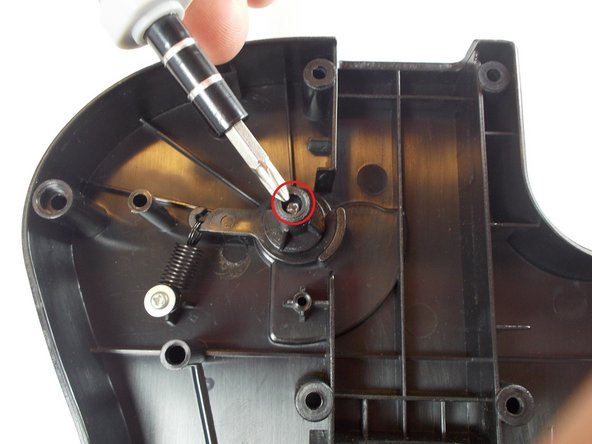
- Start by unscrewing the two screws holding down the main connection parts. The first screw is 1 cm and the second screw is 0.8 cm.
- Take the spring off the main connection mechanism. It should come off pretty easily.
- If this spring is broken or snapped, then it will need to be replaced.
- Pull out the main connection mechanism.
- Make sure that it is not broken or it will need to be replaced.
- This can be put back together by inserting the mechanism again, attaching the spring and screwing the two screws back in place.