Les Paul Wireless Guitar Peripheral Whammy Bar Replacement
ID: 19141
Description: This guide will show how to replace the whammy...
Steps:
- Remove batteries
- Remove void warranty sticker
- The sticker is covering a torx screw
- Unscrew the 11 screws securing the back of the body using a T10 Torx screwdriver. Each screw is 1 cm long.
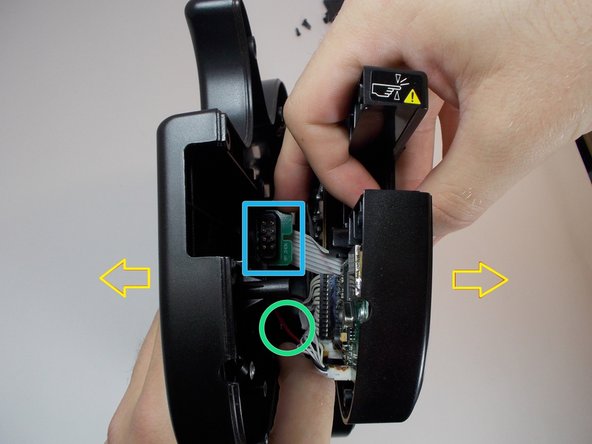
- Push level, this will detach the back of the guitar from the front.
- Carefully remove the back of the body
- The battery pack cord is attached to both sides of the guitar, be careful not to tear it apart.
- The neck connector may be stuck to the back so be sure to detach it before fully pulling
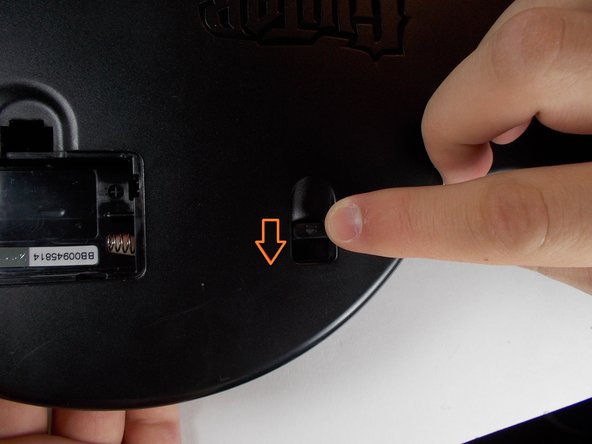
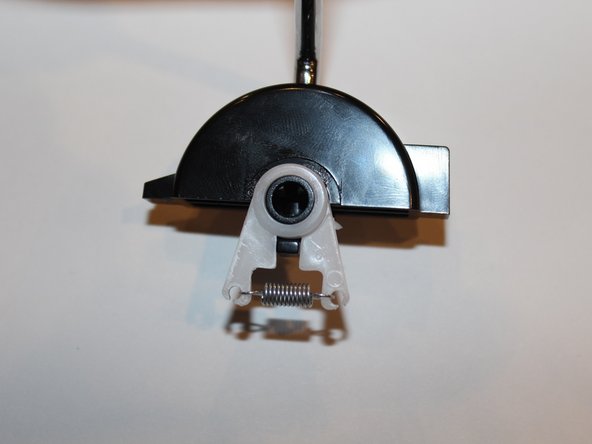
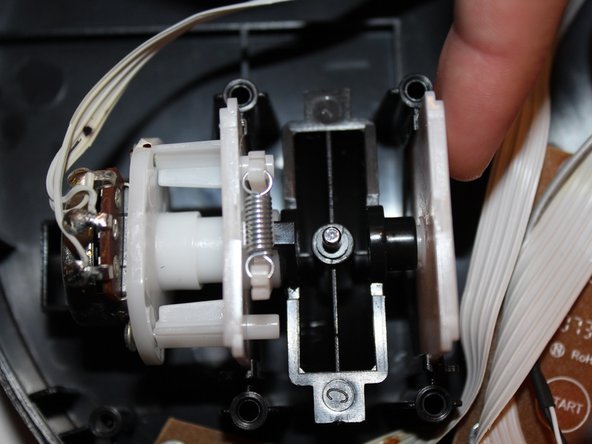
- Carefully remove whammy bar from its slot, it should slide out easily.
- Make sure the wires are not cut or damaged or it may need replacement.
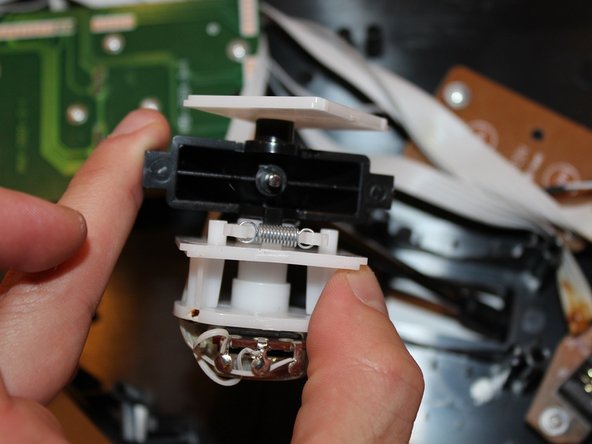
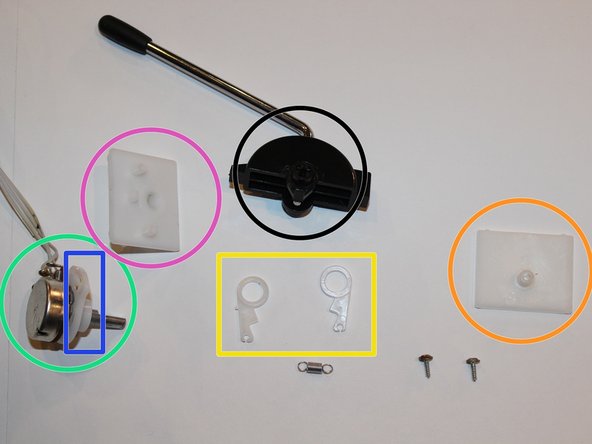
- Once taken out, the parts can come apart easily by pulling on the sides.
- The whammy bar should split into multiple parts.
- If any part is broken, then it will need to be replaced.
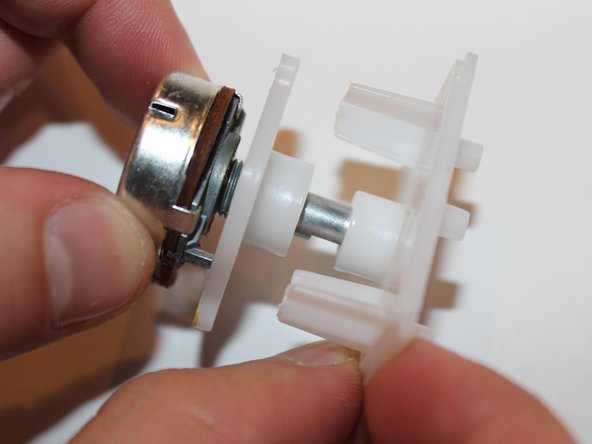
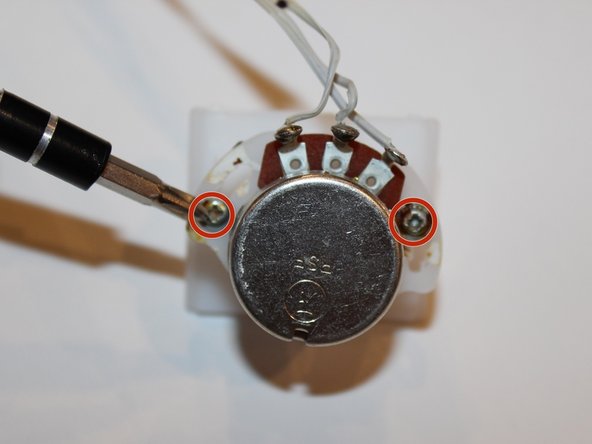
- Remove the two screws with a philips head screwdriver. Each screw is 0.8 cm.
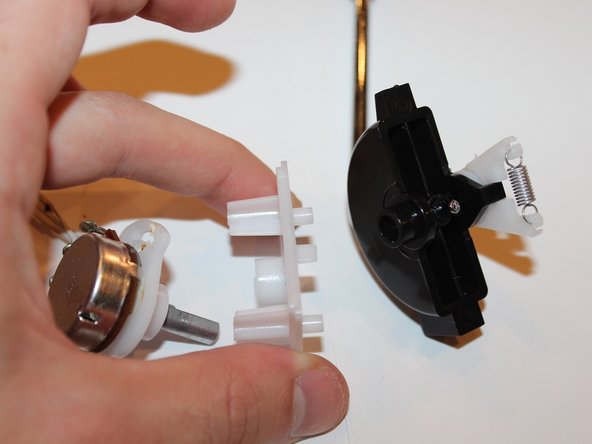
- Slide the other plastic pieces off the metal piece so all pieces are separate. Each piece will be given a number and color to make repair easier.
- Whammy Bar
- Plastic piece 1
- Plastic piece 2
- Plastic piece 3 and 4
- Plastic piece 5
- Metal piece
- Place plastic piece 3 and 4 in the whammy bar slot for them, and have them overlap.
- The pointed edges should be facing each other.
- Then use the tweezers or your hands to connect the spring from plastic piece 3 to 4.
- Connect metal piece to plastic piece 5 and make sure the metal prongs fit into the holes for them.
- Next slide plastic piece 2 on the metal piece and make sure the three stubs are on the upper half.
- Then, make sure the metal piece holes and the plastic piece holes match up and screw them in place with the Philips head screw driver.
- Connect each piece to the whammy bar.
- The metal piece will connect on the side with plastic pieces 3 and 4. Plastic piece 1 will be on the other side.
- Make sure each part slides in place correctly.
- Finally, slide the whammy bar back into place.