Tightening of a loose microphone
ID: 191772
Description: This tutorial aims to fix a known problem on...
Steps:
- Remove the left speaker cushion (it has the L letter inside) by gently pulling on its sides.
- With a T6 Torx screwdriver, unscrew the four screws holding the left speaker (that's also the part that holds the cusion in place).
- Put the left speaker on the side. It's not useful to disconnect it because the wire length is sufficient.
- With a PH00 screwdriver, unscrew the four screws holding the two cover mounts (black). Before doing this, it's better to note how were those screws tightened in order to tighten them the same way when re-assembling the headset.
- Remote the cover and put it on the side with the speaker.
- With a PH00 screwdriver, unscrew the two screws holding the 3.5 mm jack port in place.
- Remove the connector from its place by gently prying under the back of the connector (the side where the wires are soldered) with a plastic prying tool or your fingers. Do not touch the wires because they are very fragile.
- If this doesn't work, don't hesitate to push on the front of the connector (the side where the 3.5 mm jack cable plugs in) with any kind of tool.
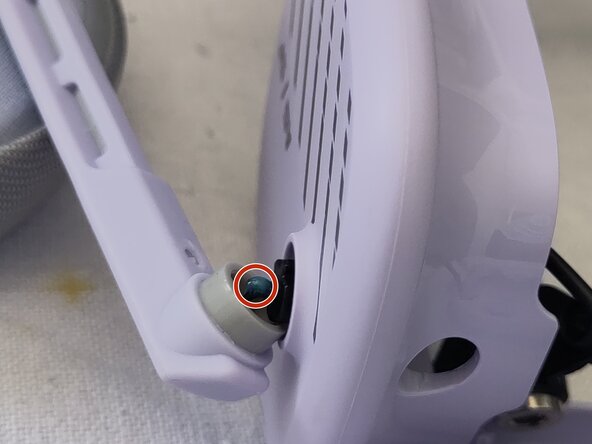
- (Optional) Very carefully remove the microphone from its location (very short and fragile wire) and add a drop of threadlocker to the screw to prevent it from unscrewing in the future.
- Put the microphone back in its slot, and, using a PH00 screwdriver, tighten the screw holding the microphone in place.
- Repeat these steps in reverse order to reassemble the helmet.
- Be careful not to over-tighten the two black cover mounts removed in step 3, or the left ear of the helmet will become very stiff and uncomfortable. To tighten it correctly, rotate both ears of the helmet to see if they behave in the same way, and adjust the tightening.