Samsung Gear S3 Classic Battery Replacement
ID: 192556
Description: Hello, in this guide I will be showing you how...
Steps:
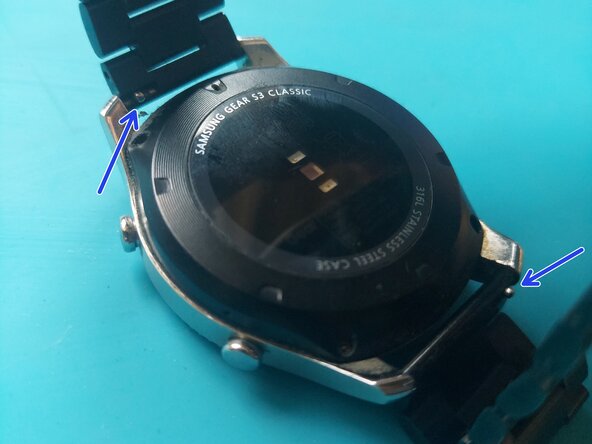
- Pull back the locking tabs to release the bracelet so it`s out of the way.
- Remove the four Y wing screws.
- Use a prying tool to separate the back from the watch. Go all the way around and do not pry only in one place, because you can damage the plastic back.
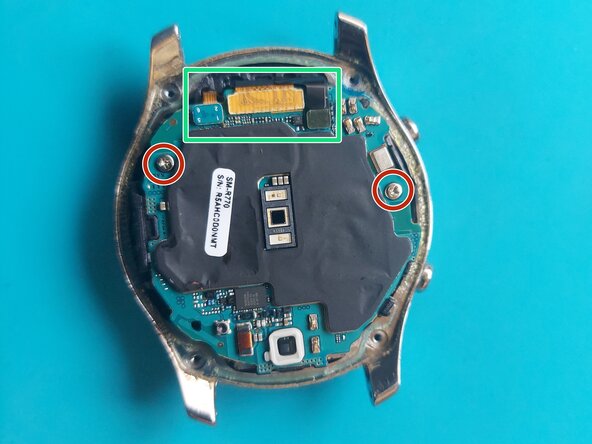
- Remove the two Phillips screws and disconnect the three connectors.
- Use a plastic prying tool to CAREFULLY lift up the motherboard. The battery is glued to it, so it can be a bit difficult. Have patience, this step is crucual!
- Use a prying tool to lift up the battery connector. It is glued to the surface, but should come out easily.
- Be very careful with the button flex cable. It cannot be removed so you will have to work around it.
- Use a plastic prying tool to separate the battery from the motherboard. A bit of IPA can help here.
- Cut some double-sided adhesive strips and lay them on the back of the motherboard.
- Put a small piece of adhesive on the plastic that holds the battery connector.
- Carefully slot the battery and the battery connector in the casing.
- I suggest putting the battery connector first and then the rest of the battery, starting from the left-top corner. Be careful not the puncture the battery.