Gateway KAV60 LT2016U Webcam Replacement
ID: 19302
Description: Once you've opened up the netbook to reach the...
Steps:
- Unlock the tab located in the top left corner of the netbook.
- The red tab indicated that the battery has been properly unlocked.
- Remove the battery.
- When working with electronics, it is always wise to remove the power source before taking the device apart.
- Make sure the RAM, hard drive, and WiFi card have been removed from the computer before trying to take off the cover so they are not damaged in the process.
- Remove six (6) 5mm screws, two (2) 17.5mm screws, and three (3) 2.5mm screws from the back, using the Phillips #0 screwdriver, as marked here.
- Pry up the keyboard using a spudger or plastic opening tool in the exact location shown in the photograph.
- Don't use a screwdriver as a pry tool as shown in this example.
- Carefully disconnect the keyboard ribbon cable from the motherboard, and remove the keyboard.
- Remove the five (5) 5mm screws shown here using the Phillips #0 screwdriver.
- Separate the upper cover from the back cover. It is possible to do this without a tool, but you may also use a plastic opening tool for added leverage.
- Be careful to keep even pressure all the way around the cover so that it is not bent beyond repair.
- Carefully disconnect two ribbon cables to complete the separation of the upper cover.
- Pry the border around the monitor off of the top cover using a plastic opening tool, as shown.
- Be careful not to damage the computer screen in the process
- Separate the monitor from the border cover once all snap connections have been pried apart.
- Remove the six (6) 5mm screws shown here using the Phillips #0 screwdriver.
- Take the screen out of the top cover.
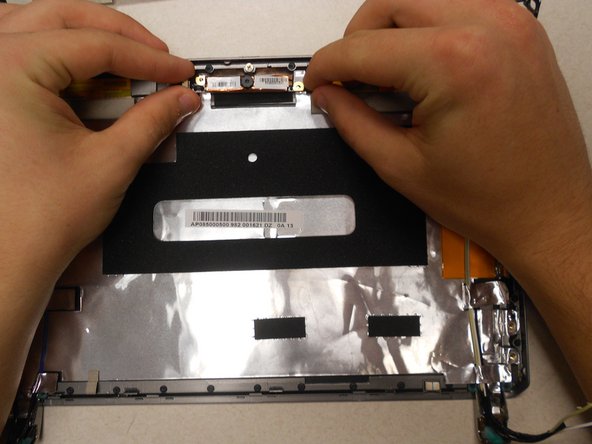
- The webcam is located here, as shown.
- Disconnect the webcam from the wires attaching it to the computer.
- Lift the webcam away from the top cover.