Lenovo ThinkPad P51s Speakers Replacement
ID: 199177
Description: The Lenovo ThinkPad P51s uses a pair of...
Steps:
- Flip the laptop so the bottom is facing up.
- Place it on a soft cloth so you don’t scratch the lid.
- Slide both locking latches outward using your thumbs.
- Keep the right latch held in the unlocked position with your right thumb.
- With your left hand, push the battery out from its slot.
- Once it detaches, use both hands to slide the battery out.
- Use a Phillips #00 screwdriver to loosen all seven captive screws that secure the lower case.
- Captive screws should not be removed.
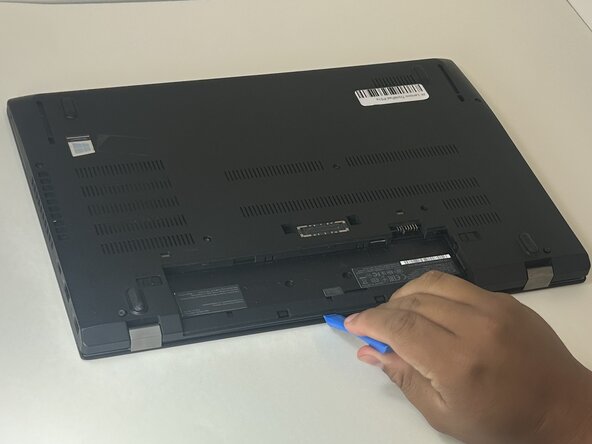
- Insert an opening tool into the gap along one edge of the laptop.
- Slide the tool along the perimeter to release the retaining clips.
- Work slowly and apply even pressure
- Lift the back cover off the laptop.
- Metal tools can crack the plastic clips—use only plastic prying tools.
- Find the internal battery pack. It’s the large, flat rectangle labeled with voltage/capacity.
- Use both thumbs to walk the battery cable straight out of the socket on the motherboard.
- Don’t pull on the wires.
- Use a Phillips #0 screwdriver to remove the five 3 mm screws securing the internal battery to the motherboard.
- Lift the battery out of the device.
- Identify the two internal speakers at the front edge of the laptop, one on each side of the chassis.
- The speakers are connected by a small cable running across the front of the system.
- Gently pull the speaker cable connector straight out from the motherboard socket.
- If the speaker cable connector doesn't slide out easily, use the point of a spudger to push on alternating sides of the connector to "walk" it out of its socket.
- Do not pull on the wires.
- Lift the speaker cable out of any retaining clips or guides along the chassis.
- Note the cable routing so you can place it back correctly during reassembly.
- Use a Phillips #00 screwdriver to remove the single 3 mm screw from each speaker.
- Lift each speaker straight up and out of its slot.
- Pull the speaker cable out of the wire guide along the edge of the laptop.
- Keep track of the speaker screws — they are small and easy to lose.