Lenovo ThinkPad E14 Gen 2 Motherboard Replacement
ID: 199224
Description: If your Lenovo ThinkPad E14 Gen 2 fails to...
Steps:
- Unscrew the seven 8 mm captive screws from the back of your device with a Phillips #0 screwdriver.
- Use the Jimmy tool to pry off the back of the device.
- Use precision tweezers or your fingers to gently unplug the battery connector directly out of the motherboard socket.
- Remove the five 6 mm screws that hold the battery in place with the JIS #0 screwdriver.
- Gently use your fingers to lift the battery up and out.
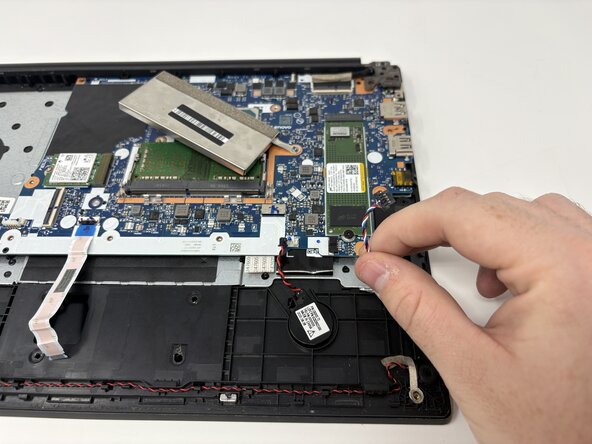
- Using the precision tweezers, gently disconnect the thermal sensor wire (the thin grey and black wires) from the Wi-Fi card.
- Using the precision tweezers, gently disconnect the motherboard wire (the thick black wire wrapped in thermal tape).
- Using the precision tweezers, gently disconnect the fan power cable (the bundle of thin wires) from the motherboard.
- Move all of the disconnected wires (thermal sensor wire, motherboard wire, fan power cable) out of the way.
- Remove the three 7 mm screws with the JIS #00 screwdriver.
- Remove the cooling fan from your device.
- Remove the four 7 mm screws with the JIS #000 screwdriver
- Carefully remove the heat sink from the device.
- Remove the three 7 mm screws with the JIS #000 screwdriver.
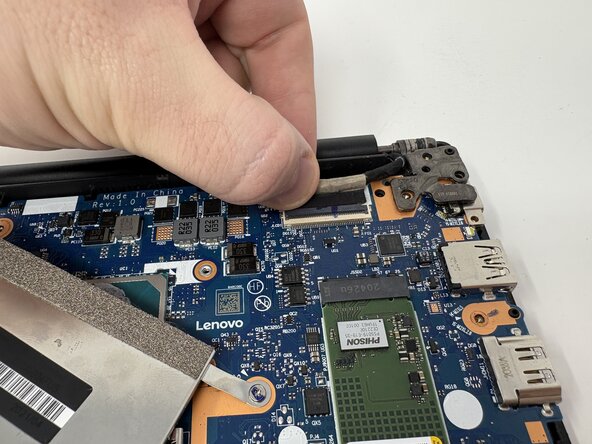
- Use your fingers to unplug the low-voltage power wire (red and black wire).
- Use your fingers to gently unplug the control wire trio (red, white, and blue wire).
- Use your fingers to gently unplug the display cable (black wired plug).
- Remove the 3 mm screw from the shielding cover with the JIS #000 screwdriver.
- Lift up the motherboard.
- Use your fingers to gently unplug the flat ribbon cable (white cable) from the back of the motherboard.
- Use your fingers to gently unplug the shielded ribbon cable (black cable) from the back of the motherboard.
- Remove the motherboard.