Nissan Altima 2015 Brake Light Bulb Replacement
ID: 199282
Description: This guide shows how to replace the brake light...
Steps:
- Open the trunk and locate the rear brake light housing on the side where the bulb is burnt out.
- The brake light assembly is usually held in place by a few screws or clips that you’ll remove in the next step.
- Use a trim remover tool to remove the interior trunk panel clips that cover the back of the taillight assembly.
- Be gentle when prying up the clips—plastic trim pieces can crack if too much force is used.
- Set the clips aside to use for reassembly.
- Carefully peel back the trunk lining from the area you will be working.
- Use an 8 mm wrench to remove the screws (or unclip the fasteners) securing the brake light housing.
- Keep the screws or clips in a small container so they don’t get lost.
- Carefully pull the entire tail light housing straight back from the car.
- Wiggle it slightly if it feels stuck.
- It should pop free without excessive force.
- Don’t pull too far—wiring for the bulb sockets is still connected.
- Twist the bulb socket counterclockwise to unlock it.
- Pull it out of the housing.
- It may take a gentle turn to release—don’t force it.
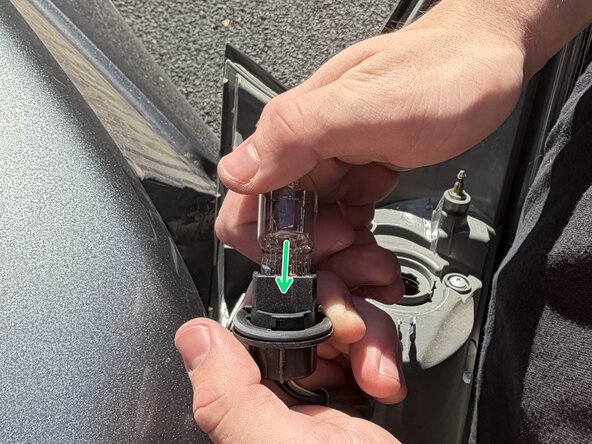
- Pull the old bulb straight out of the socket.
- Insert a new 7443 dual-filament bulb firmly into the socket until it clicks into place.
- Avoid touching the glass of the bulb, as oils and salts from your hands can create hot spots and cause it to burn out more quickly.
- Reinsert the bulb socket into the housing and twist clockwise to lock it.
- Align the tail light housing with the car body and push it back into place.
- Secure it with the screws or clips you removed earlier.
- Double-check that all clips are firmly seated and the housing sits flush with the car body.
- Start the car or turn the ignition key to “On.”
- Press the brake pedal (or ask someone to help) and check that the new light illuminates properly.
- If the light doesn’t work, make sure the bulb is seated correctly and the socket is fully connected.