LG V40 ThinQ Power/Volume Buttons Replacement
ID: 199617
Description: If your LG V40 ThinQ’s power or volume buttons...
Steps:
- Use an iOpener or hairdryer to heat the adhesive on the back cover by rolling it up and down the back of the phone.
- You will know when the back is hot enough when an Opening pick is able to slide under the back cover.
- Use opening to pry the back cover away from the adhesive.
- This can take some time. Be patient and go slowly.
- We recommend you move slowly and carefully to not crack the back glass.
- Carefully disconnect the fingerprint sensor from the back camera lens cover.
- Use the opening picks again to gently remove the back camera lens cover and fingerprint sensor off from the back cover.
- Set the fingerprint sensor and camera cover aside. You will need the fingerprint sensor to put into any new back cover bought for the phone.
- Clean the back cover of any old adhesive by gently heating the area with the iOpener to soften the adhesive.
- Use a cloth or cotton swab soaked in isopropyl alcohol to gently rub and dissolve the glue.
- Apply new adhesive on the back cover in the places where the old adhesive was applied.
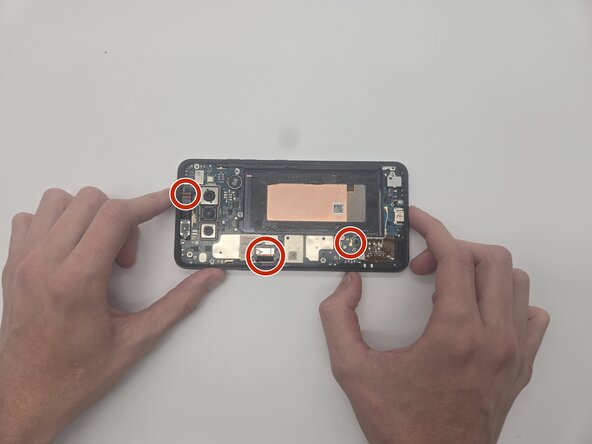
- Remove the fourteen 15 mm-long Phillips #000 screws holding down the wireless charging coil and loudspeaker module.
- Disconnect the battery press connector.
- With the opening picks, very gently insert and pry the battery slowly until it comes free from the adhesive and remove it.
- This can take some time to safely remove the battery without damaging it. Be careful not to rip the battery from the adhesive holding it down.
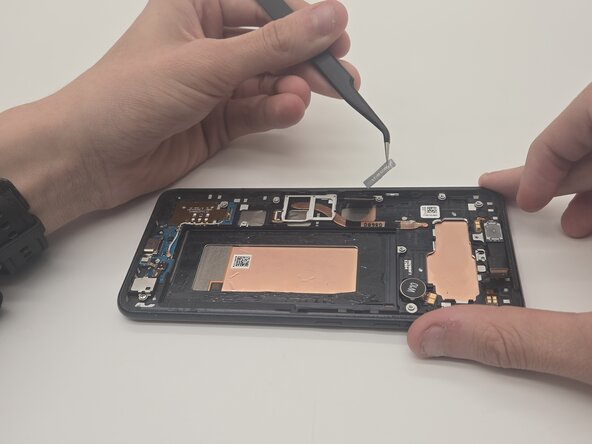
- Use opening picks to detach the motherboard cables.
- Remove the motherboard.
- Disconnect both flex cables from the button sensors to avoid scratching and damaging them while prying with the Jimmy tool.
- Using the Jimmy, gently remove the power and volume buttons.
- The Jimmy can be very sharp. It can slip and you can cut your self.
- Remove the tape covering the power button.
- Using the Angled ESD precision Tweezers, remove the power button.
- Remove the tape covering the volume buttons.
- Using the Angled ESD precision Tweezers, remove the volume buttons.