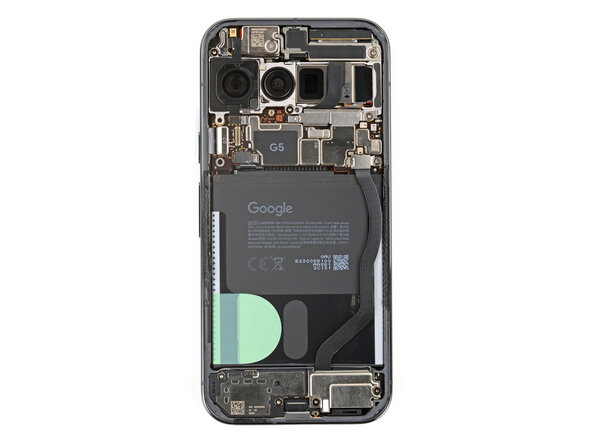
Google Pixel 10 Pro 5G mmWave Antenna Replacement
ID: 199641
Description: This repair guide was authored by the iFixit...
Steps:
- Let your Pixel's battery drain below 25% before starting this repair. A charged lithium‑ion battery may catch fire if damaged.
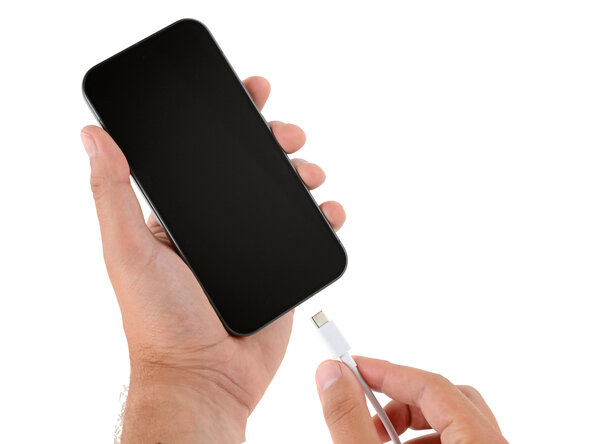
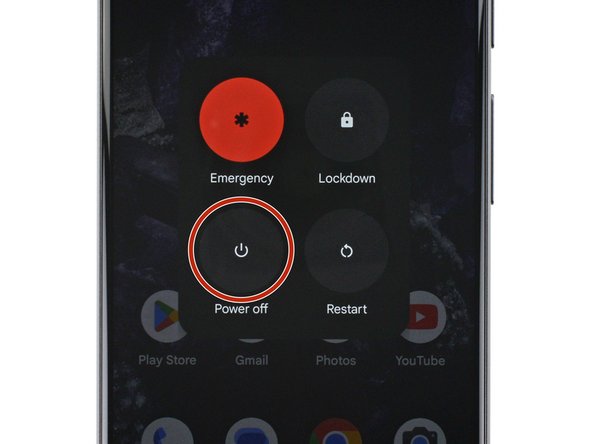
- Unplug all cables and completely power down your phone.
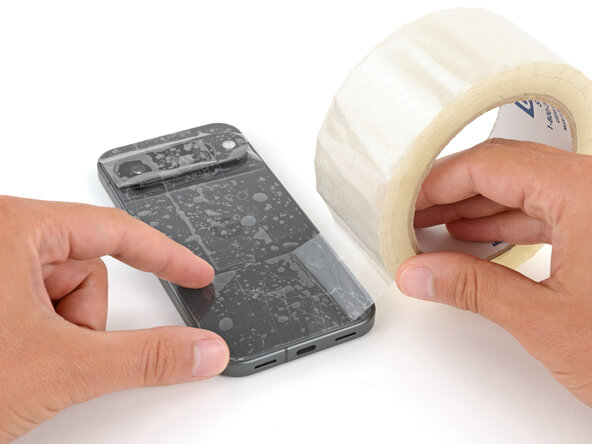
- Glass shards can complicate disassembly—or worse, cause injury. If your phone's back glass is cracked, follow this step.
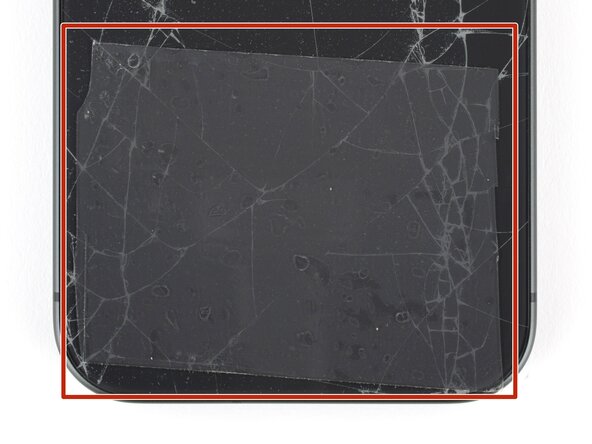
- Apply strips of packing tape to the cracked glass until it's completely covered—this will help keep the glass contained and allow the suction cup to stick.
- Make sure there's a single strip (not overlapping) of tape across the bottom edge, big enough for a suction cup to fit on.
- Only cover the glass itself—don't stick any tape to the frame.
- Consider wearing safety glasses to protect your eyes from any glass shaken free during the repair.
- Adhesive secures the back glass to the frame. Heating the glass softens the adhesive, making it easier to separate.
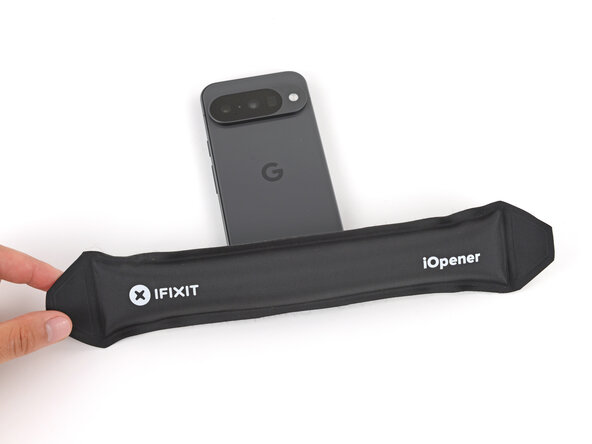
- Heat an iOpener and lay it on the bottom edge of the back glass for two minutes.
- Alternatively, you can use a hair dryer or heat gun to heat the back glass.
- Improper use of a heat gun can destroy the display and/or battery—follow the linked instructions carefully.
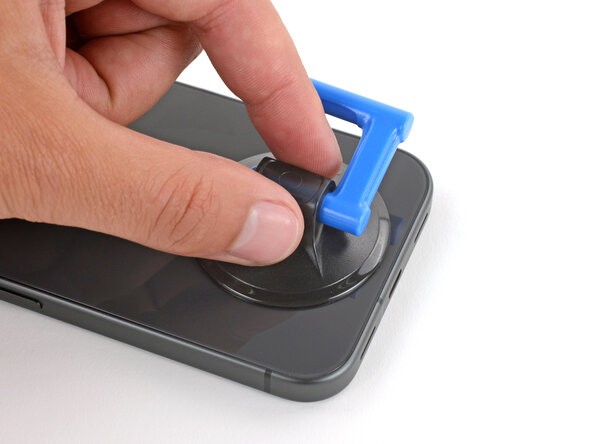
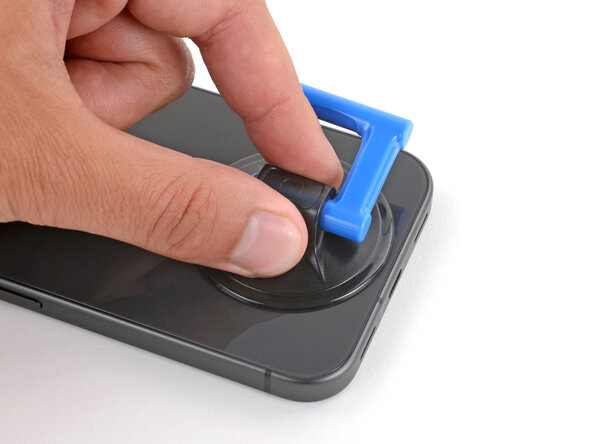
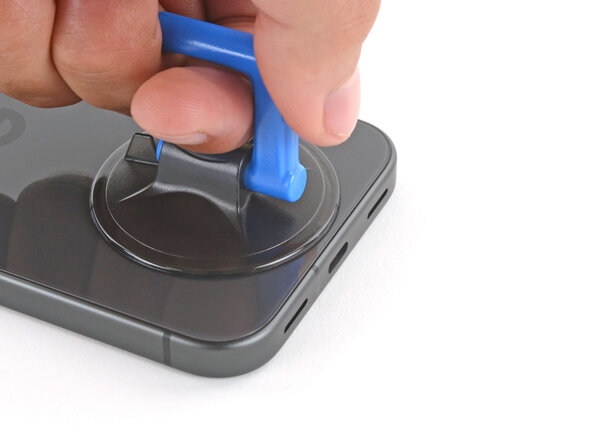
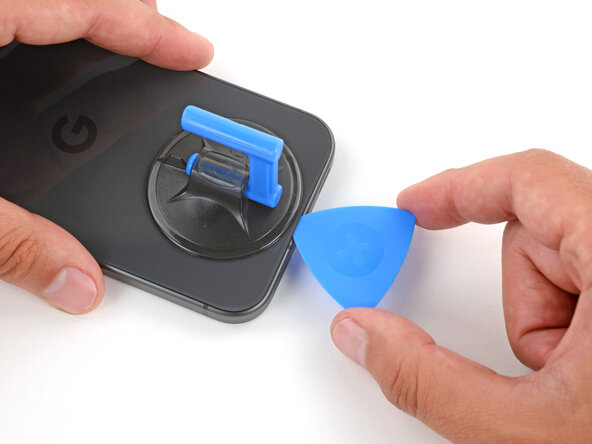
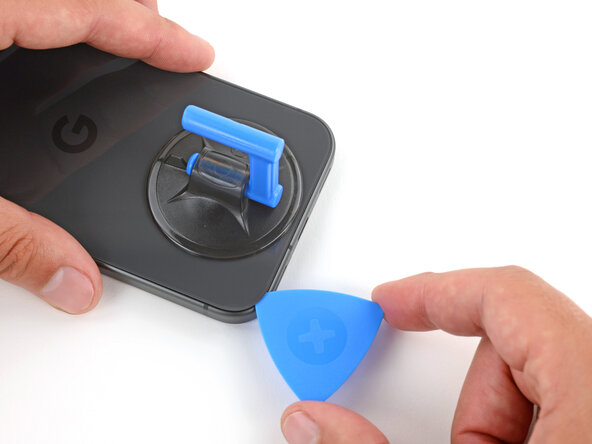
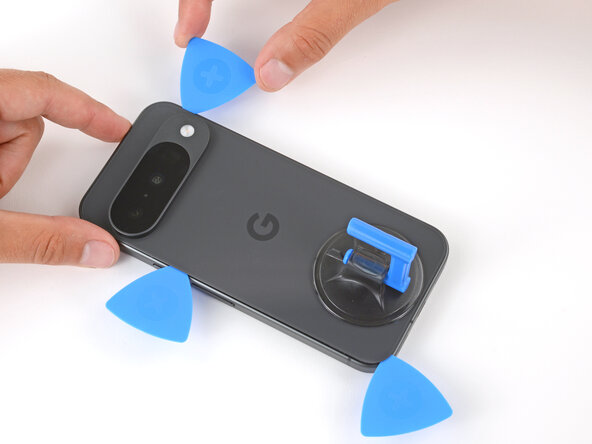
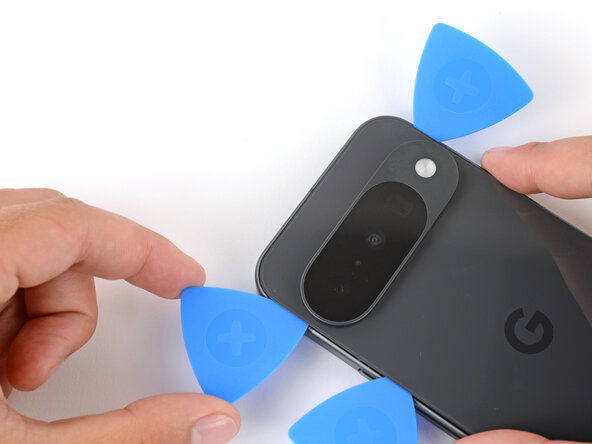
- Apply a suction handle to the center of the back glass's bottom edge, as close to the edge as possible.
- Pull up on the suction handle with strong, steady force until a gap forms between the back glass and frame.
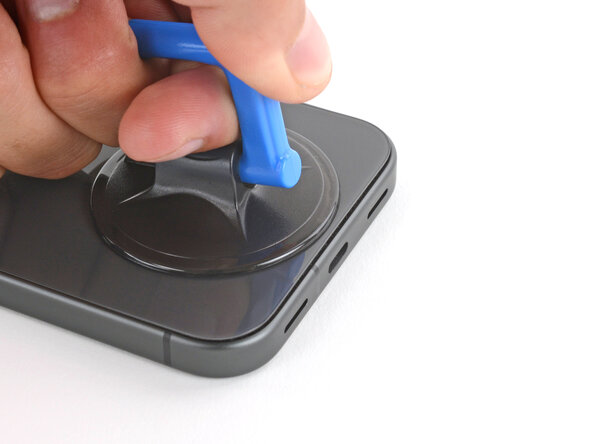
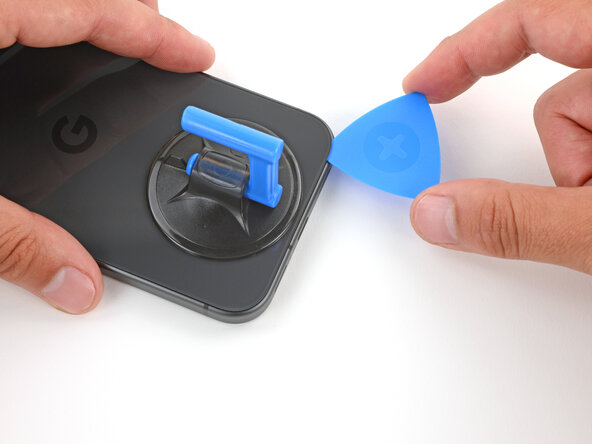
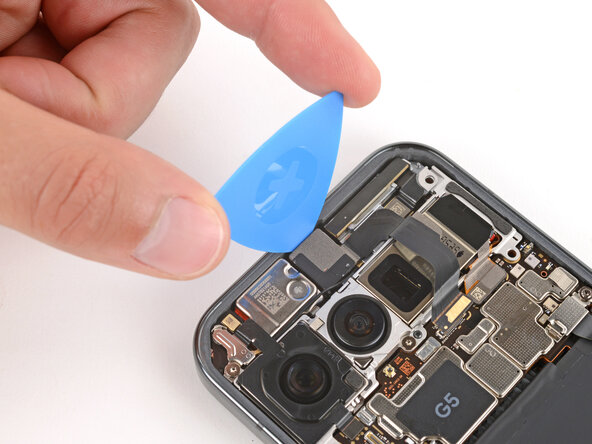
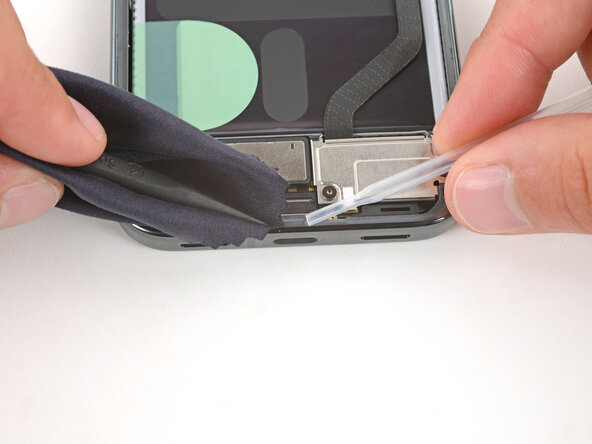
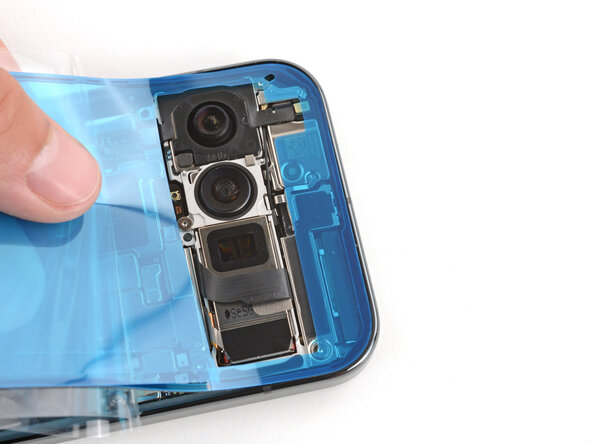
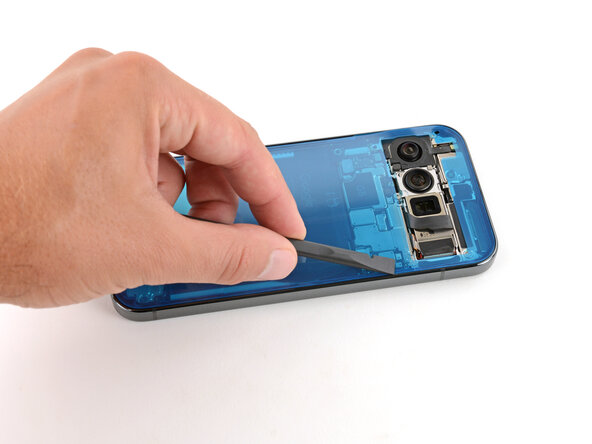
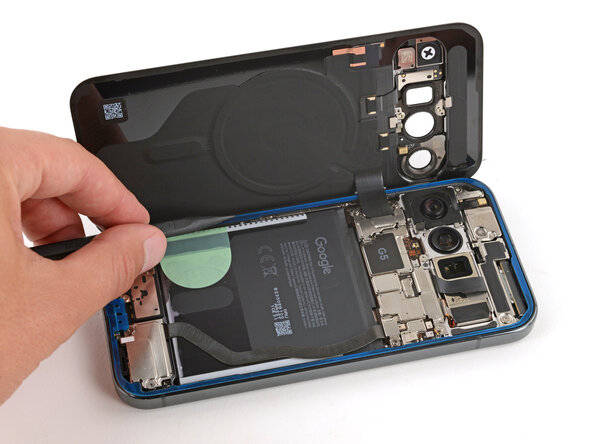
- Insert the tip of an opening pick into the gap.
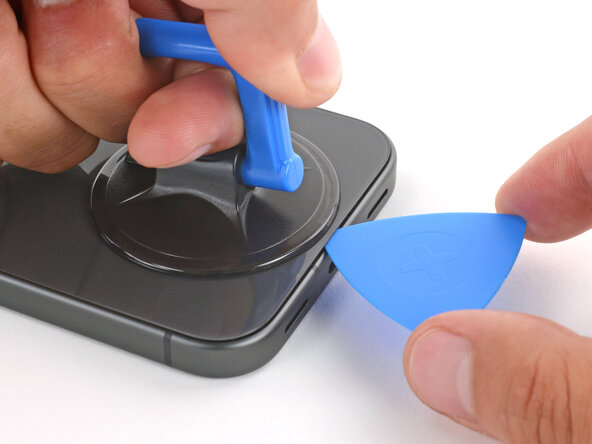
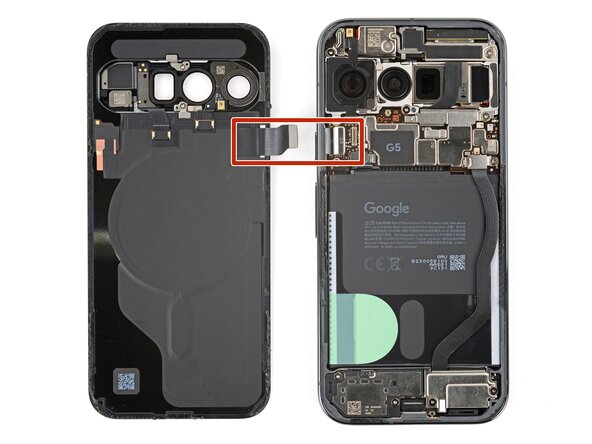
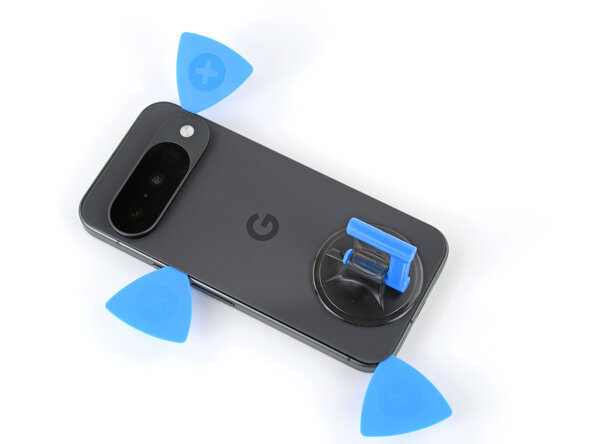
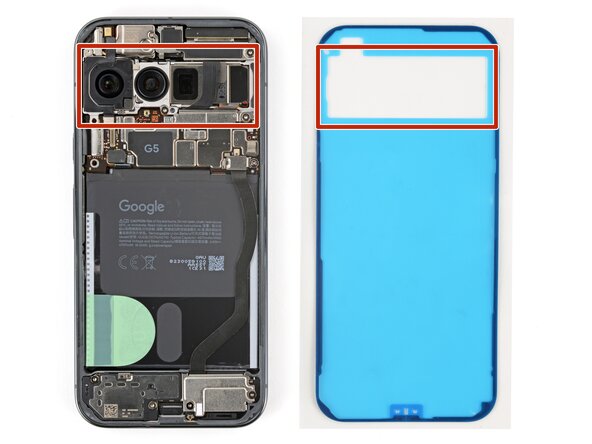
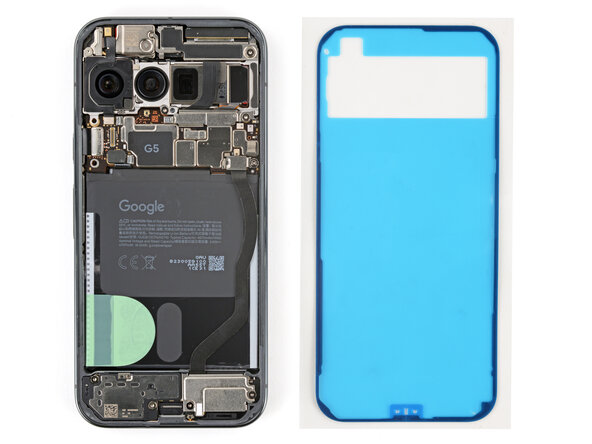
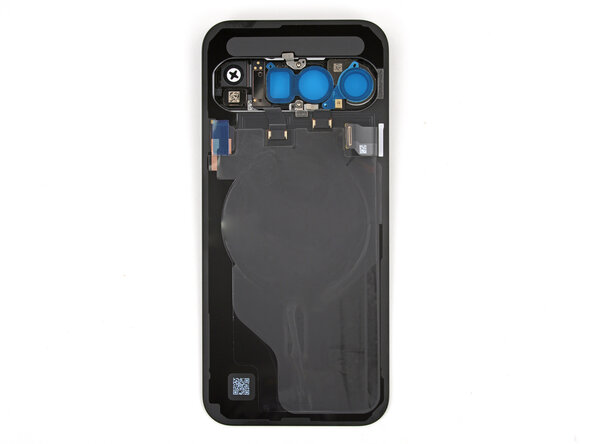
- The back glass is secured with adhesive around the perimeter of the frame. Use this picture as a reference while you separate the adhesive.
- A cable connects the back glass near the power button. Don't insert your pick here to avoid damaging the cable.
- If the back glass feels stuck at any point during the next few steps, apply heat to the area and try again.
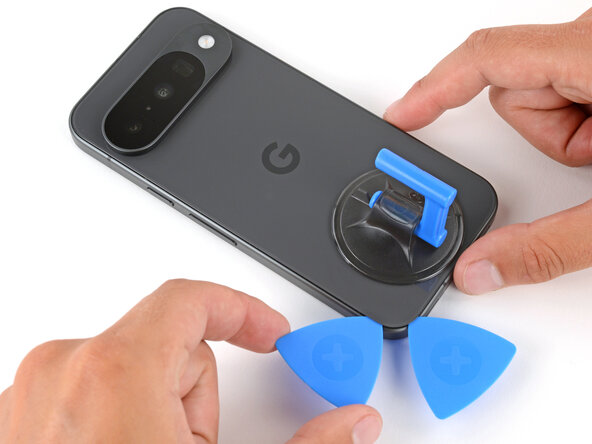
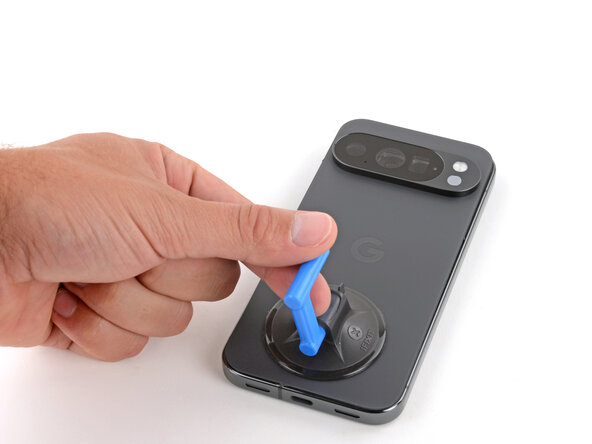
- Slide the opening pick along the bottom edge to separate the adhesive.
- Leave the pick inserted under the bottom left corner to prevent the adhesive from re‑sealing.
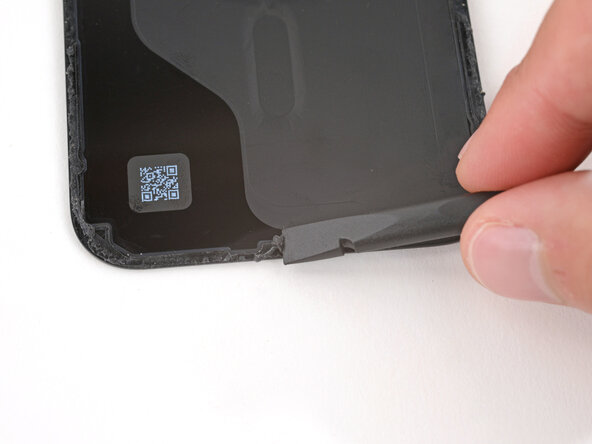
- Insert a second pick under the bottom left corner and slide it up the left edge, stopping at the power button.
- Leave the pick inserted to prevent the adhesive from re‑sealing.
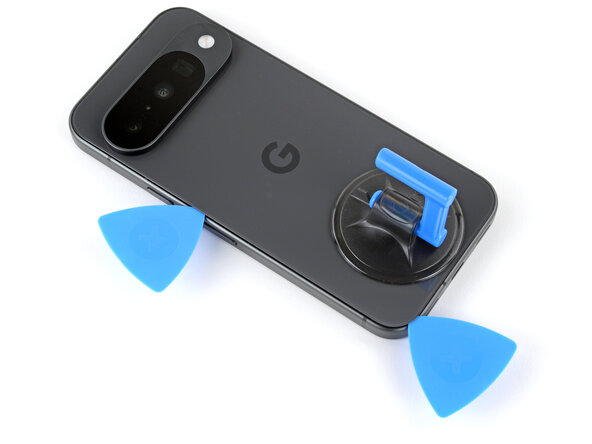
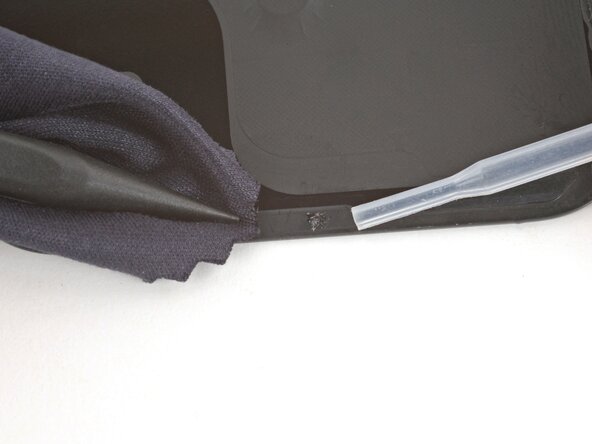
- Insert a third pick under the bottom right corner of the back glass and slide it up the right edge.
- Leave the pick inserted under the top right corner.
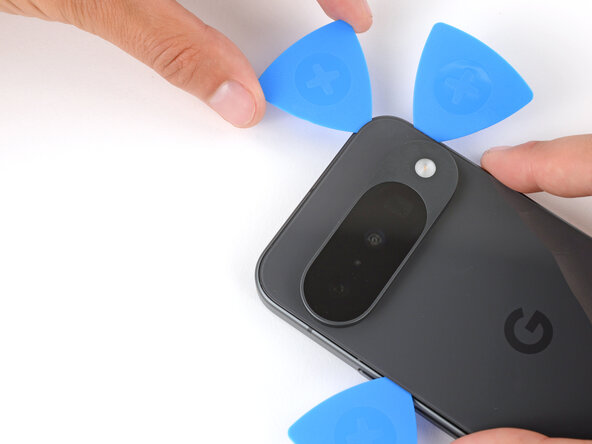
- Insert a fourth pick under the top right corner.
- Slide the pick along the top edge and slightly around the top left corner, stopping at the bottom of the camera bump.
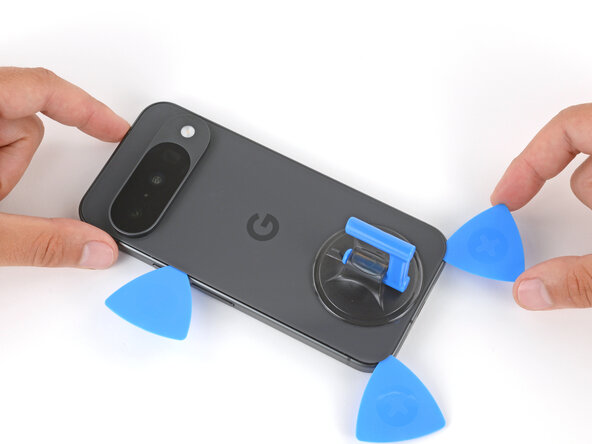
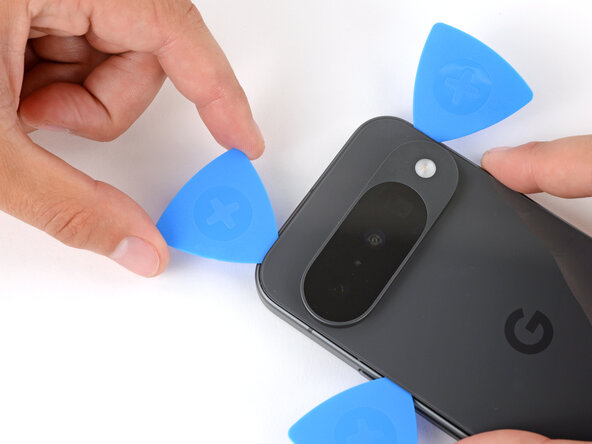
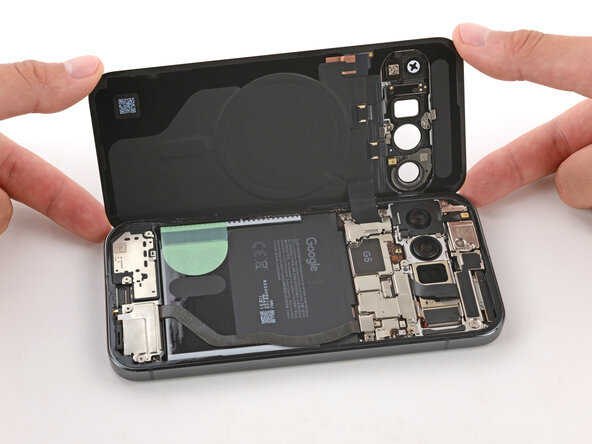
- Don't try to fully remove the back glass yet, as it's still connected by a ribbon cable.
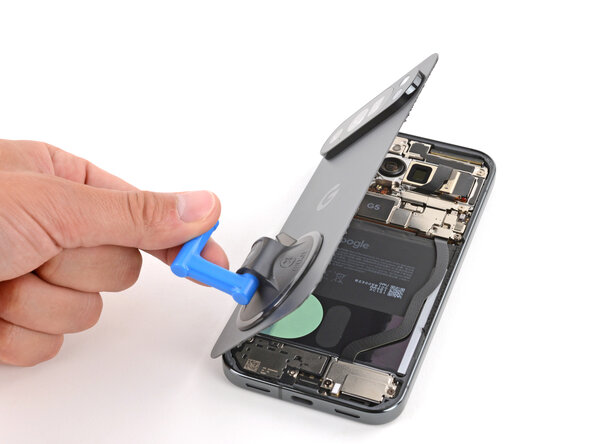
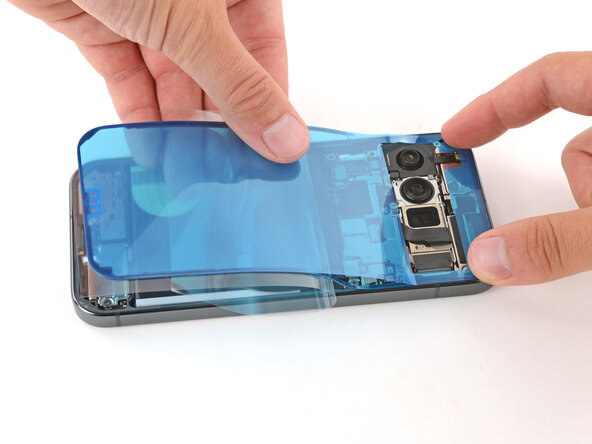
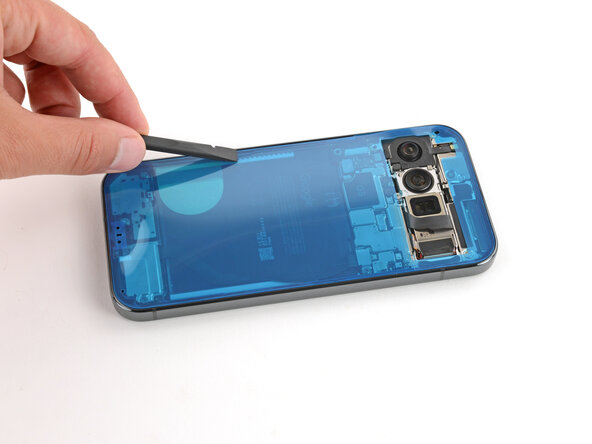
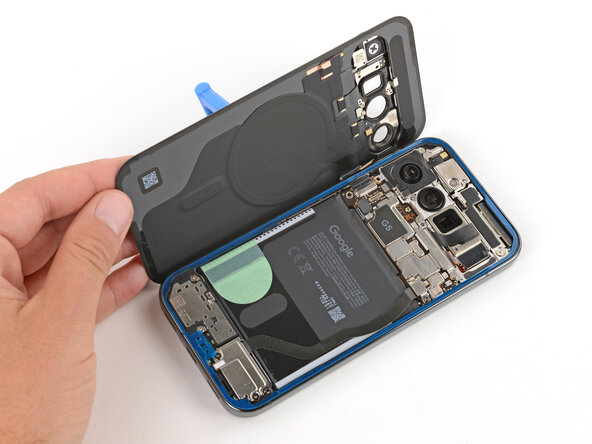
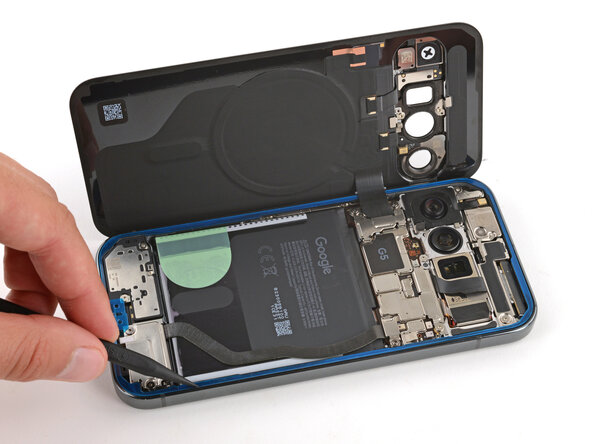
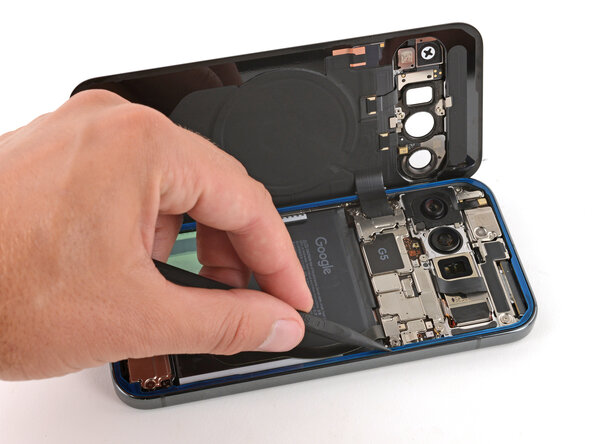
- Flip the back glass over the left side of the phone and use the suction handle (or a sturdy object) to prop it up.
- If the back glass still feels stuck, go back around the perimeter with an opening pick and separate any remaining adhesive.
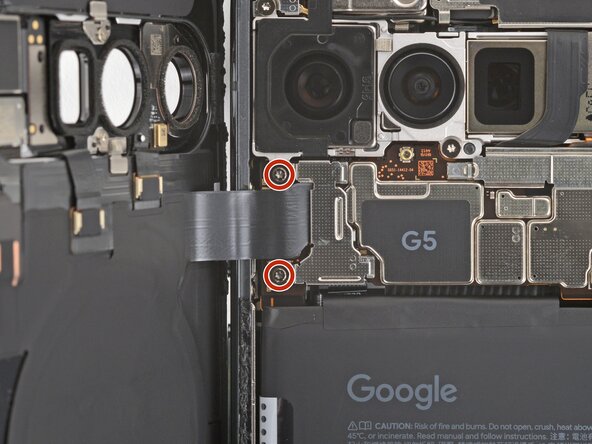
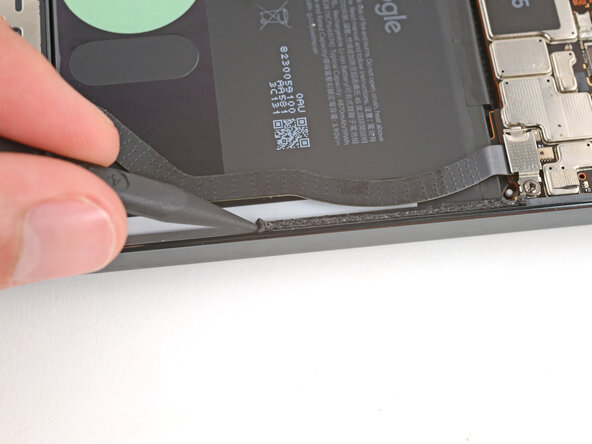
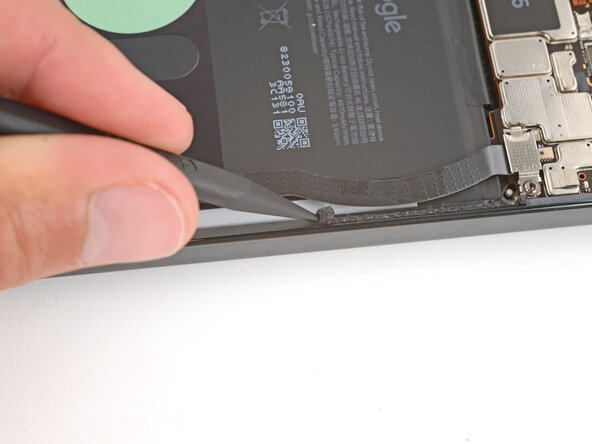
- Use a Torx Plus 3IP screwdriver to remove the two 5.8 mm‑long screws securing the back glass connector bracket.
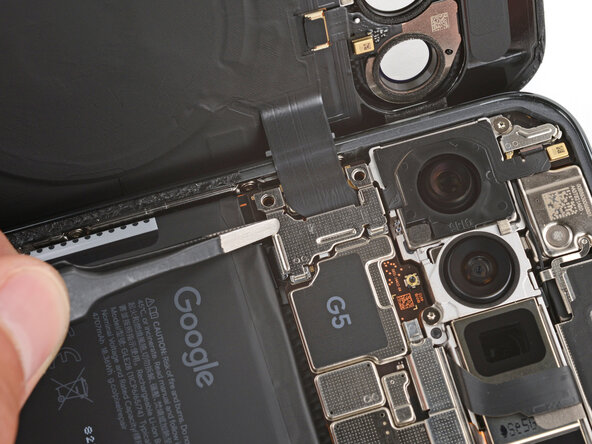
- Use tweezers to slide the cover towards the center of the phone to unhook the tabs and remove it.
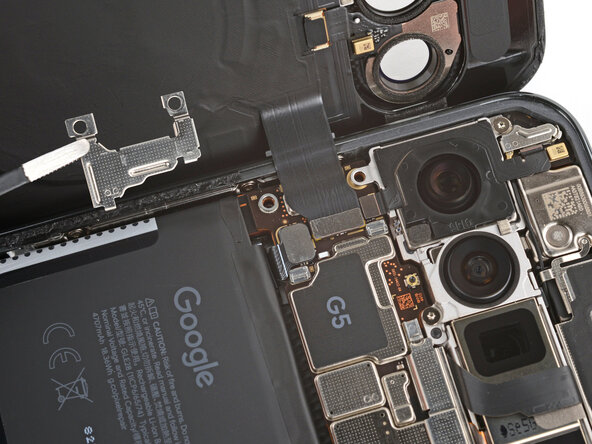
- Be careful not to damage the battery or rear cameras.
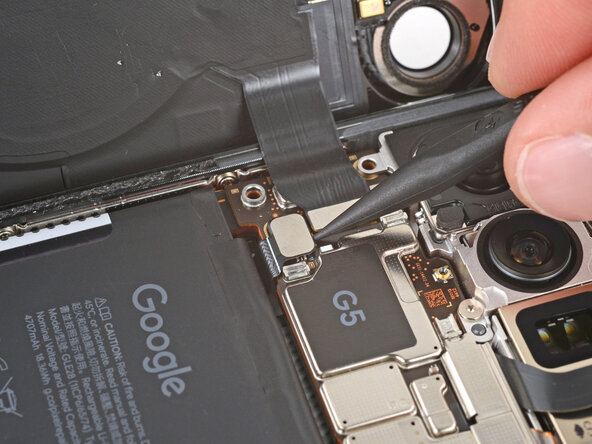
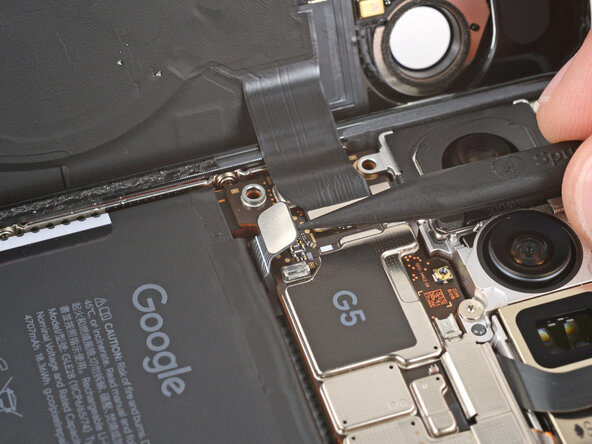
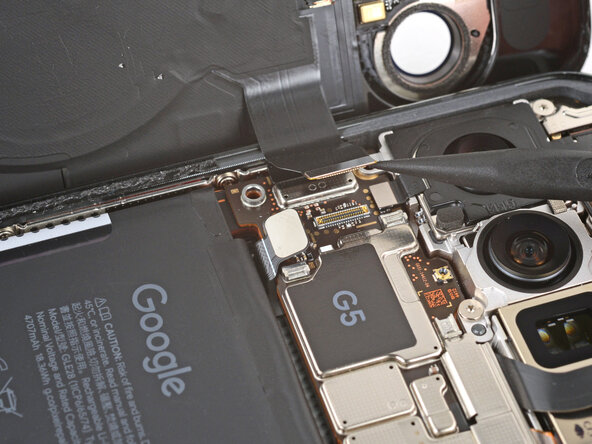
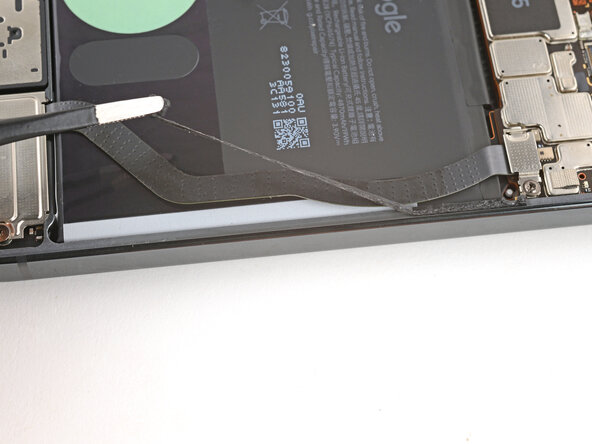
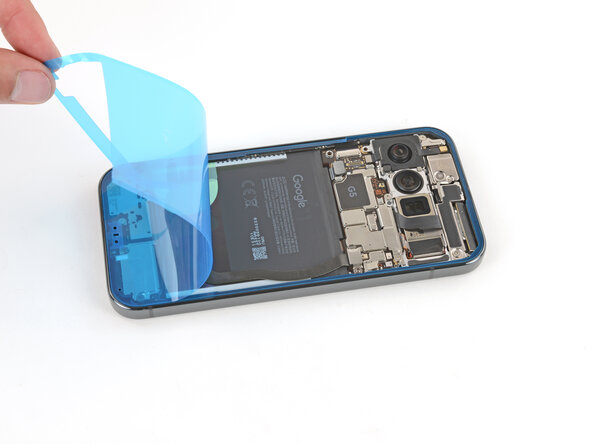
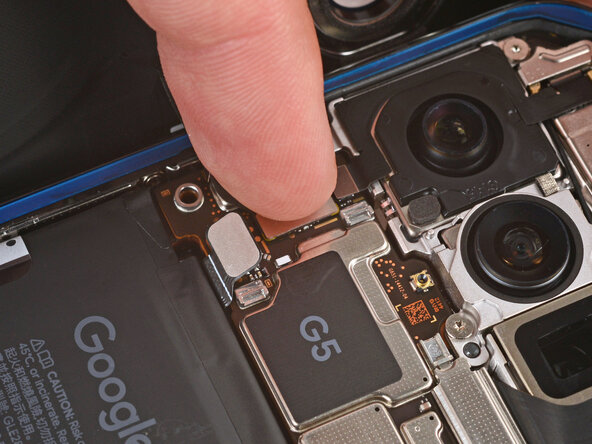
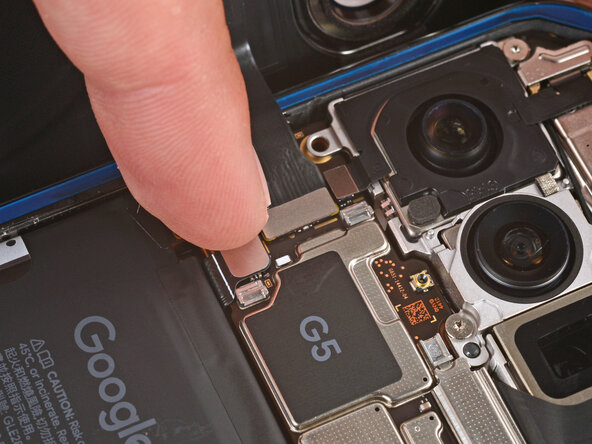
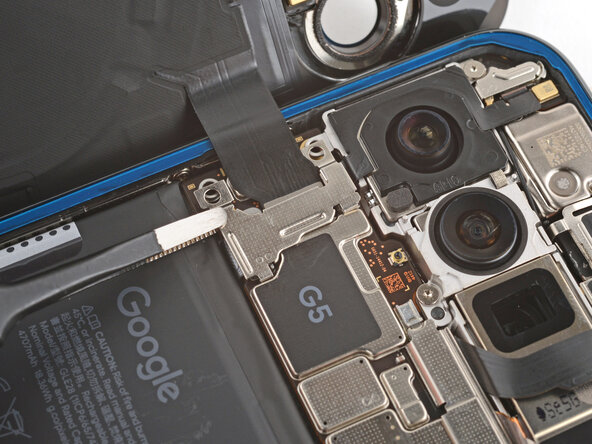
- Use the point of a spudger to pry up and disconnect the battery and back glass press connectors.
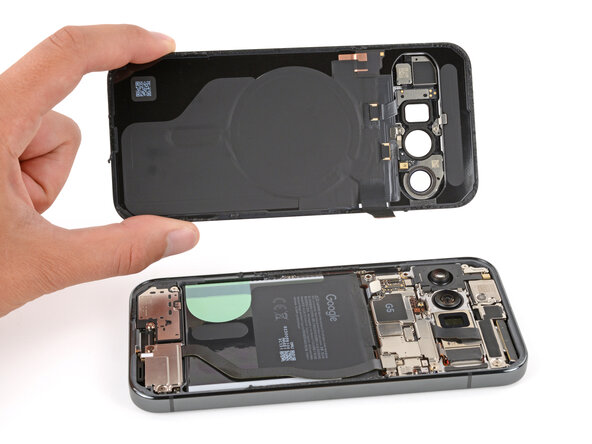
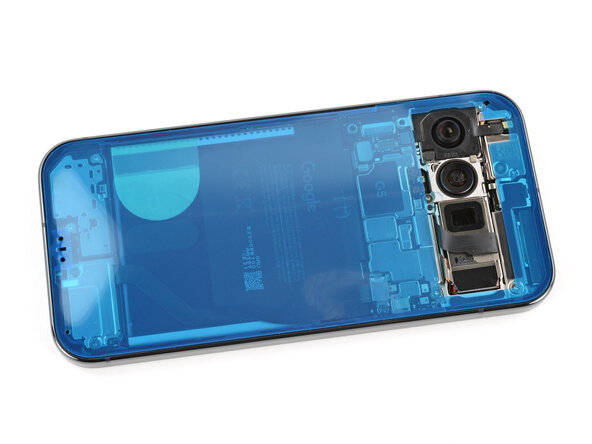
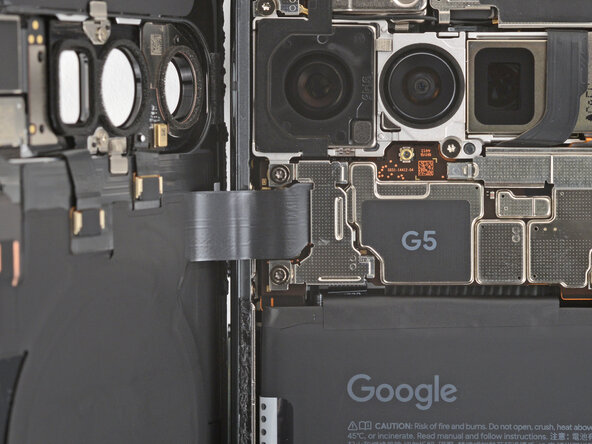
- Remove the back glass.
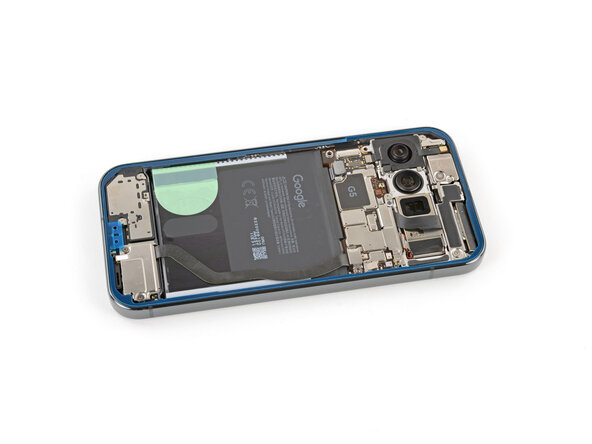
- Use a Torx Plus 3IP screwdriver to remove the 5.7 mm‑long screw securing the front camera connector cover.
- Remove the cover.
- Use a Torx Plus 3IP screwdriver to remove the 5.7 mm‑long screw securing the front camera bracket.
- Use the point of a spudger to push the front camera bracket's clip in and up to release it.
- Remove the bracket.
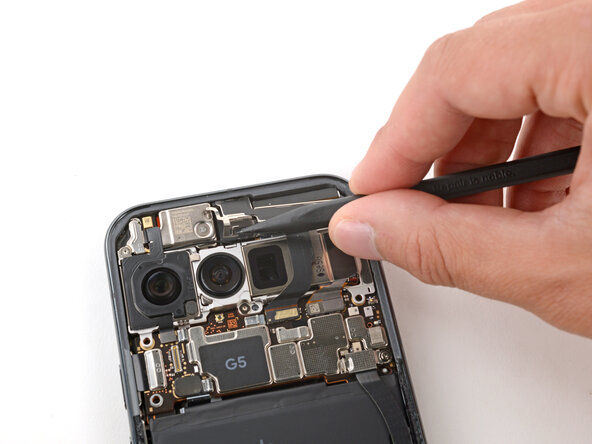
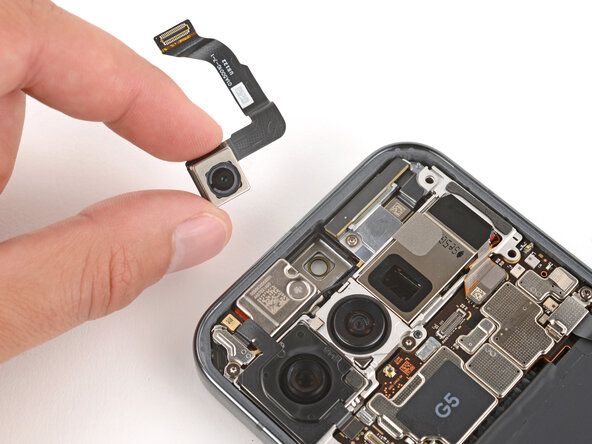
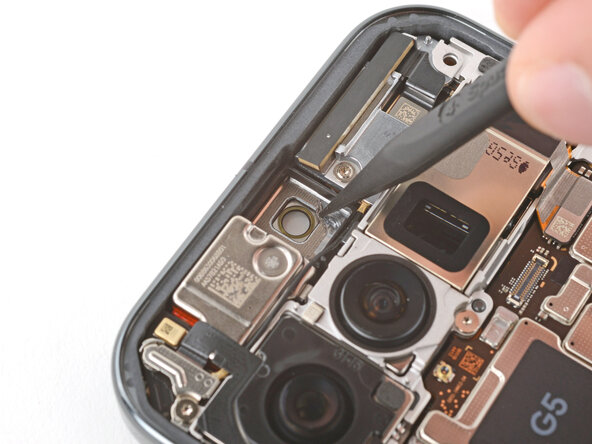
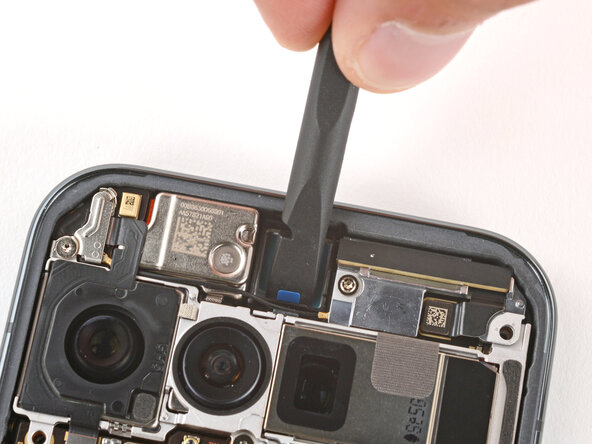
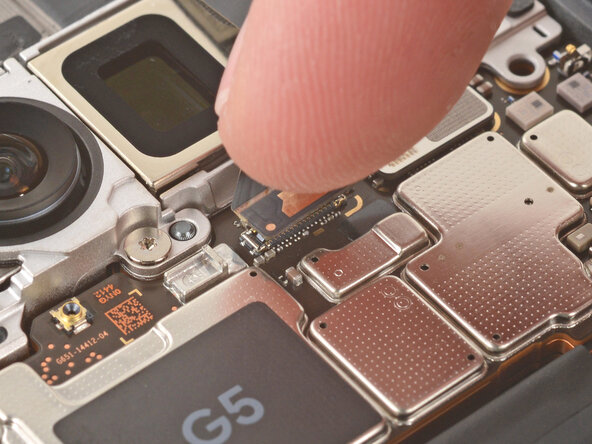
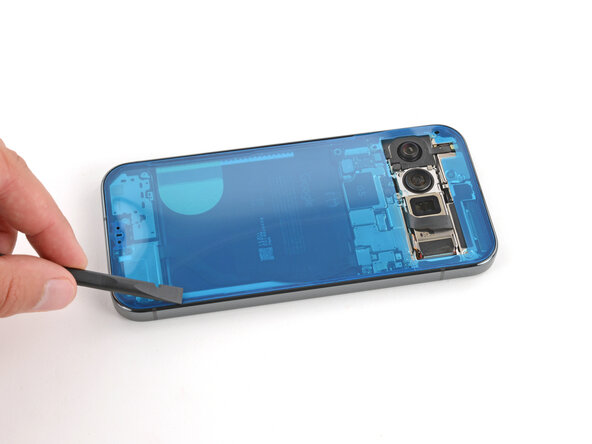
- Use a spudger to pry up and disconnect the front camera press connector.
- Adhesive secures the front camera in its recess.
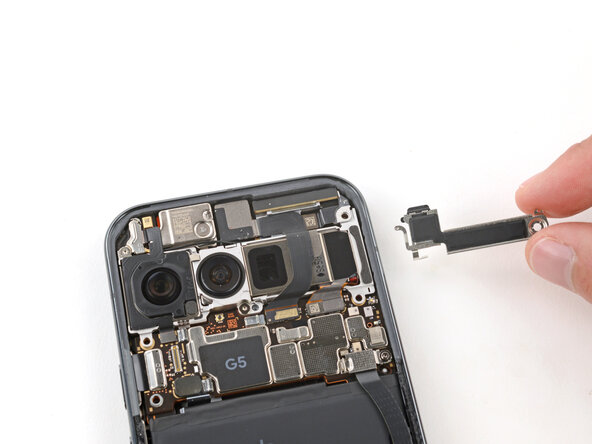
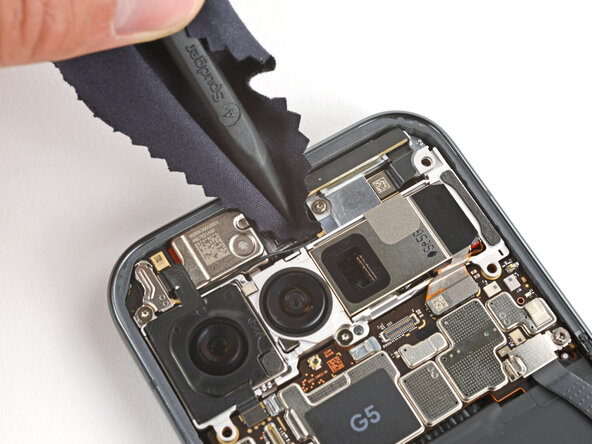
- Use the tip of an opening pick to gently pry the front camera up from the top edge and remove it.
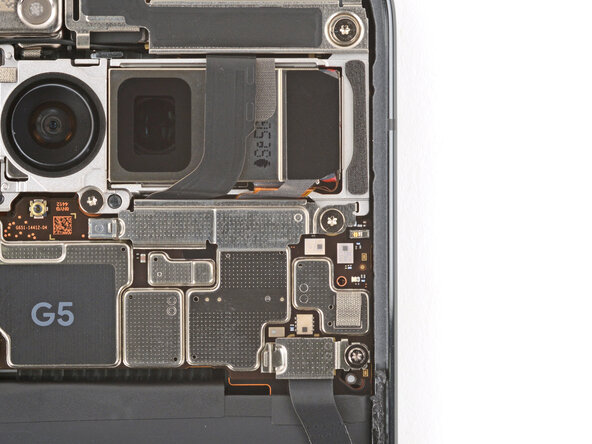
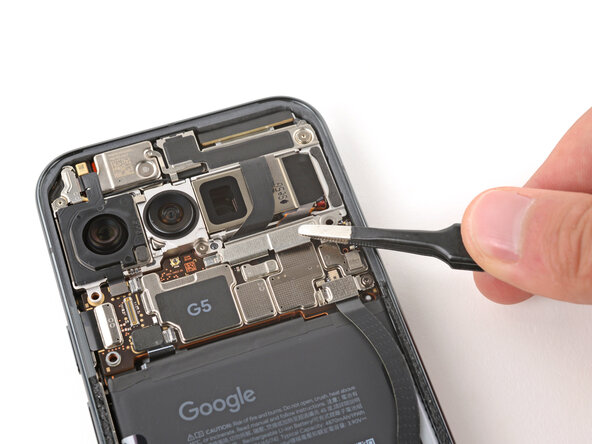
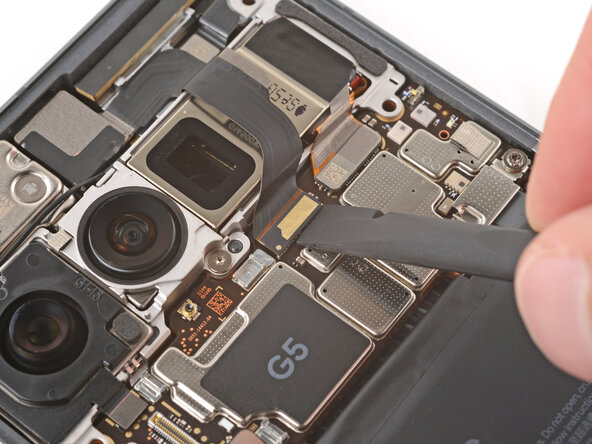
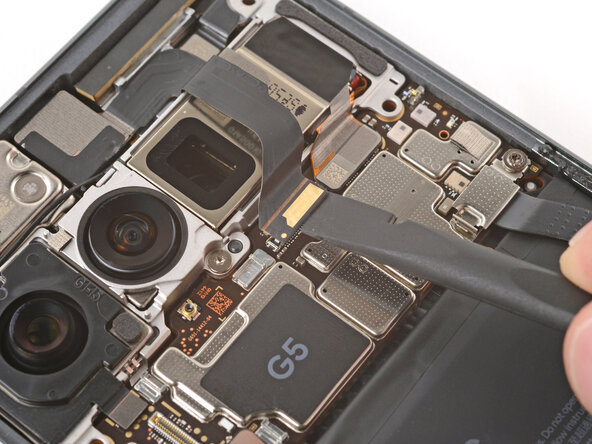
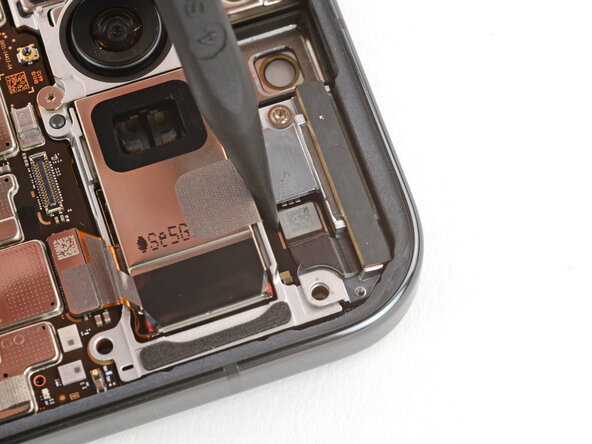
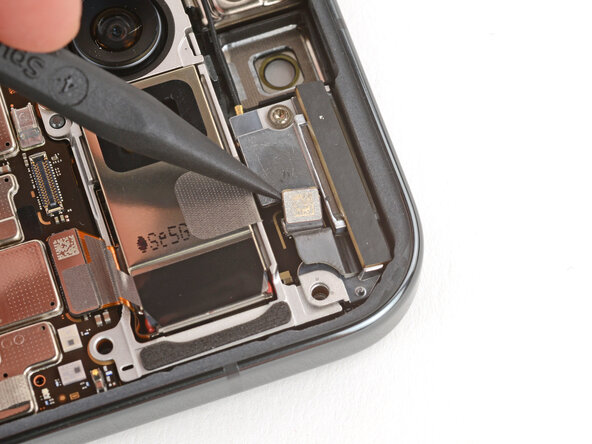
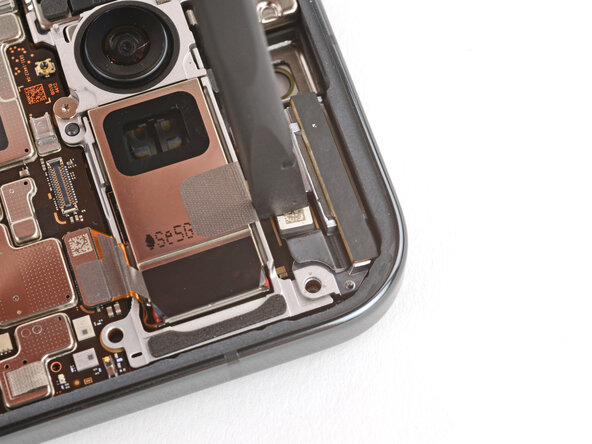
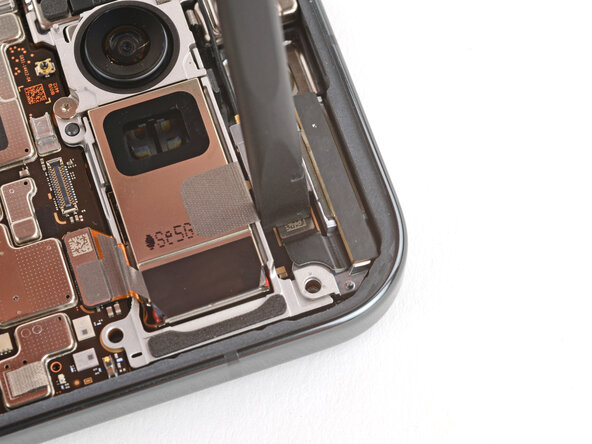
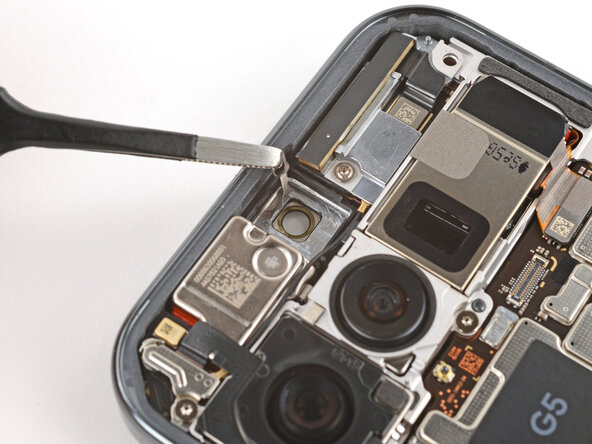
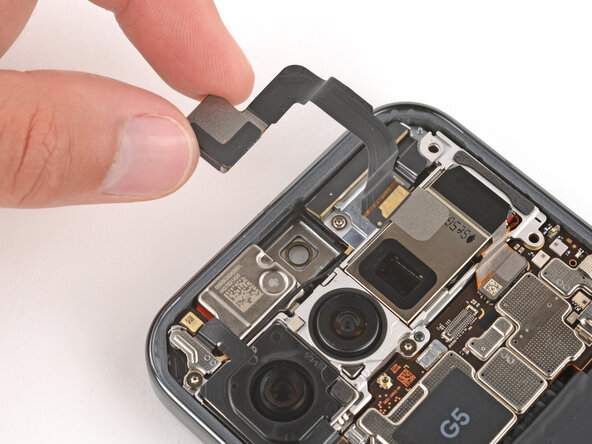
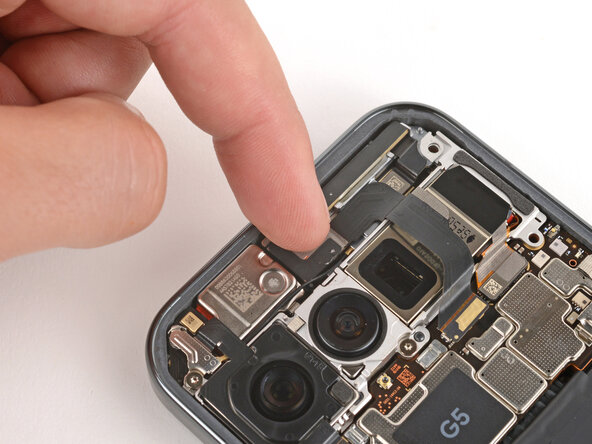
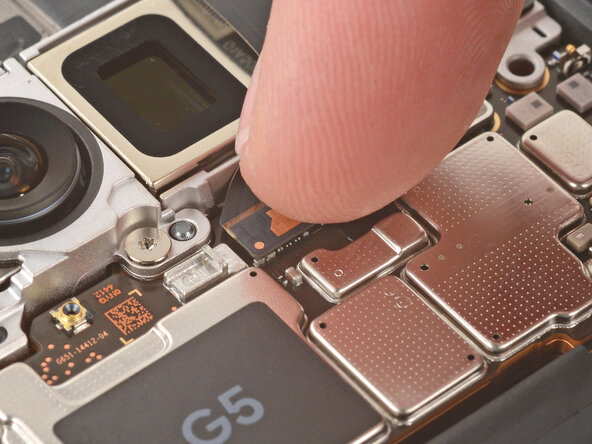
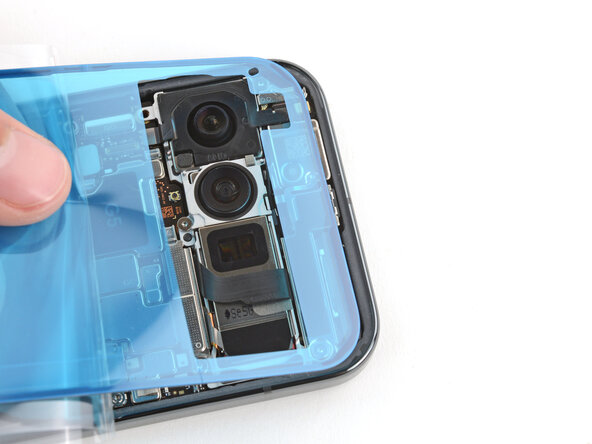
- Use the point of a spudger to pry up and disconnect the mmWave antenna press connector.
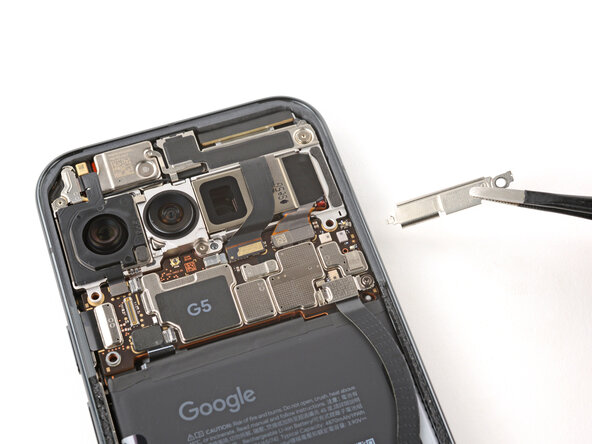
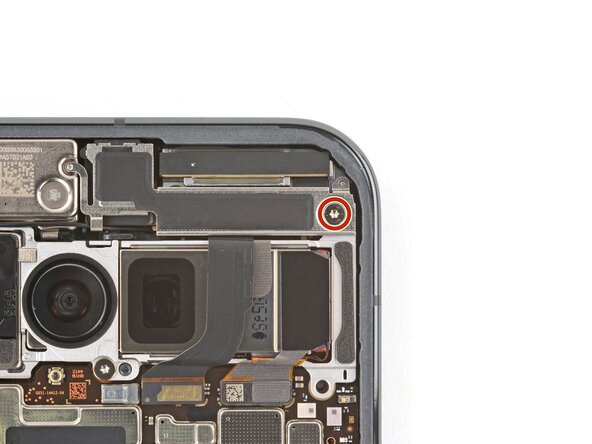
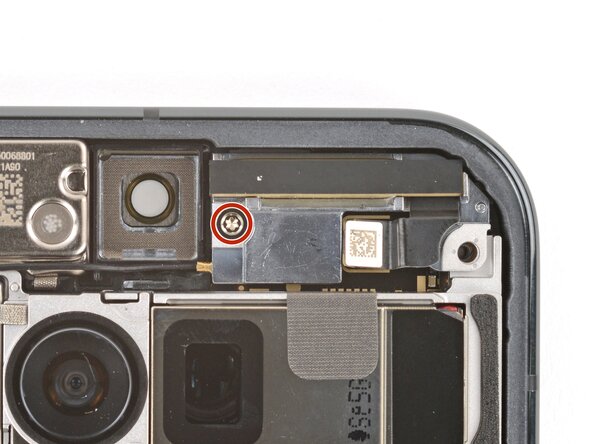
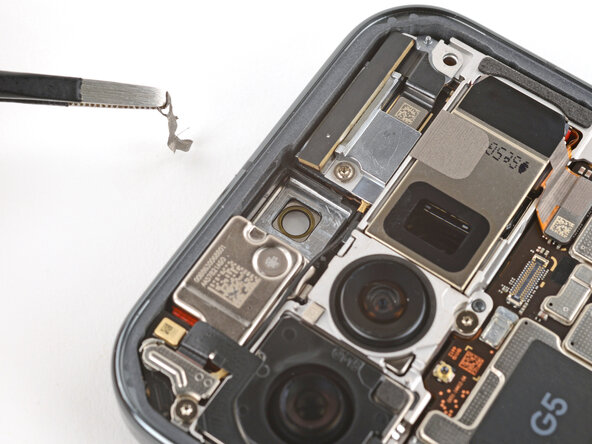
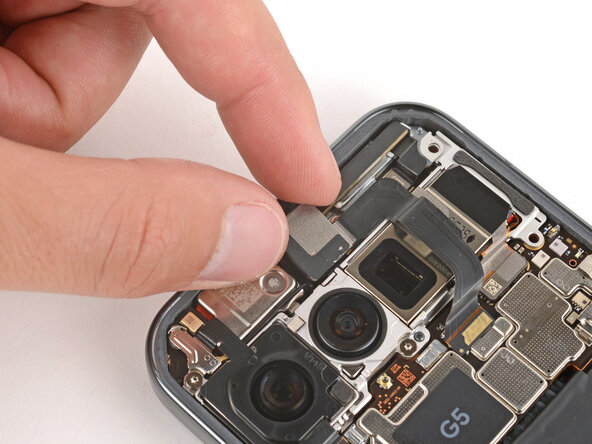
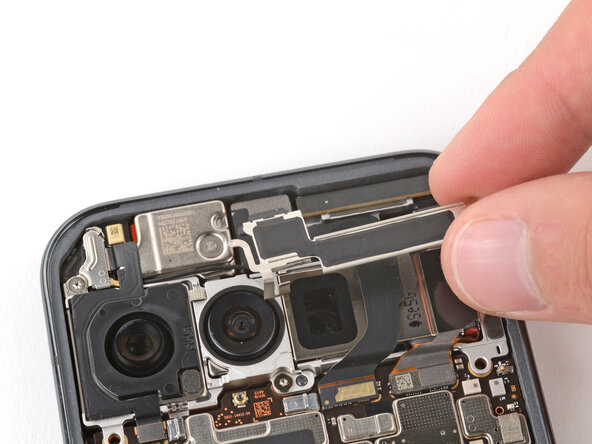
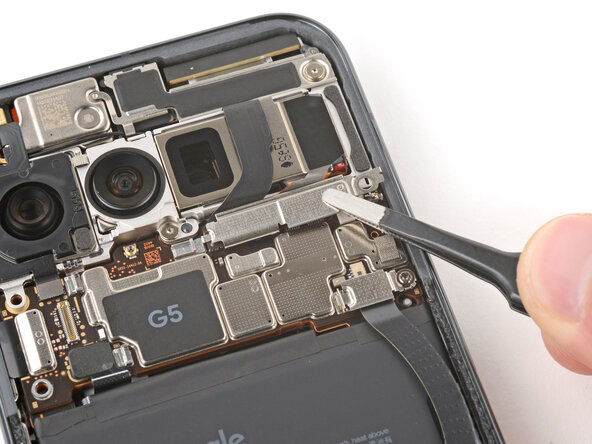
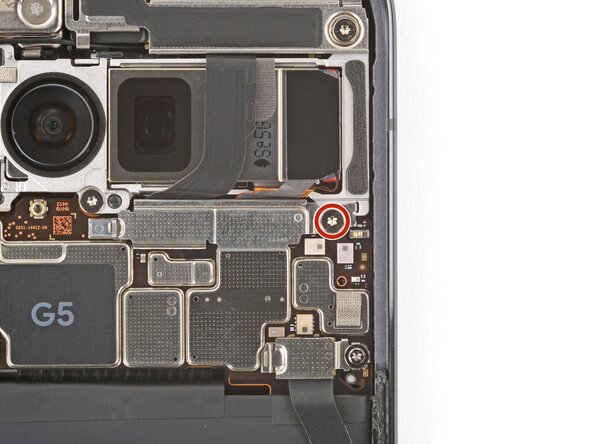
- Use a Torx Plus 3IP screwdriver to remove the 4.1 mm‑long screw securing the mmWave antenna.
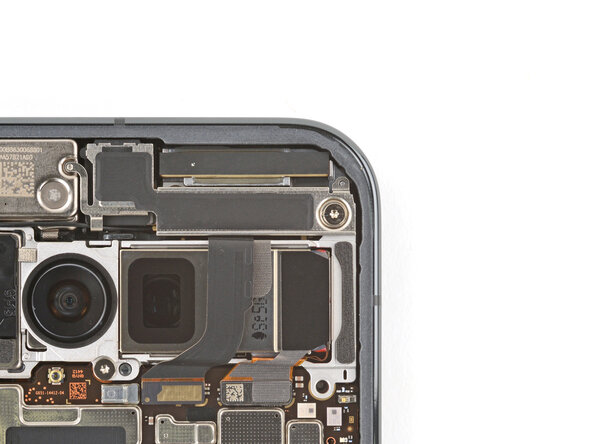
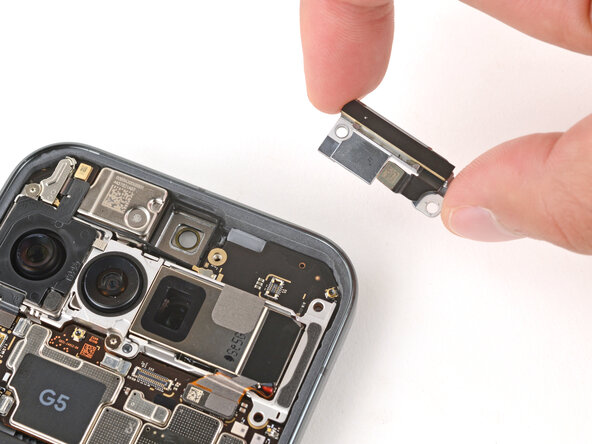
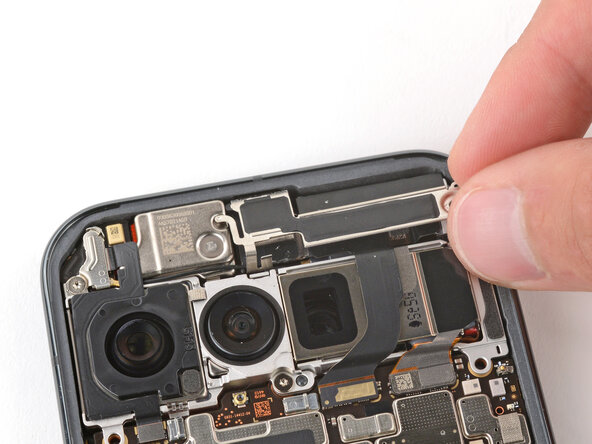
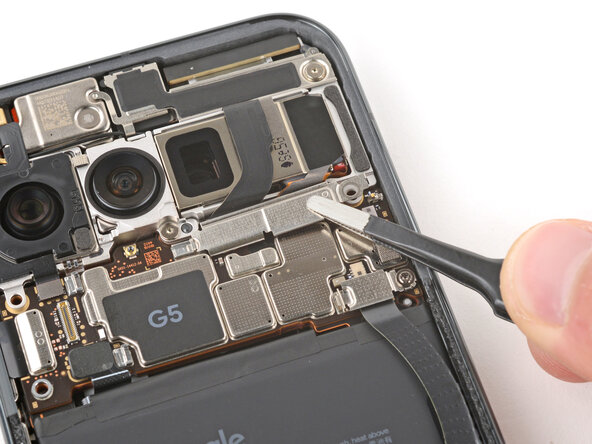
- Remove the mmWave antenna.
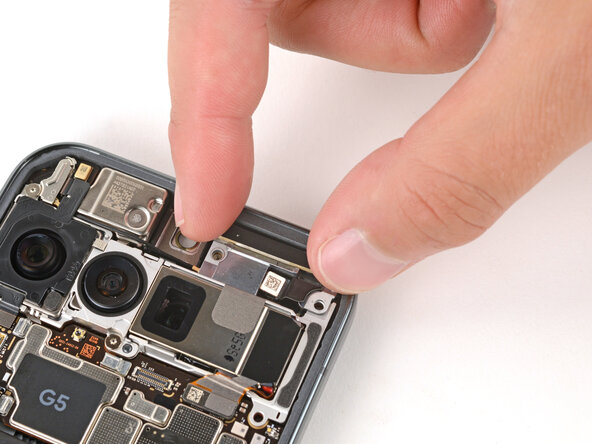
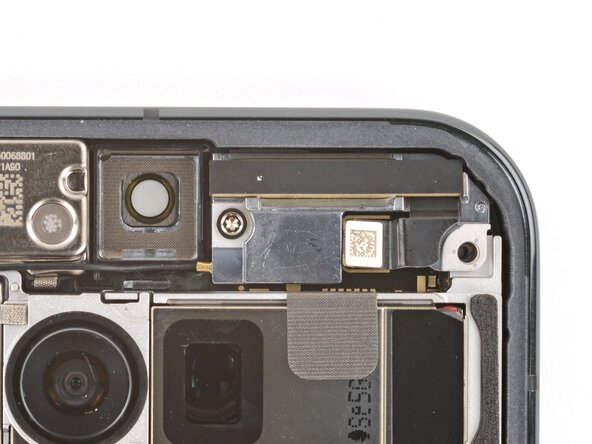
- Place the mmWave antenna into its recess.
- Use the flat end of a spudger to press down and connect the mmWave antenna press connector.
- Use a Torx Plus 3IP screwdriver to install the 4.1 mm‑long screw securing the mmWave antenna.
- Use the point of a spudger and tweezers to gently scrape up and remove all the old front camera adhesive.
- Use a spudger wrapped in a microfiber cloth and one drop of high‑concentration (>90%) isopropyl alcohol to clean up any adhesive residue from the front camera recess.
- Allow the alcohol to dry completely before continuing.
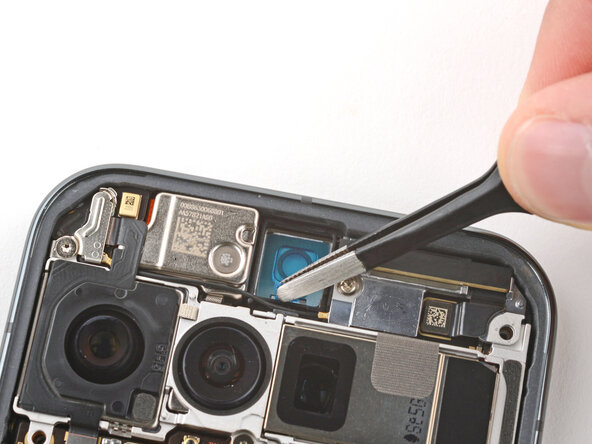
- Remove the large clear liner from the front camera adhesive and gently place it into the recess.
- Use a spudger to press down firmly on the adhesive to secure it.
- Slowly peel up and remove the remaining liner.
- If the adhesive starts to peel up with the liner, lay it down and press it into place firmly before trying again.
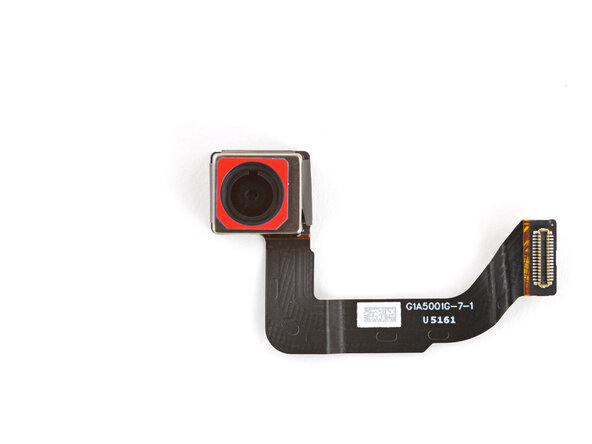
- If your replacement front camera has a protective cap on the front, carefully remove it.
- With the cable facing the bottom of the phone, lay the front camera into its recess and press it into place.
- Slide the top corners of the front camera bracket under the lip in the frame and press the clip in to secure it.
- Be careful not to touch the rear cameras.
- Use a Torx Plus 3IP screwdriver to install the 5.7 mm‑long screw securing the front camera bracket.
- Use your finger to press down and reconnect the front camera press connector.
- Slide the tab on the left edge of the front camera connector cover into its slot and lay the cover down flat.
- Use a Torx Plus 3IP screwdriver to install the 5.7 mm‑long screw securing the front camera connector cover.
- Before installing new adhesive, all the old adhesive and its residue must be completely removed from the frame.
- Take your time during the next two steps. A clean frame allows replacement adhesive to lay totally flat, ensuring a better seal for your back glass.
- Removing all the old adhesive can be very tricky and time‑consuming.
- When removing the back glass adhesive during this step, be very careful not to damage the battery or any of the fragile components near the perimeter of the frame.
- Use the point of a spudger to remove all the old screen adhesive from the frame. Try to "roll" the adhesive onto itself so it balls up, making it easier to remove.
- If you can ball up a big enough chunk, use tweezers to slowly pull the adhesive the opposite way you were scraping with your spudger.
- If you're having trouble removing smaller chunks, apply a single drop of high‑concentration (>90%) isopropyl alcohol and scrape them up with your spudger.
- Wrap a microfiber or lint‑free cloth around a spudger.
- Use the spudger and high‑concentration (>90%) isopropyl alcohol to clean up all the remaining adhesive residue from the frame, applying more drops of alcohol as necessary.
- Let the alcohol dry completely before continuing.
- If you're reinstalling your original back glass, repeat the procedures in the previous two steps on the back glass to clean it.
- Before applying the back glass adhesive, make sure you know how it will sit on the frame. If you apply the adhesive incorrectly, you'll need to restart with new adhesive.
- Hold the adhesive above the frame to find its orientation. Use the rear camera cutout in the liner to help visualize how it will lay in the frame.
- Peel down the top half of the large, clear liner to expose the adhesive—don't fully remove the liner yet.
- Take your time aligning the adhesive with the frame—it's very sticky and can't be moved after you apply it.
- With the larger, clear liner folded towards the bottom of the phone, lay the exposed top edge of the adhesive onto the frame.
- Use the lip of the frame to help align the adhesive.
- Once the top edge is properly aligned, gently press down on the top corners to secure the adhesive.
- Slowly lay the rest of the adhesive onto the frame, pressing it into place and peeling away the larger liner as you go.
- Use a spudger to press down firmly on the adhesive to secure it to the frame.
- Slowly peel up and remove the large colored liner, gripping it from the cutout near the top edge.
- If the adhesive starts to peel up with the liner, check that you’ve pushed all of it into place with your spudger. If it continues to peel up, hold it down with the point of your spudger as you go.
- If you're installing a new back glass, your replacement will have various protective liners and pieces of tape on the underside that must be removed. Your part may have different pieces in different locations, so make sure to check carefully!
- Remove all liners from the underside of the back glass, paying special attention to the front camera cutouts and bottom edge.
- Usually, you can identify the liners by their pull tabs.
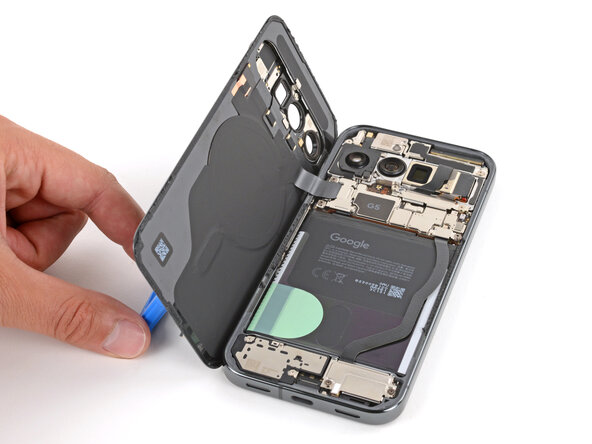
- Apply a suction handle to the back glass and prop it up on the left side of your phone, so the cable is near its connector.
- Alternatively, you can use a sturdy object (such as a stack of books) to prop up the back glass.
- Use your finger to press down and connect the back glass and battery press connectors.
- For wider connectors like the back glass one, first press down on one of the short sides until it clicks into place, then repeat on the other side. Don't press down in the middle. If the connector is misaligned, the pins can bend and cause permanent damage.
- Put the back glass connector cover back into place so the tabs hook into the slots.
- Use a Torx Plus 3IP screwdriver to install the two 5.8 mm‑long screws securing the cover.
- Use a spudger to press down firmly on the adhesive to secure it to the frame.
- This is a good point to power on your device and test all functions before sealing it up. If you have trouble, try some basic troubleshooting. Be sure to power back down completely before you continue working.
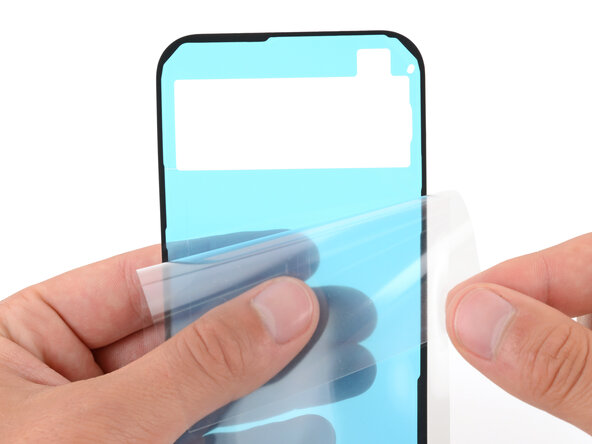
- Remove the remaining liners from the back glass adhesive.
- If the adhesive starts to peel up with the liner, check that you’ve pushed all of it into place with your spudger. If it continues to peel up, hold it down with the point of your spudger as you go.
- Flip the back glass onto the frame and press it firmly into place.
- Hold your phone up and squeeze firmly around the perimeter to strengthen the bond.
- For an even stronger bond, you can stack books on the back glass or use screen vise clamps.