Framework Laptop 16 Antenna Installation
ID: 199814
Description:
Steps:
- Remove the liner from the back of your replacement right antenna.
- The right antenna has a white cable and has an R printed on its front.
- Use your fingers to slide the right antenna into its slot on the Top Cover and press it into its alignment peg.
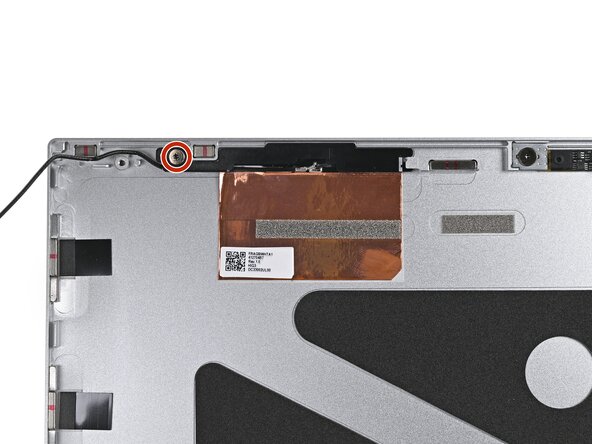
- While keeping the antenna pressed into place, use your Framework Screwdriver to install the 2.4 mm‑long T5 Torx screw securing the right antenna.
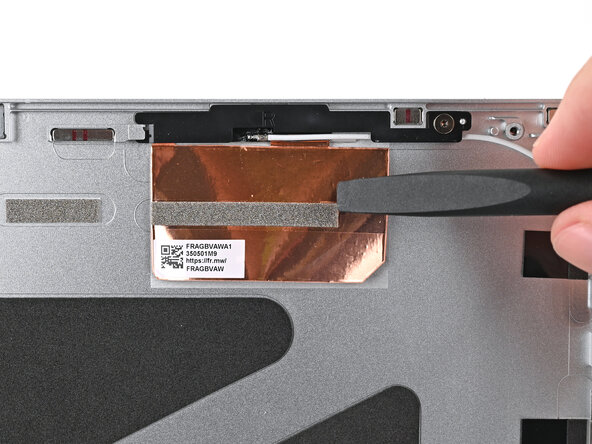
- Use the flat end of your Framework Screwdriver to press the copper film onto the Top Cover and adhere it.
- Use the flat end of your Framework Screwdriver, or your fingers, to press the white antenna cable into its clips at the top right corner of the Top Cover.
- Repeat the previous step for the clips along the right edge of the Top Cover.
- Remove the liner from the back of your replacement left antenna.
- The left antenna has a black cable and has an L printed on its front.
- Use your fingers to slide the left antenna into its slot on the Top Cover and press it into its alignment peg.
- While keeping the antenna pressed into place, use your Framework Screwdriver to install the 2.4 mm‑long T5 Torx screw securing the left antenna.
- Use the flat end of your Framework Screwdriver to press the copper film onto the Top Cover and adhere it.
- Use the flat end of your Framework Screwdriver, or your fingers, to press the black antenna cable into its clips at the top left corner of the Top Cover.
- Repeat the previous step for the clips along the left edge of the Top Cover.