1987 Chevrolet S10 Taillight Blinker Light Bulb Replacement
ID: 205880
Description: If the taillight blinker on your 1987 Chevrolet...
Steps:
- Open the truck tailgate.
- Use a T15 Torx screwdriver to remove the two 19.1 mm screws from the truck bed side of the taillight.
- Use the same screwdriver to remove the two 31.75 mm screws from the taillight housing.
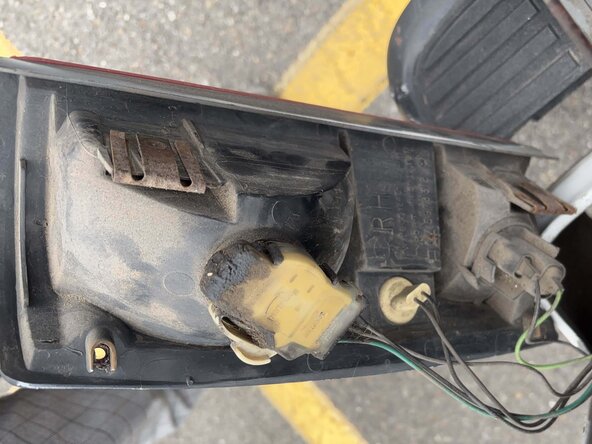
- Gently pull the taillight outward to expose the yellow light housing.
- Do not pull the taillight away completely, as cables are still connected to the light assembly.
- Push down the white lever on the side of the light housing.
- Twist the yellow cover clockwise while pushing the lever down.
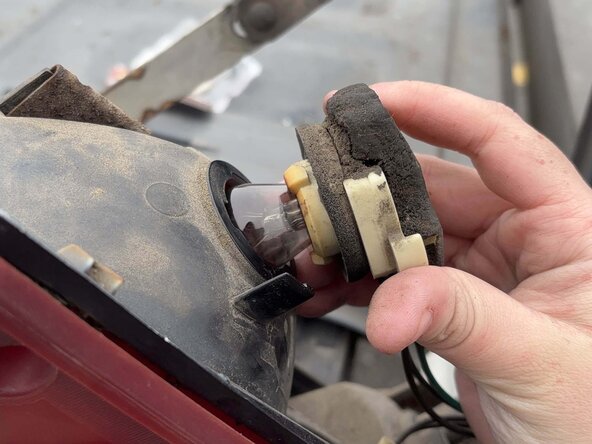
- Pull the light connector out of the housing to expose the taillight light bulb.
- Twist the old light bulb counterclockwise to release it.
- Pull out the old bulb from the taillight socket.
- There are two bayonet pins at different heights on the 1157 Incandescent Mini Bulb.
- Wear gloves when handling the new bulb to prevent oils from your hands from getting on the glass, which can create hot spots and shorten the bulb’s lifespan.
- Align the new light bulb bayonet pins with the notches in the bulb socket.
- Push the light bulb in and turn it clockwise to lock it in place.
- The light bulb should lock into place easily. If there is resistance, flip the light bulb to align the other bayonet pin with the notch instead.
- Place the light socket back into the housing.
- Turn it counterclockwise to lock it in place.
- Gently put the taillight back into place.
- You will know it is properly in place when the taillight screw holes align with both the housing and truck bed side screw holes.
- First, use a T15 Torx screwdriver to screw in the two 19.1 mm Torx truck bed side screws.
- To finish, screw in the two 31.75 mm Torx T15 taillight housing screws with the same screwdriver.