Bullnose Tile Replacement
ID: 205960
Description: This guide will walk you through how to...
Steps:
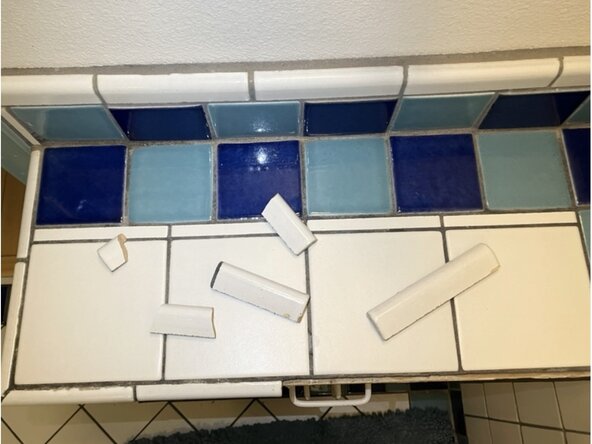
- Collect all bullnose tile pieces that have fallen off into one place.
- Locate the place where the bullnose tiles previously were (where the tiles broke off from).
- Align any tiles that may have broken.
- To check you have all the tiles in the correct alignment, place the bullnose tiles along the edge that they broke off of to make sure they fit.
- Remember, the standard size tiles (typically the longer ones) should be placed towards the center with the remaining tiles (typically the shorter ones) on the edge.
- To double check the order, find the perfect fit between the tile and the remaining grout (where the tile lies flush with the grout).
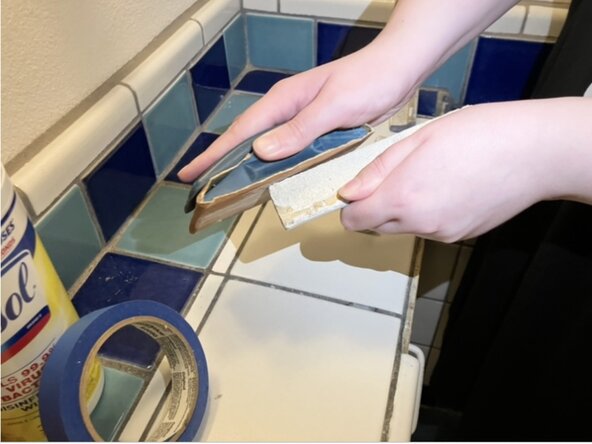
- Now that you are sure, flip the tiles over so their underside is accessible.
- Sand off any extra bits attached to the tile that will impact reattachment (for example, general debris or unsavable tile slivers).
- Keep in mind that some texture is good for the later reattachment, so sand sparingly.
- Clean off your space to avoid accidentally gluing grime back onto your tiles.
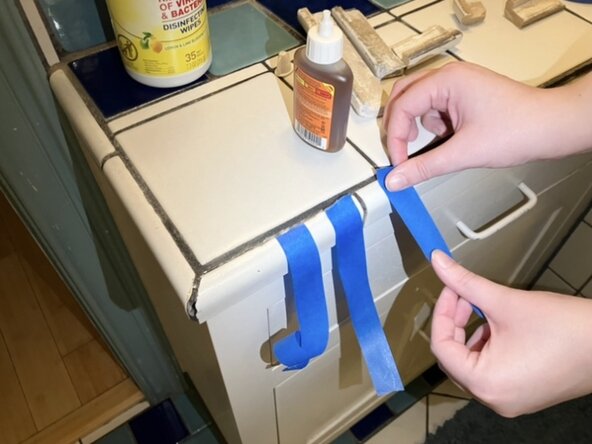
- Prepare about three strips of painter's tape per complete tile or one per broken tile piece.
- These tape strips will be used to hold the tiles in place while the glue dries, so make each one long enough to secure tightly over both sides of the tile.
- Apply Gorilla Glue generously to the interior sides of the tile, as well as the corner edge that will be pressed into the tile.
- Ensure the room in which this project is taking place is well ventilated.
- Apply glue generously to the surface you are attempting to reattach the tile to.
- Make sure to glue one tile area at a time to avoid premature glue drying.
- Press and hold your glued tile into your glued surface.
- Use your painters tape to hold the glued tile and surface together while the glue dries.
- Continue these last five steps for all the bullnose tiles you are reattaching.
- The glue will take 1-2 hours to dry.
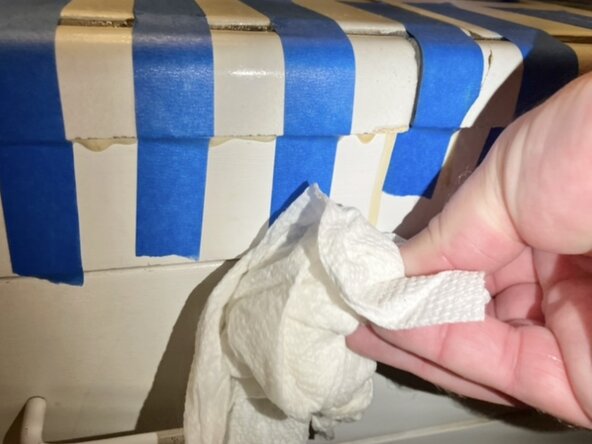
- Use a paper towel to clean off as much dripping glue as you can.
- Do not worry if you miss some; later there will be a more thorough glue cleanup step once the glue is dried.
- While drying, the glue may foam and eventually become firm when dried. This is normal. This is how industrial grade glue gets to as much surface as possible for the best attachment.
- Once the glue is dry, remove the painters tape.
- The tape directly touching the glue will be harder to remove, so do not focus on removing those pieces right now. They will be removed later alongside dried excess glue.
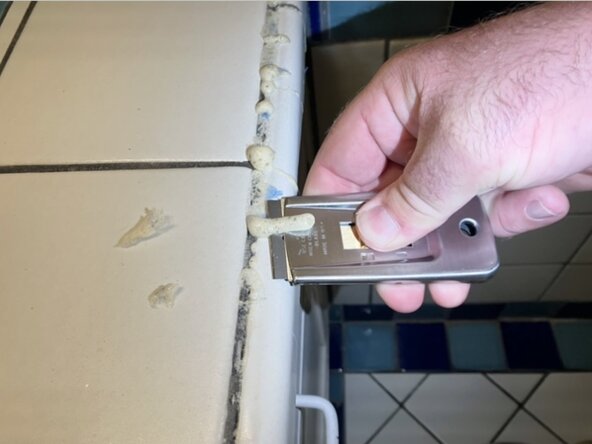
- Use your razor cutter to chip off the excess dried glue.
- Remember to get the glue that has dripped past your working area as well.
- Make sure you are never in the cutting path of the blade.
- Use your standard scraper to remove as much dried glue that found its way between your tiles. This space should be made as clear as possible for grout.
- Squeeze your grout into the gap.
- You are done when the grout pushes out all three exposed sides. This is how you know that the gap is filled completely.
- Apply grout alongside the exposed edges of the tiles as well. Use the grout that remains from the original design to mark where yours should go.
- Wipe off the excess grout with a damp paper towel.
- Wait for the grout to dry and SUCCESS! Enjoy your reattached bullnose tiles!