Mensent Quartz Electronic Analog Clock Alarm Trigger Repair
ID: 205976
Description: If the alarm of a battery-operated quartz...
Steps:
- Lay the clock facedown and remove the battery.
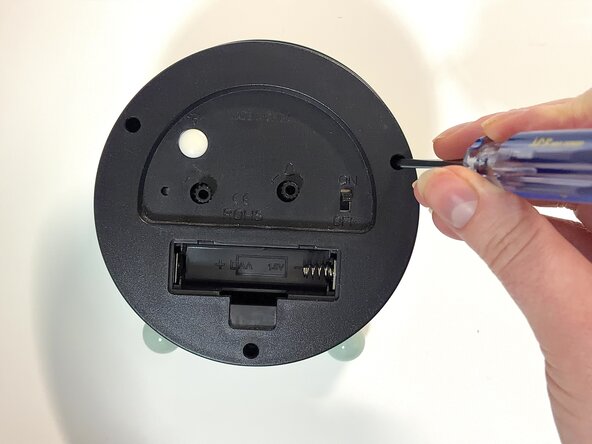
- Unscrew the back cover.
- Gently remove the back cover.
- Unscrew the screws holding the back housing.
- Carefully separate the back housing.
- Reminder: Be aware of any wires attaching the battery to the buzzer when removing the back housing.
- Reminder: Take pictures during disassembly for reference during reassembly.
- Identify the alarm trigger components and all central parts.
- Look for:
- The alarm wheel attached to the alarm hand.
- The trigger lever (thin metal or plastic arm that rides on the alarm wheel).
- The electrical contact that completes the electrical circuit to the buzzer.
- Temporarily reinsert the battery.
- Rotate the minute hand forward and watch what happens when the current time meets the alarm time.
- Misalignment of the alarm trigger is confirmed if:
- The alarm wheel misses the trigger lever.
- The lever fails to move far enough to trigger the alarm.
- The lever slips off the wheel and fails to ride over the wheel.
- Remove the battery again.
- Clean all the gear surfaces and the alarm wheel using tweezers and a cotton ball with isopropyl alcohol.
- Clean the pivot point of the trigger lever.
- Clean the electrical contact surfaces.
- Let all of the parts dry completely.
- Reseat the alarm wheel and press gently to ensure a parallel position.
- Replace the gears and press gently to ensure a parallel seat.
- Reinsert the battery.
- Set the alarm and slowly advance the time.
- If the alarm fails to sound, verify proper assembly and repeat steps 4-6.
- Remove the battery again.
- Replace the back housing and screw into place.
- Replace the back cover and screw into place.
- Reinsert the battery.