Google Pixel 10 Pro Fold Flip Battery Installation
ID: 206874
Description:
Steps:
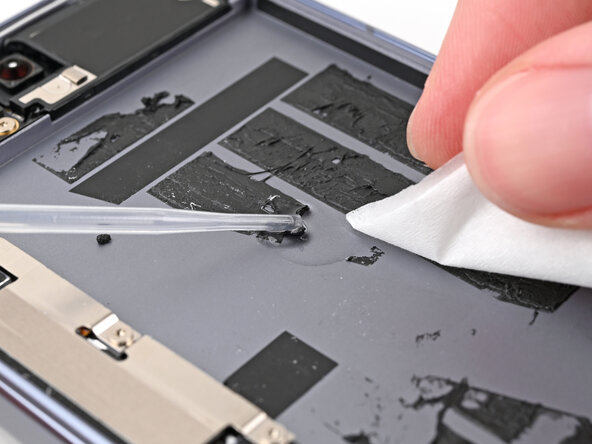
- Use tweezers, or your fingers, to remove the old flip battery adhesive from the frame.
- Apply isopropyl alcohol (>90%) and use a coffee filter or microfiber cloth to clean any adhesive residue.
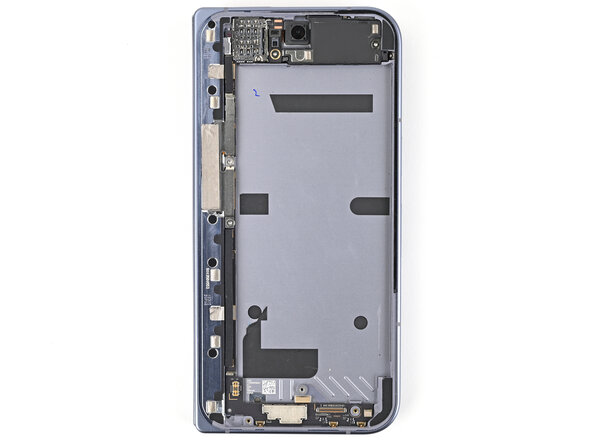
- Before removing any liners, check that both of your flip battery adhesives match the size and shape of the cutout in the frame.
- The clear liner should face the frame.
- Peel off the main flip battery adhesive sheet from its clear liner.
- Be careful during this step, as it's easy to stick the adhesive in the wrong spot. Take your time and work slowly.
- Align the top edge of the adhesive sheet with the top right corner of the battery recess.
- Lay the adhesive sheet on the frame.
- Use the flat end of a spudger, or your fingers, to press down the individual adhesive strips and adhere them to the frame.
- Be careful during this step, as it's easy to stick the adhesive in the wrong spot. Take your time and work slowly.
- Peel off the secondary flip battery adhesive strip from its clear liner.
- Align the circle on the adhesive with the circular cutout on the frame and press it onto the frame.
- The strip doesn't have to be perfectly straight. The black pull tab just has to be far enough down so the battery sits flat.
- Use the flat end of a spudger, or your fingers, to press down the adhesive strip and adhere it to the frame.
- Use tweezers to remove the blue liner from the underside of the black pull tab.
- Press down the pull tab to adhere it to the frame.
- Use tweezers to remove the blue liner from the secondary flip battery adhesive strip.
- Use your fingers, or tweezers, to remove the large blue liner from the main flip battery adhesive strip.
- Before removing any liners, check that your flip battery jacket matches the size and shape of the cutout in the frame.
- The clear liner should face the frame.
- Peel off the flip battery jacket from its clear liner.
- Align the jacket so it doesn't overlap with the flip battery adhesive.
- Lay the jacket on the frame.
- Use the flat end of a spudger, or your fingers, to press down the jacket and adhere it to the frame.
- Use a spudger to press the green tab near the SIM card tray against the edge of the flip battery well.
- Slide the spudger across the green tab to smooth out and adhere it against the SIM card tray.
- Use your fingers, or tweezers, to remove the blue liner from the flip battery jacket.
- Be careful during this step, as it's easy to stick the adhesive in the wrong spot. Take your time and work slowly.
- Align the top edge of the flip battery with the top edge of the battery well.
- Lay the battery over the frame.
- Press down along the perimeter of the flip battery to adhere it to the frame.
- Let the phone sit for an hour for the adhesive to cure.