1995-1999 BMW 3 Series (E36) Onboard Computer (OBC) Light Bulb Replacement
ID: 206892
Description: 1995-1999 BMW 3 Series (E36) BMW 318i, 318ti,...
Steps:
- In the trunk of the vehicle on the front right side, remove the battery cover by firmly pulling up.
- Disconnect the battery of the vehicle by removing the negative (black) terminal on the battery using a 10mm socket or wrench and turning counterclockwise until loose.
- DO NOT allow any conductive item (such as your wrench) to touch both terminals of the battery simultaneously.
- Firmly remove the negative terminal of the battery, preventing it from coming into contact with the post of the terminal for the remainder of the guide.
- Put the vehicle in 2nd or 4th gear if the vehicle is a manual car or in second gear if the vehicle is automatic to give more working space.
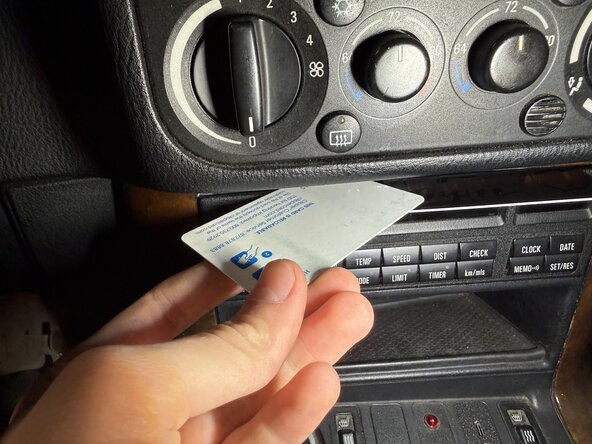
- Insert one credit card into the side of the top of the OBC and rotate outwards towards the sides of the OBC, leaving the card in when done.
- Insert the second credit card into the other side of the top of the OBC and rotate inwards towards the center of the OBC, leaving the cards in when done.
- Insert a finger into the center top of the sunglasses tray and feel for the long rectangular clip, firmly depressing it.
- It is a large, thick clip as shown in the picture and firm pressure must be used.
- Gently but firmly pull towards you pushing the OBC with your finger through the hole in the sunglasses tray until the OBC comes out.
- Push the top of the plug down to depress the lock retainer, then slide the locking clip until it rests flat on the back of the OBC.
- Firmly remove the plug from the OBC.
- Repeat for the other plug.
- Insert a 1/8 (3mm) flathead into the top of the bulb housing and rotate counter-clockwise until loose.
- Remove bulb and replace.
- DO NOT touch new bulb glass with fingers, it will burn out far more quickly!
- If there are oils on the new bulb, cleaning with isopropyl alcohol is advised.