2003-2004 Infiniti G35 Front Headlight Unit Replacement
ID: 212232
Description: This guide is designed for Infiniti G35 Coupe...
Steps:
- Park on a flat surface, turn off the engine, and let it cool.
- Pop the hood and secure it with the prop rod.
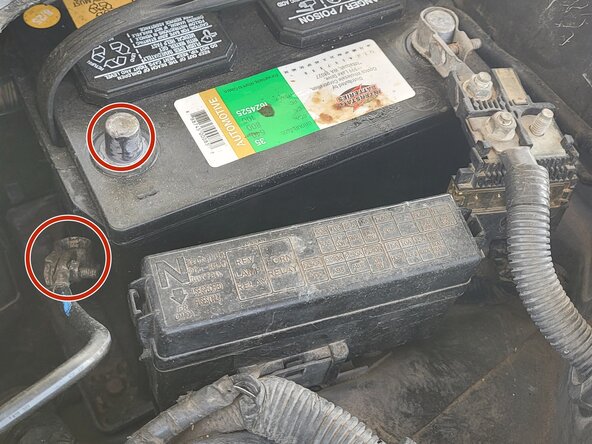
- For safety, disconnect the negative terminal on the battery by loosening the 10mm nut on the terminal with a 10mm socket and a wrench.
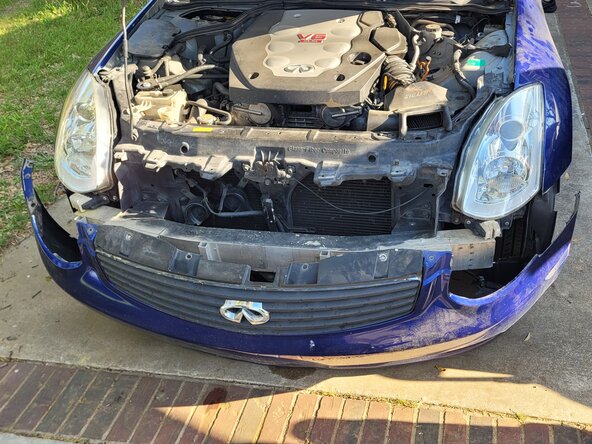
- The G35 Coupe headlight assembly is held in place partly by the bumper cover, so you'll need to loosen it slightly.
- With a clip removal tool, remove the plastic push-pin clips along the top edge of the bumper cover (there are usually 4–6).
- Remove the two screws in the wheel well liner on the side you're working on (you may need to turn the wheel outward for better access).
- Gently pull it back enough to free the headlight.
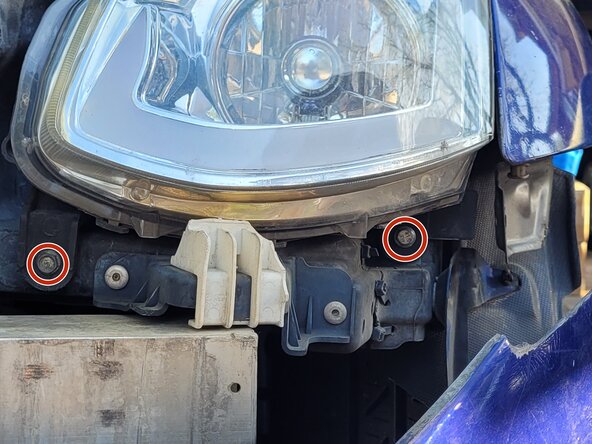
- With the bumper loosened, you'll have access to the headlight bolts
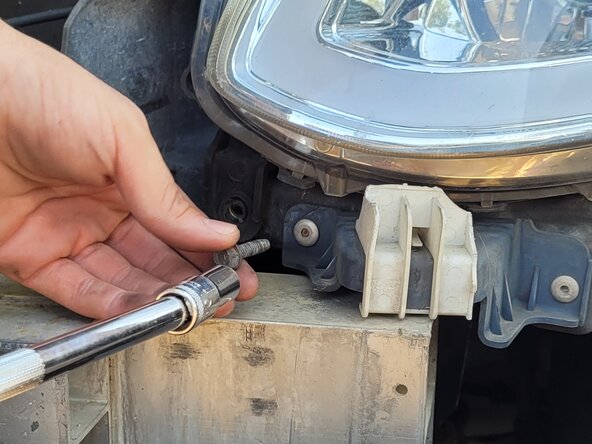
- Locate the three or four 10mm bolts securing the headlight assembly, typically one on top (accessible from the engine bay) and two or three near the front once the bumper is pulled back.
- Remove all bolts and keep them somewhere safe.
- Carefully slide the headlight assembly forward and out of its housing.
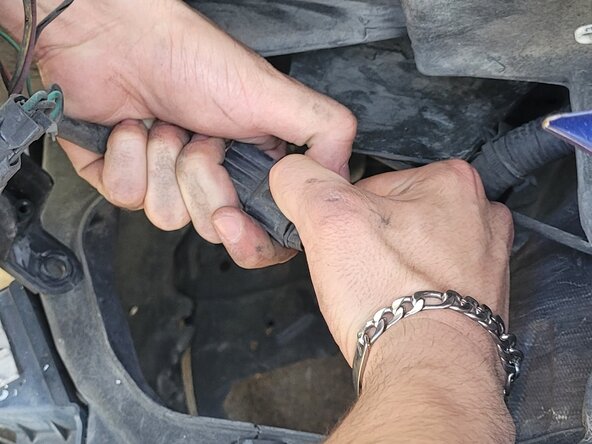
- Reach behind the unit and press the release tab on each electrical connector, then pull them free.
- There will typically be 2–3 connectors: main headlight, turn signal, and possibly a parking light. Disconnect all the connectors.
- Once all connectors are unplugged, fully remove the headlight assembly from the vehicle.
- Set it aside.
- Plug all the wiring harness connectors into the new headlight assembly before fully placing it and seating it in the car. It's easier to connect them while you have room.
- Slide the new unit into position, aligning the mounting tabs and holes.
- Hand-tighten the 10mm bolts first, then snug them down; don't overtorque.
- Push the bumper cover back into place.
- Reinstall all push-pin clips along the top and the screws in the wheel well.
- Reconnect the negative battery terminal and tighten the 10mm bolt to secure it. Don't over-tighten.
- Turn on the headlights and test the low beam, high beam, and turn signal to confirm everything works.
- Park 25 feet from a wall in a dark area and check that the beam pattern is level and matches the opposite side.
- There is an adjustment screw on top of the headlight assembly that you can turn with a Phillips screwdriver to raise or lower the beam.