Alienware AW510H Motherboard Replacement
ID: 213182
Description: Before using this guide, refer to the two...
Steps:
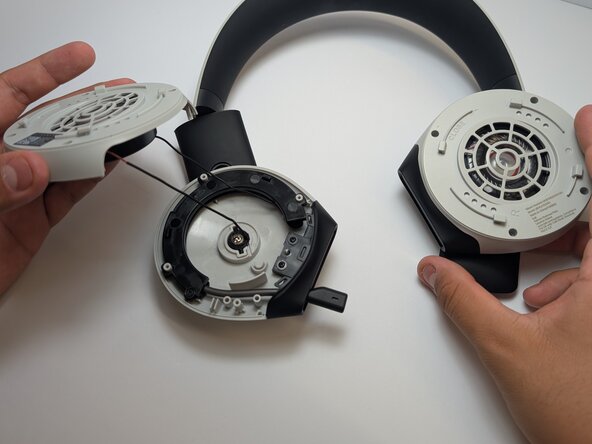
- Hold the earcup with one hand and firmly grip the ear pad with the other.
- Rotate the earcup counter-clockwise before pulling it away from the headset.
- Remove the four 8.5mm screws found on the base of the left ear cup housing using a Phillips #0 screwdriver.
- Gently lift the plastic shell, being cautious of the wire that is still attached.
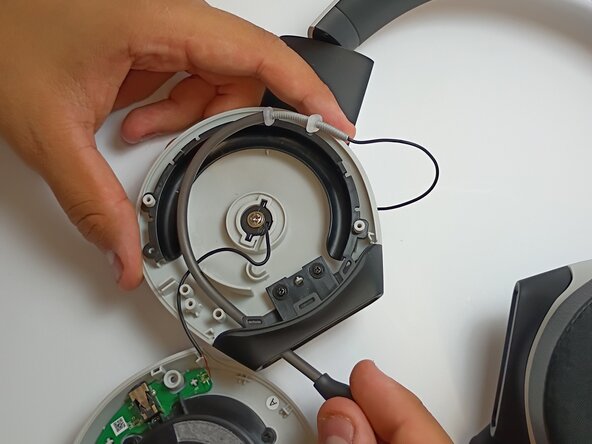
- Remove the 5mm screw from the microphone cover using a Phillips #1 screwdriver.
- Follow the microphone boom connection to the driver and motherboard.
- The retractable and bendable microphone is located on the left side.
- If there is a protective plastic or glue coating on top of the solder, scrape it off using a metal spudger before desoldering.
- Use a soldering iron to disconnect the wire connecting the microphone to the motherboard.
- Pull the old microphone assembly out of the housing.
- If the mechanism is stuck inside, gently push it out from inside the housing, perhaps with the help of tweezers or small needle nose pliers.
- Desolder the motherboard from the driver casing.
- Remember to follow safety precautions for soldering.