Corsair K100 Air Wireless Battery Replacement
ID: 213301
Description: Is the battery on your Corsair K100 Air...
Steps:
- Power the device off before starting the disassembly process. Additionally, make sure the battery indicator is low so it doesn't cause any electrical/heat damage while following this guide.
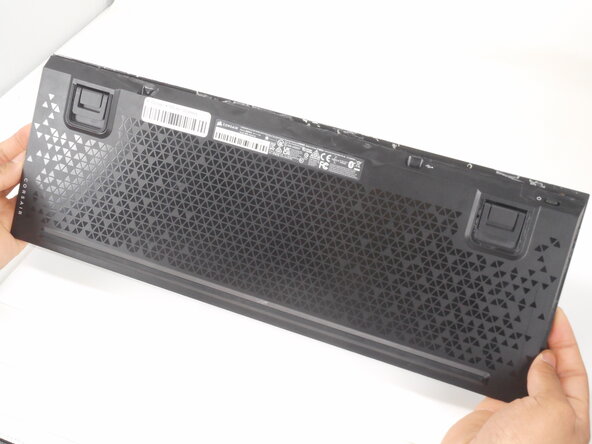
- Turn the device over so the bottom faces upward.
- Place your keyboard facedown on the table or workspace.
- Using a Halberd spudger or your hand, gently remove the keyboard rubber feet from the bottom cover.
- Try to keep them intact so you can replace them when you reassemble your keyboard.
- All three rubber feet must be removed to locate the screwholes for the next step. This includes the two U-shaped rubber feet and the long horizontal rubber feet at the bottom of the keyboard.
- There are three screws: one under the long horizontal rubber foot at the bottom and two under the top U-shaped rubber feet.
- Use a Phillips #00 screwdriver to remove the three 3.0 mm screws securing the bottom case.
- Use a hair dryer to heat and loosen the adhesive holding the keyboard together.
- Turn on the high heat setting and position the nozle 2-3 inches from the device and move it around the edge of the keyboard around your keyboard with the heat.
- Never leave your hair dryer in one spot for an extended period of time—keep it moving at all times.
- Be careful using a hairdryer, the keyboard gets very hot!
- Insert an opening tool or pick in the seam between the top and bottom case and slide it around the edges to release any clips holding them together.
- Gently lift the back cover to access the battery cable.
- Do not pull the back cover completely off before disconnecting all attached cables, as this may tear or damage them.
- Gently remove the battery connector from the socket on the board.
- If it doesn't come out easily, use the point of a spudger to push on alternating sides of the connector to "walk" it out of its socket.
- It may take a lot of alternating before the connector comes out. Be patient, and don't pull on the cables.
- Once the cable is safely disconnected, you can fully remove the back cover from the keyboard.
- Use a Phillips #00 screwdriver to remove the two 3.0 mm screws on the left and right sides of the metal battery bracket securing the battery.
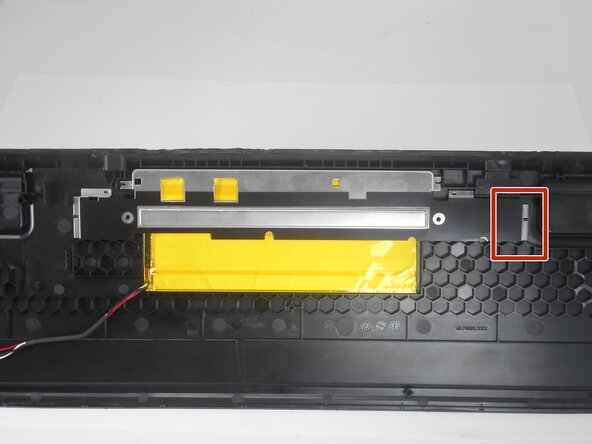
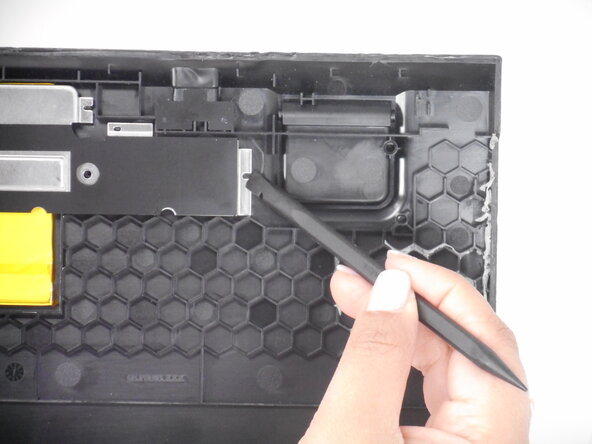
- The battery bracket is held by various plastic weld joints.
- Use a spudger to remove the black plastic weld joints on the far right side.
- Pull the bracket out to expose the battery.
- The battery is attached to the battery housing using double-sided tape.
- Refer to the How to Use iFixit Adhesive Remover guide for tips on removing the battery using the adhesive remover.
- Avoid bending, puncturing, or prying the battery.
- Scrape any residual tape from the battery housing.
- You have now successfully removed your battery!
- Find a battery recycling facility near you: https://batterynetwork.org/locator/