Flydigi Direwolf 2 Motherboard Replacement
ID: 213431
Description: Use this guide to replace the motherboard in a...
Steps:
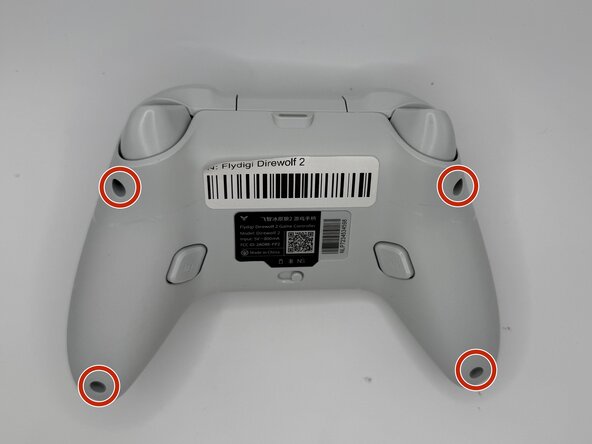
- Remove the four 10 mm-long Phillips 10mm screws securing the rear case to the front case.
- Insert an opening pick into the seam between the rear and front case.
- Slide the pick around the perimeter of the controller until the two halves of the controller release.
- Remove the rear case.
- Lift the battery connector directly out of its socket.
- Slide an opening pick underneath the battery to sever the adhesive securing it.
- Take care not to bend, twist, or puncture the battery during removal.
- Gently lift the battery out.
- Use your fingernails to lift and disconnect each of the two rumble motor connectors.
- Lift the rumble motors directly out of their housings.
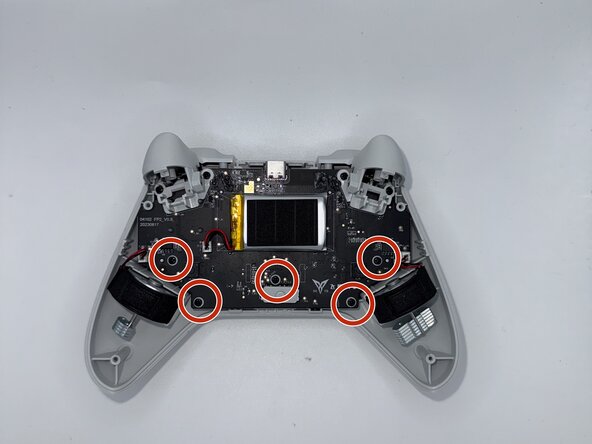
- Remove the five 10 mm Phillips screws securing the motherboard.
- Remove the four 10 mm Phillips securing the triggers.
- Remove both of the triggers from the top of the controller.
- Lift the motherboard by holding it from the top and bottom of the controller.
- The action buttons (A,B,X,Y) are loose and will fall out of the front panel if the controller is not kept face down properly.