Dell Precision 3541 Hard Drive Replacement
ID: 213470
Description: This guide will show you how to safely remove...
Steps:
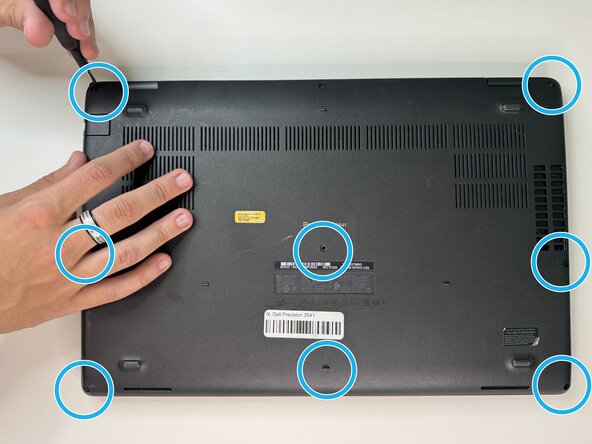
- The first step for hard drive replacement is to locate the base cover which is the bottom panel of the device. You will find a total of eight small screws, three on each side, and two in the middle of the panel. They will be embedded in indentations which require a small phillips head #1 or similar screwdriver to reach and unscrew.
- Once all screws are removed, it may be helpful to use a flat, pointy tool such as a paint key, to pop the panel off of the device.
- Locate the hard drive, it will be at the lower left corner (once the laptop is flipped over).
- Start unscrewing the screws, there are 4 in total.
- Once uncrewed, disconnect the hard drive cable from the SATA connector on the system board.
- Now you can remove the hard drive from the drive slot.
- Now, disconnect the cable connector that is located beside the hard drive.
- Finally, unscrew the 4 screws that secure the hard drive bracket to the hard drive and lift it off of the hard drive bracket.
- To replace the hard drive, make sure you align the hard drive to the hard drive bracket, then start screwing back the screws, and follow the steps in reverse.