1997 Toyota Camry Exterior Driver-Side Door Handle Replacement
ID: 213599
Description: Have you ever tried to open your Toyota Camry’s...
Steps:
- Get all your tools ready!
- Make sure the window is all the way up.
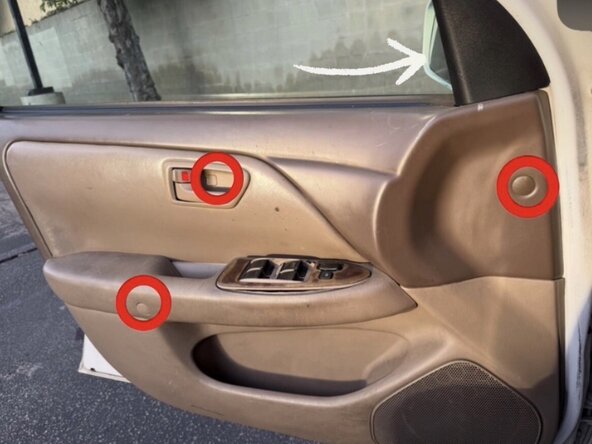
- Use a pick tool to remove the two plastic plugs and the plastic trim inside the door release lever.
- Use a flat blade screwdriver to pop out the trim panel.
- Remove the switch housing from the door by holding the button and disconnecting it.
- Use a flat blade screwdriver to pry the small triangular plastic cover on the right side of the window interior.
- Use a no. 2 Phillips head screwdriver to remove the 5 Phillips head screws from the door panel.
- Use a flat-blade screwdriver to remove the bezel by placing it between the handle and the bezel, starting from the bottom, then the top.
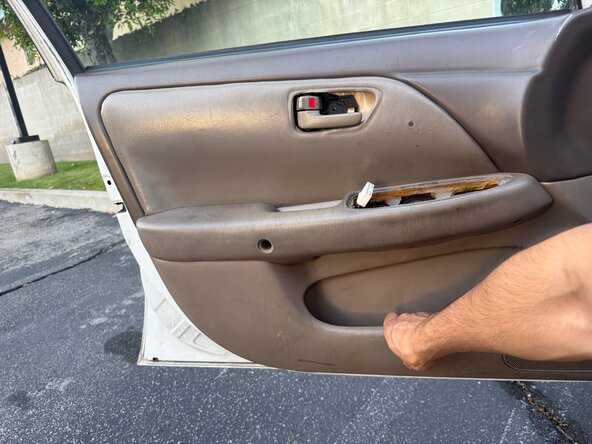
- Pop out the bottom of the door panel, then lift and remove the panel.
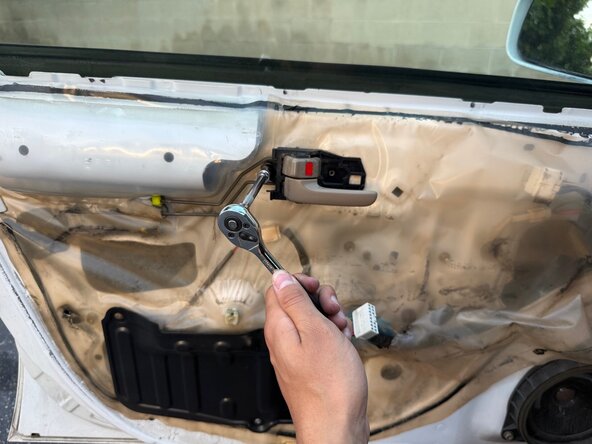
- Use a 10mm socket with ratchet and extension to remove the bolt from the back of the door handle.
- Rotate the interior door handle the opposite way to release the metal latch rods from the handle and the lock.
- Remember that the upper is for the lock and the lower is for the handle
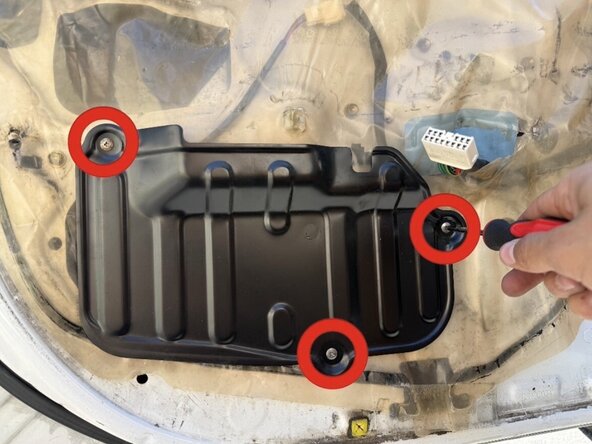
- Use a Phillips head screwdriver to remove the 3 Phillips head screws from the metal plate.
- Carefully remove the weather shielding inside the door panel.
- Pull the wiring harness through the shielding before finishing removing it.
- Place the shielding off to the side where it won’t get wrinkled or torn.
- Disconnect the latch rod from the back of the door handle by flipping up on the plastic lock rod retainer clip.
- Use a flat blade screwdriver to pry the latch rod out of the handle.
- For the plastic lock rod retainer clip and rod repeat the same step.
- The Plastic Lock Rod Retainer Clip is supposed to stay in the hole, but mine is broken, and the new door handle came with a new one.
- Use a 10mm socket with ratchet and extension to remove the 2 bolts.
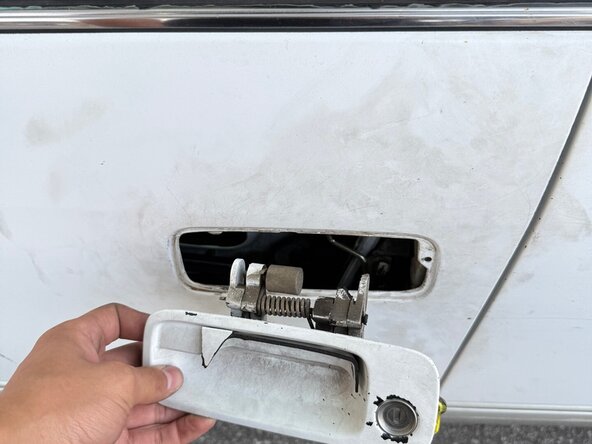
- Lift up on the door handle and pull out to remove it.
- Use a 10mm socket with ratchet and extension to remove the bolt.
- Remove the lock from handle and reinstall it into your new handle.
- Install your new door handle the same way you took out the old one.
- Use a 10mm socket with ratchet and extension to reinstall the 10mm bolts.
- Reconnect the lock rod into the hole on the bottom of the lock cylinder and snap the yellow lock rod retainer clip into place.
- Reconnect the latch rod into the back of the door handle and snap the white lock rod retainer clip into place.
- Reinstall the weather shielding to the inside of the door making sure you put through the wiring
- Use a Phillips head screwdriver to reinstall the 3 Phillips head screws in the lower metal cover.
- Reinstall the lock rod into the top and the handle latch rod into the bottom.
- Connect the hooks from the back of the latch into the door, and slide back to engage them.
- Use a 10mm socket with ratchet and extension to reinstall the 10mm bolt thats in the back of the handle.
- Reinstall the door panel and make sure your door lock and window switch wires are pulled through so they don't get stuck behind it.
- Use a Phillips head screwdriver to reinstall your 5 Phillips head screwdriver on your door panel.
- Reconnect the electrical connectors on your lock and window switch and place back onto the arm rest.
- Reconnect the bezel around the interior door handle and reinstall your Phillips head screw.
- Plug back in all three screw covers and snap back on the black triangular plastic cover.
- Finished!