Philips GC9640 Steam Generator Iron Troubleshooting and Pump Replacement
ID: 218301
Description: In my case, no more steam was coming out of the...
Steps:
- First, try to solve the problem using the components you can reach without disassembly:
- Press the tank outlet valve at the bottom to see if water comes out.
- Remove the De-Calc screw and rinse with water (only on a cold device! Do not use descaler!).
- Bend the hose to the iron back and forth to release limescale.
- If the problem is not resolved, you must open the station. You can find the guide for this in John Maier's "Philips Steam Generator Iron GC9640 Solenoid Valve Coil Replacement" up to and including step 4.
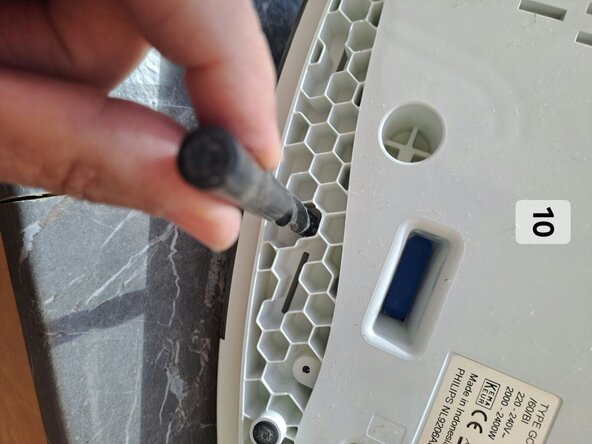
- To do this, I enlarged the holes of the recesses for two of the screw holes with a 10 mm drill bit so that the bit holder would fit through.
- After lifting off the housing, the return line to the tank and a cable connector (9-pin) are removed. In the photo, I am holding it in my fingers.
- Unfortunately, I had to rotate the photo, because iFixit requires 800x600 instead of 600x800.
- When the station is open, release the clear holder for the PCB (red clips in the lower—now right—area of the photo).
- Remove the hose from the tank connection to the pump's intake port.
- The photo shows the final state with new hose clamps. In the original state, metal clamps are installed that can only be released by bending them open with pliers.
- The hose can be extremely stuck due to pressure and temperature. I was able to get the pump side off, but not the boiler side. In my case, that was sufficient.
- While you're at it, you can let water flow through the boiler and check that it comes back out through the De-Calc screw.
- There are two options for checking the function. 1. Control the pump via the station or 2. via an independent power source.
- 1. For operation via the station, a small magnet must be placed on the Hall sensor (red circle in the photo) so that the station thinks the water tank is in position. Then it can be switched on and the pump will be activated.
- 2. For an independent power source, the cable lugs must be removed from the pump and a separate 220V cable must be connected. It is best to use one with a switch, because the pump is not designed for continuous operation for longer than 1-2 minutes.
- In both cases, hoses must be attached to the pump inlet, the outlet, and the overflow. The inlet needs water (from a bucket or a funnel) and the hose should be bled. The other two hoses ensure that the water does not run into the station, but into a second bucket or similar.
- Now the pump can be activated. Water should come out of the outlet; at the same time, some may drip out of the overflow. This is how it was with my new pump, see video. With the old one, water only came out of the overflow. Do not be alarmed; this type of pump is not designed for high water volumes, but for high pressure.
- If the pump is identified as the cause, it must be removed. This is very simple—it just needs to be wiggled out of the rubber mounts.
- A replacement is easy to find online. Sometimes delivery times were very long, but I received the replacement within 2–3 days and for under 40€.
- Before the reassembly of the station, I tested the function of the new pump.
- Reassembly is straightforward.
- When installing the hose clamps on the tank and the pump, you should hold the clamp with pliers so that the connectors do not break.
- The trickiest part was positioning the screws into the two deep recesses. I used a short piece of hose to help with this and then tightened them with the bit holder and T15.