How to rebuild a laptop CMOS battery - pre tabbed cells
ID: 218330
Description: cell. (4.3) Example of a cell with horizontal ...
Steps:
- The Fluke 3000 FC was used due to the display being photo friendly. Any meter with 0.50% accuracy in the $50-200 range is sufficient. You DO NOT need a $400+ 0.09% accuracy meter, nor a Fluke. As long as the meter is accurate, a ~$100 or cheaper True RMS from KleinMM420, ~$64.98, MM720, ~$99.09, Southwire, Extech or ~$150-200 Brymen (Greenlee in the US) will work.
- If you want to accuracy check a brand NOT ON this list for your use, buy 2 retail samples and compare it against a voltage reference like this if you are confident the meter will qualify. I will not add these personally as I need to do the test against a meter like a Fluke but feel free to share qualifying meters in the comments.
- TL;DR: Don't use one that was named by a cat on a keyboard or has "AI" (ex: AstroAI) in the name on a Chinese DMM which doesn't try and exceed the spec sheet and you will probably meet these requirements. Store brands like Commercial Electric will work, as long as the OEM is known.
- Post build only: If your meter does not meet the main guide requirements, Step 7 has an alternative test procedure to compensate for the many, many issues cheap meters are known for. Skip Step 1 and go to Step 3.
- Reliable name brand like Klein Tools, Southwire, Extech, Brymen or Greenlee in the US (or local equivalent brands). EEVblog also sells Brymen meters as well, but these tend to ship from Australia now, no matter where you buy it.
- Safe meter designed with proper fusing and a honest Cat rating
- Optional — Ideally True RMS (sometimes known as TRMS) — easily met by 95% of CatIII meters at the $50+ range.
- If your laptop uses a cell like this, you will need to remove the motherboard and solder a new one on directly to the board - this guide does not support these laptops.
- Not all laptops will use common CR20 cells like the CR2032 -- some like this T480 use a CR1632. These will require manual sizing as I can't account for every "unusual" cell.
- Measure the cell outside of the laptop with a digital caliper and determine the size -- IGNORE THE LAST INSINFICANT DIGIT - this will not help you search for heatshrink. Take this size to a site like https://www.digikey.com/ or https://www.mouser.com/ to buy heatshrink for your machine.
- Take the final diameter, and search for Heat shrink tubing. Use the final diameter to search under the Inner diameter to locate compatible heatshrink.
- On your preferred site, take the diameter and find the closest value - it should be on par with the caliper but if it is not available sizing down slightly is acceptable as sizing up can cause shrink issues.
- Authors note: I chose this Dell E5410 for this guide because when I got it, the CMOS cell was dead and the primary battery capacity reports "low" in the BIOS. A working battery will mask a dead CMOS battery so pull the battery and hold the power button for 30 seconds to test it if the pack has some life left.
- If you are unsure if your CMOS RAM battery is dead, the usual clue is the inability for the machine to hold custom settings or the time. If you see a message like this, your battery is dead.
- Probe the old cell with your DMM - if it is only registering a few mV or 0.00V, it is dead.
- Authors note: I do not know how your local laws work when it comes to disposing of lithium cells as laws vary wildly at the state or county level, even per country; as such, I cannot answer for how you should dispose of the old cell. Follow your local state/county laws, or use a drop off box in a big box store which takes dead lithium batteries.
- Most laptops use a CR2032 or CR2025 cell. Laptops with a CR2016 are uncommon.
- Take the battery apart and check out what cell you need. This may be difficult depending on the wrap used. If it is not clear, remove the wrap and check the cell part number (typically CR2016, 2025 or 2032).
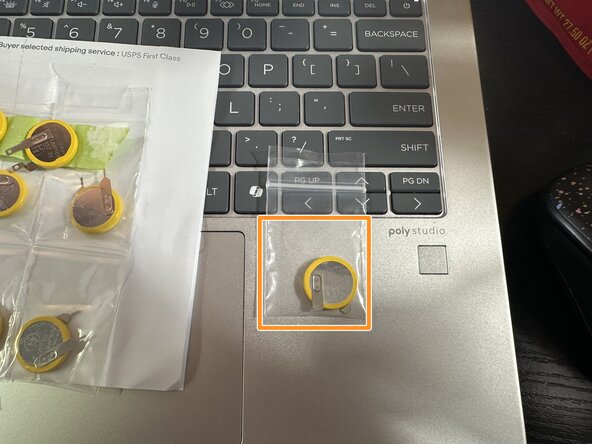
- If you buy the battery from a game store, show them this photo so they know what cell you need. For some cells you may not readily find "thick" leaded cells, so these will need more precise soldering.
- The iFixit flush cutters found in the FixHub kit (or sold individually - Mandable flush cutters) are not sufficient to trim the solder tabs on the new battery for soldering. The CHP-170 cutters are the only cutters that will work. Order these alongside any other iFixit tools you need! You can also use other cutters that are designed for this type of cut.
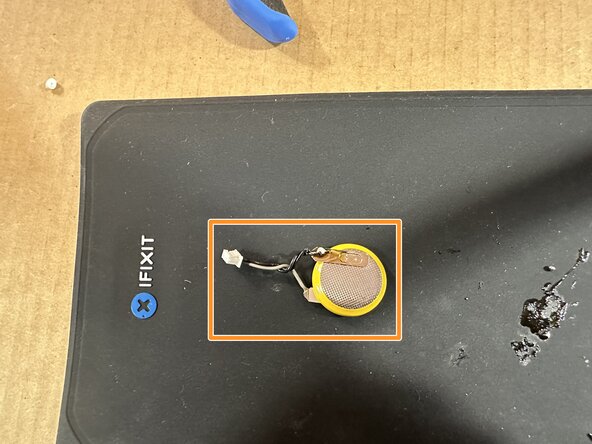
- The cell must come with a very specific type of tab - it must have a lot of material and be designed for PCBs (where the leads are easily removed and the tabs are shortened), or mostly flat and easily used as-is or slightly trimmed down.
- Using CHP-170 cutters, trim the leads down to the point the flat part is all that remains (for thin leaded tabs with a flat point) or trim the hole off of cells with a flat tab with a punched hole - this hole will not be used.
- If your cell is crimped, the crimped end must be cut off and bare wire exposed, which can be tinned for soldering. The crimp will not solder.
- Before you solder to the new cell: Measure the cell tabs bare, and remember this base voltage. You will need this for this step and the final verification on Step 8.
- Add flux to the tab and solder the wire to the positive (Red) terminal. If it takes more then 2-3 seconds to take solder well, stop and add more flux.
- Add flux to the tab and solder the wire to the negative (Black) tab on the cell. If it takes more then 2-3 seconds to take solder well, stop and add more flux.
- Quickly voltage test the cell and make sure the DMM leads are on the right wire and check to make sure the cell is not showing a negative voltage. If it is, you will need to reverse the wires.
- Not shown - photo limit -- clean your soldering iron once you are done.
- If you are using leads like the Fluke TL75, TL175 or other general purpose leads these may be too small for some connectors. Look for replacement leads with small tips designed for electronics use like this.
- These meters are blacklisted: MCH-108 (IF145-035-7) -- reason: Concerning errors (5.02V on CatIII meter, 5.003V on CatIV version); IF145-035-1, includes "830 class (ex: DT/XL/A)" meters, Harbor Freight 7-Function Digital Multimeter and the many clones -- reason: This was iFixit's white label 830 meter, manual ranging averaging 3 1/2 count meter - meter is insufficient for this procedure.
- How can you spot an 830 meter? They tend to have a transistor (hFE) tester (sometimes removed to hide the 830 chipset), fixed AC ranges (Commonly: 200, 600; 200, 300; 200, 250), NO independent safety certifications "self certified" or nonexistent. - List is not exhaustive, these are common red flags.
- Meters which do not meet the requirements in Step 1 MUST use this amended procedure: CMOS Battery rebuild amendment - amended procedure for cheap DMMs, pre tabbed. This includes meters with damage like battery tab corrosion from name brands like Fluke and Brymen.
- If your cell includes thin base tabs, cut these off and solder to the thick part of the tab. Those tabs are for PCBs.
- Before sealing and installing the new cell in the laptop, test the cell first - this is to catch a "dead" or "borderline" cell like the one shown here.
- IMPORTANT: IF THE CELL DROPS <.02-.03V DC from the initial baseline or the voltage is unstable, the cell is defective if the solder joint is stable. Desolder it and correct your work if the joint is borderline, otherwise if the soldering is good and it persists, you will need to replace the cell.
- Put your DMM in DC mode, the put the positive lead on the positive tab, and the negative (black) lead on the negative tab. It should read ~3.2-3.3V for a new healthy cell, or ~3.1-3.2V for a healthy used cell. As long is it at >3V and holds stable for 5-10 seconds, the cell is fine and will retain the CMOS RAM settings.
- While you can use a torch like the Dremel 2200 or similar classes of torch, it was uncomfortably hot for me during testing for this guide. If you do this (don't use a mini torch or lighter, not enough capacity!) and if you are set on doing it this way, safety glasses are non negotiable due to the heat these put out!
- After verifying the solder bond is strong and the voltage is stable, add heatshrink over the cell. A heatgun is best for this, but a lighter or butane torch can also be used.
- Meters which fail the Step 1 requirements: Skip this step, stop at Step 7 and use the amended procedure.
- Before installing the cell inside the machine, check for voltage drifting that shows up in <10 seconds. If it drifts, the cell is bad or there is a short - start over and check your work! You must also wait for the cell to cool down as it will sag when hot and may create a false positive.
- BEFORE installing the cell, quickly check the voltage one last time to see if it's >3V (3.1V-3.3V). If it stays there for 5-10 seconds with your meter, it is safe to install inside the computer.