2025-2026 Kia Carnival MPV Hybrid 12V Battery Replacement
ID: 220695
Description: Follow this guide to remove and replace the 12V...
Steps:
- The auxiliary battery is located underneath the center console inside the MPV. The factory battery is AGM60L-DIN:
- Structure: AGM (absorbent glass mat), likely not deep cycle
- Capacity: 60Ah at 20H
- RC (reserve capacity): 100 min
- CCA (cold cranking amps): 500A
- Sizing: Standard DIN H5 with the following dimensions:
- 9.40-9.56 in wide, 6.77-6.92 in long, 6.47-6.63 in high, 7.36-7.51 in total height (with the vapor capture device on top of the battery
- 239-243 mm wide, 172-176 mm long, 164.5-168.5 mm high, 187-191 mm total height (with the vapor capture device on top of the battery)
- The auxiliary battery connector is located under the hood near the top-left corner of the fuse box. It's normally mounted to the chassis frame.
- Firmly squeeze connector tab and pull it out of its socket.
- This disconnects the 12V battery positive terminal from the car, effectively cutting off 12V power. Door locks and power doors will stop working. You won't lose your saved settings/driver profiles though.
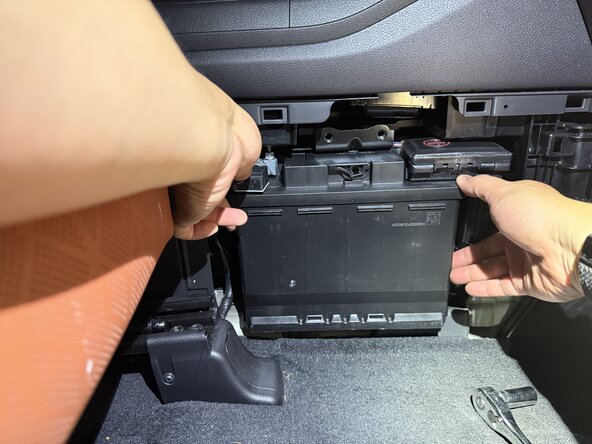
- The battery is accessible from the passenger floor console cover.
- The cover is secured with multiple clips and a screw rivet.
- Use a Phillips screwdriver to remove the screw from the cover fastener rivet.
- If the screw spins freely, use a small flathead screwdriver to pry the screw out slightly so its threads engage.
- Remove the screw and fastener rivet.
- Pull the bottom edge of the console cover.
- Firmly pull on the top edge of the console cover to release the clips.
- Angle the console out of its recess and remove it.
- Use a 12 mm socket and wrench to remove the three bolts securing the battery clamp.
- Remove the battery clamp.
- Squeeze the battery current sensor connector's tab near the negative battery terminal and pull it out of its socket.
- Use a 12 mm socket and wrench to remove the bolt connecting the battery negative terminal to the chassis.
- During reassembly, be sure to fasten this bolt tightly (26.5-32.4 Nm), or you'll encounter electrical problems.
- Don't try to fully remove the battery yet, as it's still connected by the positive terminal.
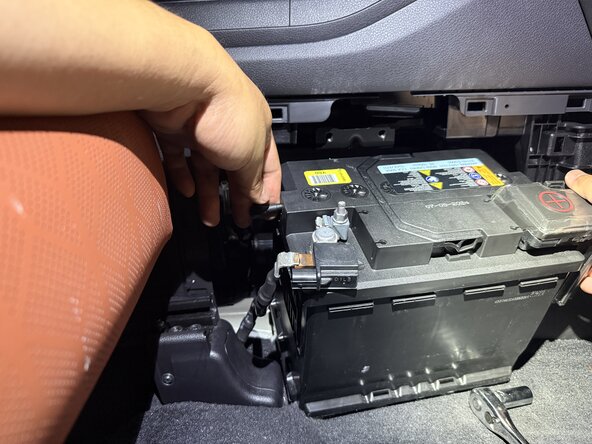
- Slowly wiggle the battery out of its recess until you can access the terminals.
- You'll encounter some resistance, as the battery still has a vent hose attached to it. You can try to disconnect it with long needle nose pliers, or let it disconnect by itself as you remove the battery.
- Use a 10 mm long socket and wrench to loosen the nuts securing the battery terminals.
- Disconnect the battery terminals and remove the battery.
- During reassembly, tighten the nuts to 7.8-9.8 Nm.
- The top of the battery has a vapor capture device, which shunts toxic gas through a vent tube. This can be challenging to reconnect during reassembly:
- Slide the battery back into its recess.
- Use a pair of long needle nose pliers or large tweezers to position the hose elbow at the capture device inlet.
- Use your fingers or a screwdriver to press the elbow into the inlet.